


How to Add Reflective Tape to Walking Poles?
For hikers, walkers, and runners who find themselves on trails or roads during dawn, dusk, or night, visibility is paramount to safety. While headlamps and blinking lights are effective, adding reflective tape to your walking poles creates a dynamic, moving visual cue that dramatically increases your visibility to others, particularly drivers and cyclists. This simple, low-cost DIY project can be a genuine lifesaver, transforming your poles into highly effective safety beacons.
Recommended trekking pole purchase link: https://s.click.aliexpress.com/e/_c4M7OWaN
Why Reflective Tape is a Game-Changer for Pole Users
When light from a car's headlights or another person's headlamp hits reflective tape, it bounces directly back to the source. On walking poles, this creates a distinctive, sweeping "X" pattern with your arm movements, which is far more noticeable than a static reflector. This moving pattern helps others instantly recognize you as a person in motion, giving them more time to react.
A Step-by-Step Guide to a Professional Application
Achieving a clean, durable application requires a bit of preparation and the right materials.
What You'll Need:
- High-Grade Reflective Tape: 3M Scotchlite or equivalent is the gold standard. It's incredibly bright, durable, and adhesive-backed. Choose silver for maximum reflectivity or red/blue for color.
- Rubbing Alcohol and a Clean Cloth
- Scissors or a Utility Knife
- A Measuring Tape (optional)
The Application Process:
- Thorough Cleaning: This is the most critical step for longevity. Wipe down the entire section of the pole shaft you plan to cover with rubbing alcohol. This removes all dirt, oils, and sunscreen that could prevent the adhesive from bonding properly. Let it dry completely.
- Plan Your Pattern: Think strategically about placement. The most effective patterns ensure tape is visible from multiple angles.Spiral Pattern: This is highly effective. By wrapping a continuous strip in a spiral down the shaft, you create reflective surfaces that are visible from almost any angle.Horizontal Bands: Applying 2-3 inch wide bands at strategic points (just below the grip, in the middle, and near the tip) is also very effective and easier to apply.Strategic Zones: Pay special attention to the lower third of the pole, as this is often at a driver's eye level. Also, consider a band just below the grip.
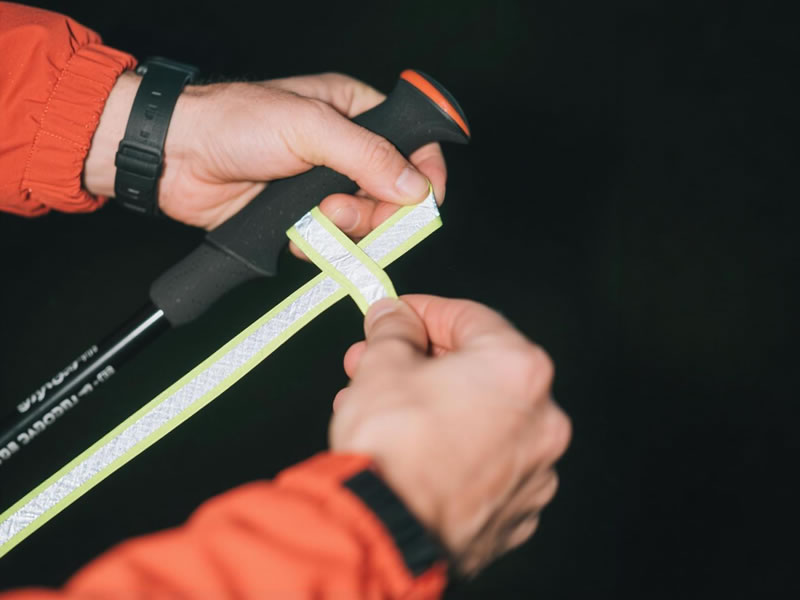
- Cut and Apply:Cut your tape to the desired length. For a spiral, you'll need a longer piece.Peel back a small portion of the backing and carefully align the tape on the pole.As you press the tape down, slowly peel away the rest of the backing, smoothing out any air bubbles as you go. Apply firm, consistent pressure along the entire length.
- Burnish for a Secure Bond: Once the tape is applied, rub it vigorously with the back of your scissors, a credit card, or another hard, smooth object. The friction generates heat, which activates the adhesive and creates a much stronger, permanent bond.
Pro Tips for a Flawless Finish
- Avoid the Locks: Keep tape away from the locking mechanisms (both lever and twist). It could interfere with their operation or get peeled off when you adjust the pole's length.
- Embrace the Basket: Don't forget the plastic basket! A small strip of tape on the basket makes the very bottom of your pole highly visible as it moves.
- Think About Your Grip: If you have a foam grip, you can add a thin band of tape at its base. However, avoid placing it where your hand will constantly rub against it.
- Double-Sided Visibility: For ultimate safety, apply tape to both poles, ensuring you are visible whether you are on the left or right side of a road.
Conclusion: A Five-Minute Upgrade for a Lifetime of Safety
Adding reflective tape is one of the simplest and most impactful modifications you can make to your hiking gear. It requires no technical skill, adds negligible weight, and costs very little. Yet, it provides a massive boost to your personal safety by making you a highly visible, moving target in low-light conditions. By taking just a few minutes to properly apply high-quality tape, you are not just customizing your poles—you are making a smart investment in your well-being on every journey.


