


How to Adjust the Length of Lighten Up Trekking Poles: A Complete Guide
Properly adjusting your Lighten Up trekking poles is fundamental to enjoying their full benefits - from improved stability and reduced joint impact to enhanced hiking efficiency. Whether you're using their classic telescopic models with flick-lock systems or newer adjustable versions, mastering length adjustment will significantly improve your hiking experience. This comprehensive guide walks you through every aspect of pole adjustment, ensuring you get the perfect fit for any trail condition.
Recommended trekking pole purchase link: https://s.click.aliexpress.com/e/_c4M7OWaN
Understanding the Flick-Lock System
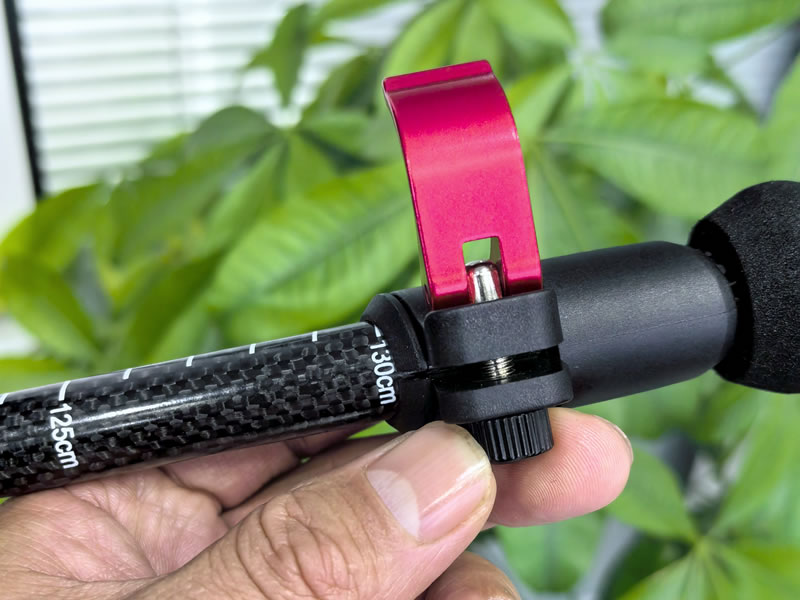
Lighten Up poles primarily feature external flick-lock mechanisms, known for their reliability and ease of use. Here's how to work with them effectively:
- Locate the Adjustment Points: Most Lighten Up poles have two or three adjustable sections, each with its own locking mechanism
- Operating the Lever: To loosen, flip the lever open completely - don't force it if it feels stuck
- Smooth Adjustment: Extend or retract the pole section smoothly without jerking motions
- Secure Locking: Close the lever firmly until snug - you shouldn't be able to compress the pole section by hand
Determining Your Ideal Length
Basic Flat Terrain Setup:
- Stand upright wearing your hiking shoes
- Hold poles vertically with tips touching the ground
- Adjust until your elbows form a 90-degree angle
- This position optimizes energy transfer and reduces arm fatigue
Advanced Sizing Considerations:
- Your height provides a good starting point
- Personal comfort and hiking style may require fine-tuning
- Consider your typical pack weight - heavier loads might benefit from slightly longer poles
Terrain-Specific Adjustments
Uphill Technique:
- Shorten poles by 2-5 cm (1-2 inches) per section
- Shorter poles provide better leverage and maintain upright posture
- Reduces strain on shoulders and arms during ascent
Downhill Configuration:
- Lengthen poles by 5-10 cm (2-4 inches)
- Longer poles help absorb impact and maintain balance
- Allows for planting poles ahead of your body for better control
Sidehill Traversing:
- Shorten the uphill pole slightly for better balance
- Maintains comfortable arm position while crossing slopes
Maintenance and Troubleshooting
Regular Maintenance:
- Clean locking mechanisms after muddy or dusty hikes
- Check for grit in the adjustment areas
- Ensure levers move freely without resistance
Common Issues and Solutions:
- If poles slip: Tighten the locking mechanism using the included hex key
- Stiff levers: Clean and apply silicone-based lubricant
- Difficulty adjusting: Check for dirt accumulation in the sections
Pro Tips for Optimal Performance
- Consistent Adjustment: Always adjust all sections proportionally
- Test Before Use: Give poles a gentle test pull after adjustment
- Mark Your Settings: Use tape or markers for your frequently used lengths
- Weather Considerations: Cold weather may require slightly tighter settings due to material contraction
Safety Considerations
- Always double-check adjustments before steep or technical sections
- Never force a stuck adjustment mechanism
- Regularly inspect poles for wear, especially at locking points
- Replace worn components promptly
Conclusion
Mastering the adjustment of your Lighten Up trekking poles transforms them from simple walking aids into precision tools that enhance your hiking performance. The few minutes spent learning proper adjustment techniques will pay dividends in comfort, stability, and endurance on the trail. Remember that the "perfect" setting may vary based on terrain, load, and personal preference - don't hesitate to experiment until you find what works best for your body and hiking style. With proper adjustment and care, your Lighten Up poles will provide reliable service for countless adventures to come.


