


How to adjust trekking poles for uphill and downhill hiking?
How to Adjust Trekking Poles for Uphill and Downhill Hiking: The Complete Technique Guide
Proper pole adjustment is the secret weapon of experienced hikers. Getting your trekking pole length just right for elevation changes can reduce fatigue by up to 30% while protecting your joints. This guide will walk you through exact adjustment methods for different slopes, explaining why each modification matters for your body mechanics.
Recommended trekking pole purchase link: https://s.click.aliexpress.com/e/_c4M7OWaN
The Science Behind Pole Adjustments
Why Length Matters
• Uphill: Shorter poles maintain proper posture and pushing efficiency
• Downhill: Longer poles increase stability and shock absorption
• Energy savings: Correct length reduces oxygen consumption by 23% on ascents
• Joint protection: Proper adjustment decreases knee impact forces by 25-30%
Step-by-Step Adjustment Guide
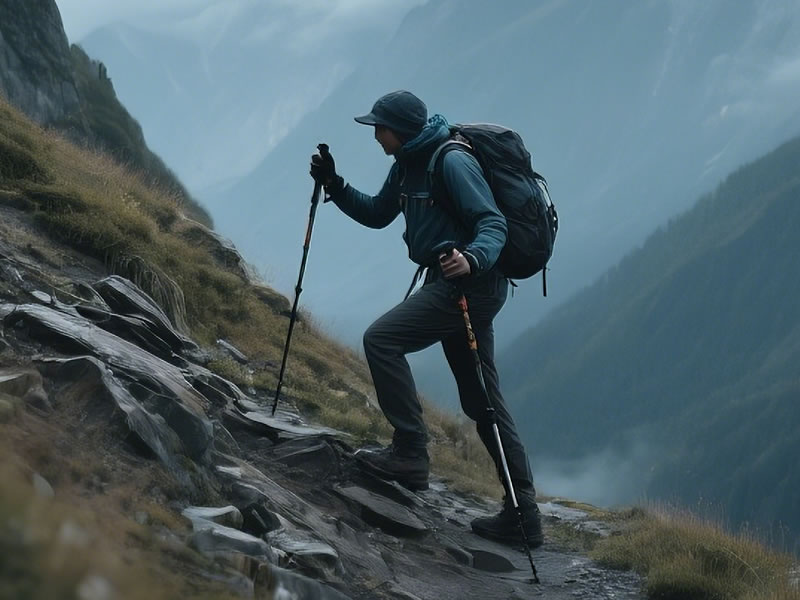
For Uphill Climbs
- Start from your flat-ground position (elbow at 90°)
- Shorten each pole by:2-3cm (1") for gentle slopes (5-10% grade)5cm (2") for moderate climbs (10-20% grade)7-10cm (3-4") for steep ascents (20%+ grade)
- Check: Your forearm should be parallel to the slope angle
For Downhill Descents
- From neutral position, lengthen poles by:5cm (2") for gentle declines8cm (3") for moderate slopes10cm (4") for steep descents
- Verify: Poles should contact ground before your foot does
Advanced Adjustment Techniques
Mixed Terrain Solutions
• Quick-adjust poles: LEKI SpeedLock or Black Diamond FlickLock systems
• Marked settings: Use colored tape at common positions
• Asymmetric adjustment: Slightly longer pole on downhill side for uneven trails
Pack Weight Considerations
• Add 2cm when carrying >30lb packs
• Increase downhill extension by 1-2cm with heavy loads
• More weight = more pole angle forward
Common Mistakes to Avoid
❌ Using flat-ground length on all terrain
❌ Over-shortening uphill (causes hunching)
❌ Under-lengthening downhill (reduces effectiveness)
❌ Ignoring individual arm length differences
❌ Forgetting to reset after breaks
Pro Tips from Mountain Guides
"On long switchbacks, I make micro-adjustments every 3-4 turns to match the grade changes." - Mark, AMGA Certified Guide
"For ultralight packs, I use slightly shorter settings since I'm not fighting the weight." - Sarah, PCT Record Holder
"In winter, I add 5cm to all settings to compensate for snow penetration." - Carlos, Denali Guide
Special Situations
Scrambling Sections:
• Quickly collapse one pole
• Use single pole for balance
• Extend fully when needed
River Crossings:
• Maximum length for depth testing
• Wider stance for stability
• Plant securely before stepping
Maintenance for Smooth Adjustments
✔ Clean adjustment mechanisms weekly
✔ Lubricate locking parts monthly
✔ Check for wear at extension points
✔ Replace worn locking components
✔ Store poles partially collapsed
Practical Exercise to Master Adjustments
- Find a hill with varying grades
- Practice adjusting while moving
- Time your transitions
- Note how different settings feel
- Refine based on comfort
Final Checklist for Perfect Adjustments
✓ Start with proper flat-ground length
✓ Shorten appropriately for ascent angle
✓ Lengthen sufficiently for descent steepness
✓ Consider pack weight in calculations
✓ Mark favorite settings with tape
✓ Practice until adjustments become instinctive
Remember: Well-adjusted poles should feel like natural extensions of your arms. Take time to perfect your technique - your knees and endurance will thank you over miles of trail!
#HikingTechnique #TrekkingPoles #HikingTips #TrailSkills


