


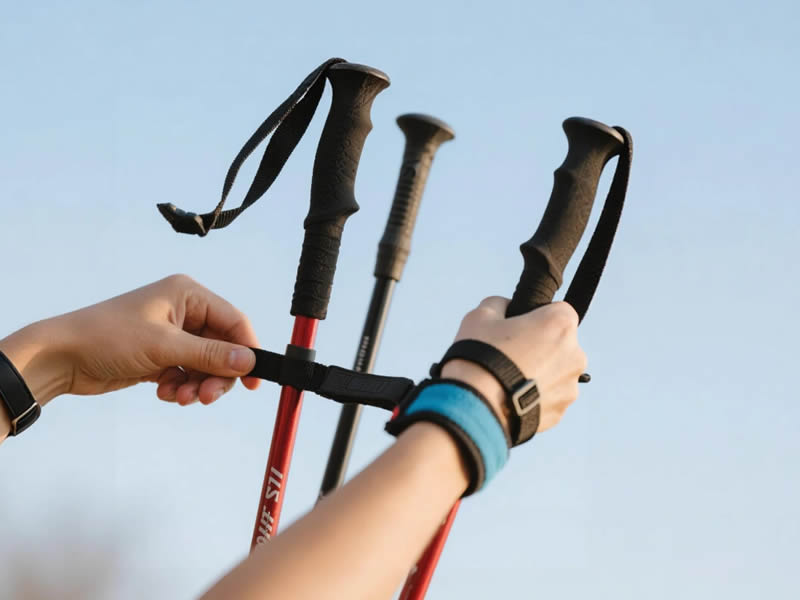
How to Add Wrist Straps to Walking Poles Without Them? A Complete DIY Guide
Wrist straps are one of the most underappreciated yet essential components of walking poles. They allow you to relax your grip, transfer weight efficiently, and maintain control even when your hands fatigue. But what if your poles didn't come with straps, or the original straps have worn out? Fortunately, adding wrist straps to poles without them is a straightforward DIY project that can significantly enhance your hiking experience. This comprehensive guide walks you through multiple methods, from simple paracord solutions to professional-grade replacements.
Recommended trekking pole purchase link:https://s.click.aliexpress.com/e/_c4M7OWaN
Why Wrist Straps Matter
Before diving into installation, it's worth understanding why straps are so important:
Weight Transfer: Properly adjusted straps allow you to push down through the strap rather than gripping tightly, transferring weight from your arms to the poles efficiently.
Reduced Fatigue: With straps bearing the load, your hands can remain relaxed, reducing grip fatigue on long hikes.
Safety: Straps prevent you from dropping poles on steep terrain or when you need your hands free quickly.
Control: On descents, straps help maintain control when poles are planted firmly.
Confidence: Knowing your poles won't slip from sweaty or tired hands builds confidence on challenging terrain.
Assessing Your Poles
Before starting, examine your poles to determine the best attachment method:
Grip Type:
- Solid Grip with Top Hole: Many poles have a pre-drilled hole through the top of the grip specifically for strap attachment
- Foam/Cork Grip: Softer materials may allow you to create an attachment point
- Molded Grip with Slot: Some grips have molded slots for strap webbing
- No Obvious Attachment Point: Requires creative solutions like creating a loop around the grip
Shaft Material:
- Aluminum: Easy to drill if necessary (though rarely needed)
- Carbon Fiber: Never drill carbon fiber—it compromises structural integrity
Method 1: Paracord DIY Straps
The simplest, most accessible method uses paracord—strong, lightweight, and readily available.
Materials Needed:
- Paracord (about 3 feet per pole)
- Lighter (for sealing ends)
- Scissors
- Optional: Small buckle or cord lock for adjustability
Step-by-Step Instructions:
- Prepare the Cord: Cut two 18-inch lengths of paracord per pole. Melt the ends with a lighter to prevent fraying.
- Create the Attachment Loop:If your grip has a hole, thread the cord through from bottom to top, leaving equal lengths on both sides.If no hole exists, create a cow hitch around the grip neck just below the grip top.
- Form the Wrist Loop:Bring both cord ends together and tie an overhand knot, creating a loop that fits comfortably around your wrist.Leave enough slack that you can grip the handle while the loop rests around your wrist.
- Add Adjustability (Optional):Thread cord ends through a small cord lock or buckle before tying the final knot.This allows you to adjust loop size for different conditions or layers.
- Test and Trim:Test the fit—you should be able to grip the handle while the strap rests around your wrist.Trim excess cord and melt ends.
Pros: Cheap, customizable, easily replaceable
Cons: Less comfortable than padded straps; may stretch over time
Method 2: Nylon Webbing Straps
For a more comfortable, professional feel, use nylon webbing.
Materials Needed:
- 1-inch nylon webbing (about 2 feet per pole)
- Small buckle (side-release or ladder lock)
- Sewing kit or fabric glue
- Scissors
- Lighter (to seal webbing edges)
Step-by-Step Instructions:
- Cut Webbing: Cut two 12-inch lengths per pole. Seal cut edges with a lighter to prevent fraying.
- Create Attachment:If grip has a slot, thread webbing through.If no slot, create a loop that encircles the grip neck and sew or glue securely.
- Add Buckle:Thread one end through buckle, fold back, and sew to create permanent loop.Thread other end through buckle adjuster.
- Form Wrist Loop:Create a loop that fits comfortably around your wrist.Test with gloves if you hike in cold conditions.
- Secure Ends:Sew or glue all folded ends securely.Consider reinforcing with several passes of stitching.
Pros: Comfortable, durable, adjustable
Cons: Requires sewing; more time-intensive
Method 3: Commercial Replacement Straps
The easiest, most reliable option is purchasing replacement straps from major manufacturers.
Best Replacement Strap Options:
- LEKI Replacement Straps: Universal fit, padded, adjustable, available in various sizes
- Black Diamond Replacement Straps: Quality construction, fits most poles with standard attachment
- Komperdell Replacement Straps: European quality, good padding
- Generic Universal Straps: Affordable, available on Amazon, check compatibility
Installation Instructions:
- Remove Old Attachment: If existing attachment point is blocked, clear it carefully.
- Thread Strap: Feed the strap through the grip hole or slot as designed.
- Adjust Length: Most replacement straps have built-in adjusters.
- Test Fit: Ensure proper tension—you should be able to grip handle with strap around wrist.
- Trim Excess: Some straps allow trimming; follow manufacturer instructions.
Pros: Professional quality, comfortable, designed specifically for poles
Cons: Cost, may require specific attachment style
Method 4: Creative Solutions for Unique Grips
For poles with unusual grip designs, consider these creative approaches:
Leather Cord Wrap: Thin leather lace wrapped and tied creates an elegant, traditional look.
Shoelace Method: Heavy-duty round shoelaces can serve as emergency straps in a pinch.
Ski Strap Conversion: Old ski pole straps can sometimes be adapted.
Bicycle Inner Tube: Cut strips create stretchy, grippy emergency straps.
Important Safety Considerations
Quick Release: Ensure your strap allows quick hand removal. You should be able to extract your hand easily if a pole gets caught.
Strength Test: Before relying on DIY straps, test them vigorously. Hang your weight from them. Better to fail at home than on the trail.
No Sharp Edges: Check that all attachment points are smooth and won't chafe hands.
Even Tension: Both poles should have similar strap tension for balanced control.
Weather Resistance: Consider how materials will perform when wet or frozen.
Proper Strap Adjustment
Once installed, proper adjustment is crucial:
- Insert Hand from Below: Reach up through the strap from underneath.
- Grip Handle: Your hand should now be between the strap and grip.
- Adjust Tension: The strap should cross the back of your hand, allowing you to relax your grip while the strap bears weight.
- Test Release: You should be able to extract your hand quickly if needed.
Common Mistakes to Avoid
- Too Tight: Straps that constrict circulation cause discomfort and safety issues.
- Too Loose: Straps that don't engage force you to grip tightly, defeating the purpose.
- Wrong Placement: Straps should cross the back of your hand, not your palm.
- Weak Attachment: Inadequately secured straps can fail when you need them most.
- Ignoring Wear: Check straps regularly for fraying or weakening.
What Experienced Hikers Say
"I added paracord straps to a pair of budget poles," shares Mike, an avid day hiker. "Took ten minutes and cost nothing. They're not as comfortable as my premium poles' straps, but they work perfectly. Great temporary fix."
"I replaced worn straps on my old poles with LEKI replacements," says Jennifer, a long-distance backpacker. "Felt like new poles. The padded straps make a huge difference on long days. Worth every penny."
The Bottom Line
Adding wrist straps to walking poles without them is absolutely achievable, whether through simple paracord DIY projects, comfortable nylon webbing creations, or professional replacement straps. The method you choose depends on your budget, skill level, and desired comfort.
For quick, no-cost solutions, paracord works admirably. For maximum comfort and durability, invest in replacement straps from reputable brands like LEKI or Black Diamond. For a balance of customization and quality, nylon webbing with buckles offers excellent results.
Remember that properly adjusted straps transform your poles from simple sticks into efficient, ergonomic tools. They reduce fatigue, improve control, and enhance safety. Taking the time to add or replace straps is one of the best investments you can make in your hiking comfort.
Disclaimer: This article provides general guidance for DIY projects. Always test homemade equipment thoroughly before relying on it in critical situations. When in doubt, purchase professionally manufactured replacement straps.


