


How to repair a broken foldable trekking pole joint?
A broken joint on a foldable trekking pole can be frustrating and even dangerous. Foldable poles—often called Z‑poles—collapse into three or four sections connected by an internal cord. Unlike telescoping poles that use external locks, foldable poles rely on spring‑loaded buttons or cams at the joints to lock into place. When a joint fails, the pole becomes unusable. This guide explains what typically breaks, which repairs are possible, and when to stop using the pole.
Recommended trekking pole purchase link: https://s.click.aliexpress.com/e/_c4M7OWaN
Common ways foldable joints fail
Foldable poles have a simpler design than they appear. An internal elastic cord runs through all sections, holding them loosely together. When you extend the pole, metal buttons or dogs snap into holes in the outer shaft to lock the joints. Understanding how each part fails helps you decide whether a repair is possible:
- Button won’t engage or feels stuck: The joint cannot lock. This is often caused by dirt or grit blocking the mechanism.
- The button is pressed but the pole feels loose: The internal plastic sleeve or metal dog may be worn.
- Internal cord is frayed, stretched, or broken: The cord keeps sections aligned. Cord failure is common in older poles or through use in cold conditions.
- Plastic cover is missing: Some folding poles have small plastic sleeves that protect the cord. If a sleeve is missing, the cord will eventually fray, leading to complete failure.
Cord‑only vs. mechanical lock folding poles
Repair options differ depending on the type of mechanism your folding pole uses.
Cord‑only (standard Z‑poles) rely solely on an internal elastic cord and spring‑loaded buttons. There are no external levers. When you extend the pole, buttons snap into place and the cord keeps everything aligned. If the cord breaks or a button fails, field repair is challenging—it requires disassembling the pole and re‑knotting the cord, a task best handled at home-15.
Mechanical lock folding poles combine a folding design with one or more external flick locks. These poles are easier to repair because you can replace individual sections or tighten the mechanical lock with a screwdriver-15. If you plan to use poles in rugged terrain, mechanical lock designs offer greater reliability when something goes wrong.
Repairing button engagement problems
If the button will not pop out or the joint cannot lock:
- Extend the pole fully so the joint is open.
- Flush the mechanism with clean water—hot water can soften dried dirt. Avoid using lubricants; oil disrupts the button from properly locking.
- Tap the pole gently on a soft surface to help seat the joint.
- Check for ice if hiking in winter. Ice inside the shaft can prevent the button from engaging.
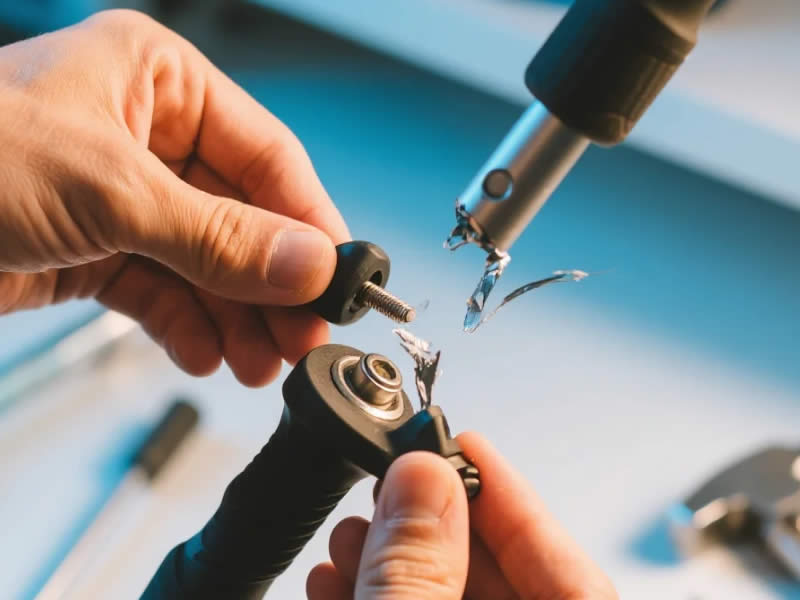
If cleaning does not work, the internal plastic sleeve may have shifted. Several hikers have reported the joint piece slipping up inside the next section. In that situation: insert a flathead screwdriver into the joint and press the broken piece back into the correct position—a quick fix that takes less than five minutes-.
Replacing a broken internal cord
A damaged internal cord is repairable. The process takes about 30 minutes with a basic repair kit.
What you need: replacement elastic cord (2.5 mm or 3 mm diameter, available from outdoor retailers or online), scissors, and a lighter or candle to seal cord ends. Some suppliers provide around 5 m of 3 mm cord in pole repair kits, which is sufficient for multiple repairs-.
Step‑by‑step cord replacement:
- Disassemble the pole completely by pulling all sections apart. Take a photo or sketch how they connect.
- Remove the frayed cord from each section, noting how it is knotted at the ends.
- Cut new cord to length matching the original. For 3‑section folding poles, you need about 10–15 cm longer than the fully extended pole length.
- Melt the cord ends with a lighter to prevent fraying during assembly.
- Thread the cord through all sections, pulling it taut so the sections align properly.
- Tie a secure knot inside the final section. A double‑overhand stopper knot works well—make sure it seats firmly into the recessed groove or cavity.
- Reassemble and test by collapsing and extending the pole several times.
On the trail, a broken cord often means the pole cannot be used at all. For a quick trail fix, some hikers tape a wooden dowel inside the upper section to hold the pole at a fixed length, then use duct tape to keep the lower sections together-.
Cleaning and maintaining joints
Most joint problems come from dirt and neglect, not from broken parts.
- After muddy hikes: extend the pole fully, rinse each joint with fresh water, and let everything dry before collapsing-23.
- Before each trip: extend and collapse the pole several times. Listen for grinding or clicking—signs of trapped grit.
- Never use lubricant on folding pole joints. Oil or spray will prevent the locking buttons from fully seating and may cause the joint to slip under load-.
When a repair is not possible
Some failures cannot be safely repaired:
- Shattered carbon fiber at the joint – carbon fiber with a visible crack or splintering is not repairable-52. Stop using the pole immediately.
- Severe aluminium bend at the joint – a bent pole may be carefully straightened only enough to finish a day, but it should be replaced afterward-52.
- Missing parts – for generic poles without spare parts support, a wooden dowel and duct tape offer a temporary fix, but the pole should be replaced long‑term-1.
- Complete snap at any joint – this is not repairable in the field. Collapse and stow the section-52.
Manufacturer repair programs
Both Black Diamond and LEKI offer spare parts and repair services for folding poles.
Black Diamond’s Reroute program provides repair guides and spare parts for Z‑poles, including replacement tips, shafts, and locking components. You can perform DIY repairs at home or send poles in for professional repair-11.
LEKI offers replacement sections for their folding poles. If the internal cord is involved, they recommend sending the pole to a workshop unless you are comfortable with the procedure-.
Prevention: making joints last longer
The best repair is the repair you never need. Prevent joint failure by:
- Collapsing poles from the middle section first when packing them away. This reduces stress on the internal cord-.
- Storing poles fully collapsed and in a dry place to prevent the internal cord from perishing.
- Inspecting the cord before each use – ideally at the start of every season. Look for fraying, stretching, or reduced tension.
- Avoiding lateral force at the joints. Folding poles are not designed to resist strong sideways bending.
A well‑maintained folding pole with a fresh internal cord can last for many seasons. But a damaged joint has a low safety margin—when in doubt, replace the section rather than risking a sudden collapse on a steep descent.


