


How to use trekking poles to reduce knee pain descending Pico da Bandeira?
Pico da Bandeira (2,891 m), Brazil’s third highest peak, offers stunning views – but the descent is punishing. The trail down from the summit is steep, rocky, and often wet. Without proper technique, each step sends a shockwave through your knees. The good news: trekking poles, used correctly, can reduce knee impact by 20–25%, sparing you from days of post‑hike pain. Here’s a step‑by‑step guide to descending Pico da Bandeira with minimal knee strain.
Recommended trekking pole purchase link: https://lightenup.aliexpress.com/store/1101521655
Why the descent hurts your knees
When you walk downhill, your quadriceps act as brakes, and each footstrike generates forces of 3–5 times your body weight through the knee joint. The steep, rocky terrain of Pico da Bandeira (especially the section from the summit to the camp at Terço de Montes) magnifies this impact. Without support, your knees absorb all that energy. Trekking poles transfer a portion of that load to your arms, reducing the force on your patellofemoral and meniscal structures.
Step 1: Lengthen your poles by 5–10 cm
Most hikers keep their poles at the same length for the entire hike – a mistake. On flat ground, your elbow should be at 90° when the tip is on the ground. For the descent, lengthen your poles by 5–10 cm (2–4 inches). A longer pole allows you to plant it ahead of your body, creating a braking angle. Your elbow will be slightly straighter than 90° – that’s correct. If your poles are too short, you’ll lean forward, placing more stress on your quads and knees.
How to adjust: Use lever locks (e.g., Leki SpeedLock, Black Diamond FlickLock) for quick, tool‑free changes. Mark your “descent” length on the shaft with tape or a marker. On Pico da Bandeira, lengthen your poles just before you start the final downhill section.
Step 2: Plant both poles ahead of your feet
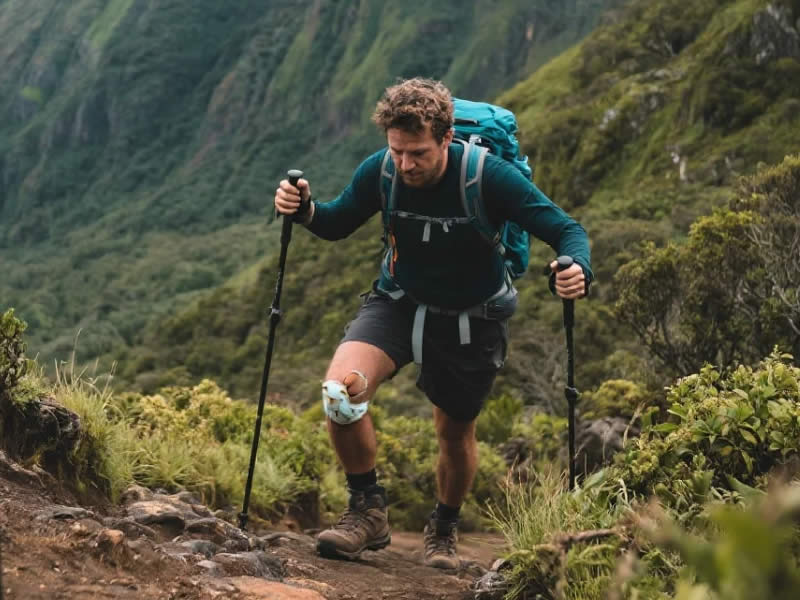
Do not plant the poles beside your feet – that does nothing to brake. Instead, reach forward and plant both poles together about 30–50 cm (12–20 inches) ahead of your forward foot. Push down firmly. The carbide tip should bite into the rock, gravel, or dirt. As you step forward, your weight will be partially supported by the poles, easing the load on your knees.
Why two poles? – Using both poles distributes the load evenly and provides a stable, four‑point base. A single pole protects only one knee and can cause you to lean.
Step 3: Push down – actively transfer weight
Don’t just let the poles touch the ground. Push down on them as you step. Imagine you are pushing the trail away. This active engagement transfers weight from your legs to your arms. You should feel your triceps, lats, and shoulders working. That’s the load being taken off your knees.
Step 4: Use wrist straps correctly – hand up from below
The wrist strap is your secret weapon. Insert your hand up through the strap from below, so the strap sits between your thumb and index finger. Tighten it snugly. Then relax your fingers – the strap should bear your weight. If you are gripping tightly, you are doing it wrong. A relaxed grip allows the strap to transfer force directly from your arm to the pole.
Step 5: Shorten your stride and keep your chest up
Long strides increase impact. Take short, controlled steps. Keep your chest open and your shoulders back – don’t hunch. Leaning forward shifts your centre of gravity downhill, putting more force on your knees. Instead, lean back slightly from your ankles. Your poles will help you maintain this upright posture.
Step 6: Use double planting on the steepest sections
On the most punishing sections (e.g., the rocky descent from the summit to the saddle), use a double‑planting rhythm: plant both poles together, step forward with one foot, then bring the other foot level. Repeat. This is slower but maximises knee protection. On less steep sections, you can alternate (opposite pole to forward foot), but keep the poles lengthened.
Step 7: Choose the right tip
Use bare tungsten carbide tips – remove any rubber covers. Carbide bites into wet rock, loose gravel, and mud. Rubber slides dangerously. Check that your tips are sharp; replace them if worn.
What about shock‑absorbing poles? – Anti‑shock springs cushion your wrists, not your knees. They add weight and can make the pole feel bouncy. For knee protection, rigid poles work just as well – and are more reliable.
Practice on the approach
Before the actual descent, practice the lengthened‑pole, double‑planting technique on the gentle downhill sections of the approach trail. Build muscle memory so that on the steep, tired descent, the movement is automatic.
Additional tips for Pico da Bandeira
- Keep your pack light – The lighter your pack, the less force on your knees. Cache unneeded gear at the camp.
- Take micro‑breaks – Every 15–20 minutes, stop, plant both poles, and lean back slightly to give your legs a rest.
- Watch your step – The trail has loose quartzite scree. Use your poles to test each foothold before committing weight.
- Hydrate – Fatigue reduces coordination. Stay hydrated to maintain good technique.
Final checklist for descending Pico da Bandeira
- Poles lengthened by 5–10 cm
- Wrist straps adjusted correctly (hand up from below)
- Carbide tips exposed and sharp
- Using double planting on steep sections
- Pushing down actively with each plant
- Short, controlled steps
Final thought
Descending Pico da Bandeira with trekking poles used correctly is not just about comfort – it’s about preserving your knees for years of future hikes. The technique takes a few minutes to learn but pays off with every step. Lengthen your poles, plant ahead, push down, and let the straps do the work. You’ll reach the bottom with fresh legs and a smile, ready for the next adventure.


