


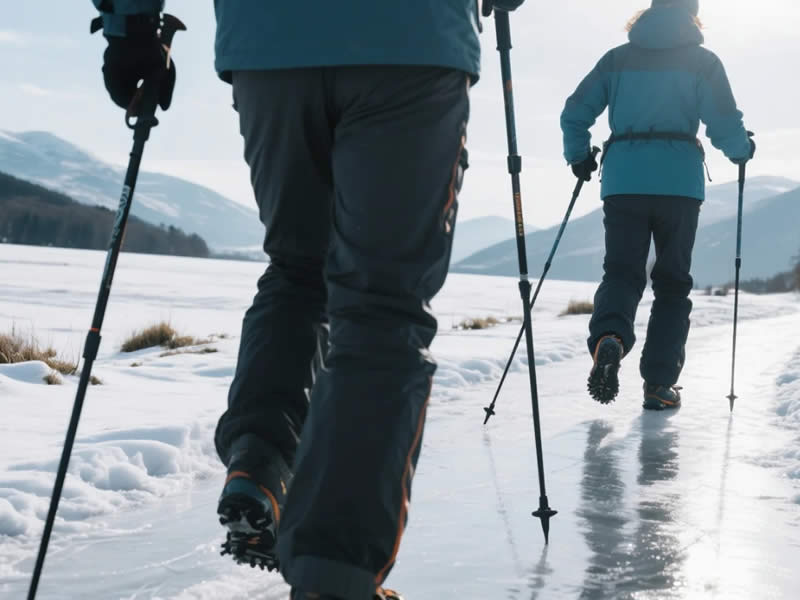
How to use trekking poles on icy and snowy trails in the Lake District?
Winter in the Lake District transforms familiar paths into challenging, icy, and snow-covered terrain. While the landscape is breathtaking, it also demands a different approach to walking. Your trekking poles become more than just a comfort aid; they are essential tools for safety and stability. This guide covers the preparation, techniques, and gear you need to use your poles effectively on icy and snowy trails.
1. Preparation – setting up your poles for winter
Before you even step onto the trail, you need to adapt your poles to the conditions. A standard summer set-up will not work in snow and ice.
a. Fit snow baskets – Your small trekking baskets are designed for mud and soft ground. In snow, they will sink straight through, offering no support. You need snow baskets, which are larger (usually 7–10 cm in diameter) and provide the necessary floatation to stop the pole from plunging deep into the snow. Make sure they are compatible with your poles. If your poles did not come with them, you can buy them separately.
b. Remove rubber ferrules – The rubber tips designed for pavement are dangerous on ice. They offer almost no grip. Always remove them and use the bare carbide tip, which is designed to bite into hard surfaces.
c. Check your locks – The cold can cause metal to contract, which can loosen your lever or twist locks. Ensure both locks are secure before you start. Give each pole a firm pull to ensure the sections are held tightly.
d. Lubricate pivot points – In freezing conditions, locks can become stiff. Apply a tiny drop of silicone spray to the pivot points of your lever locks to ensure they operate smoothly with gloves on.
2. Technique – using your poles on ice
Walking on ice requires a specific technique to prevent slipping.
- Plant the pole vertically – On icy ground, do not plant the pole at an angle. Plant it vertically (straight down) just ahead of your foot. This applies a direct, downward force that drives the carbide tip into the hard ice surface, maximising its bite.
- Apply firm downward pressure – As you step, push down firmly through the wrist strap. This creates a stable anchor point for your body weight, turning the two poles and your feet into a stable tripod.
- Use deliberate, shorter steps – Reduce your stride length. This keeps your centre of gravity over your feet and gives you more time to plant each pole securely before transferring your weight.
- Test the ground – Before committing your weight, tap the ground ahead with your pole tip. If the pole tip skids, the surface is very slippery. Adjust your footing or find a more stable spot to plant your pole.
3. Technique – using your poles on snow
Walking on snow, whether soft powder or packed snow, requires a different approach.
- Keep the snow baskets on – Your snow baskets are essential for floatation. They prevent your pole from sinking too deep, maintaining a stable platform as you walk.
- Plant slightly ahead – Plant the pole just ahead of your body to help maintain your rhythm and stability on the soft surface.
- Use a steady rhythm – Maintain a steady, alternating rhythm (left pole with right foot, right pole with left foot). A rhythmic plant helps you maintain your balance and forward momentum.
- Use a double plant on slopes – On steeper snow slopes, use a double plant – plant both poles together ahead of you, push down, and move one foot at a time. This maximises your support.
4. Technique – traversing icy slopes
When crossing an icy slope, your technique is critical to prevent sliding.
- Face the slope – Always angle your body slightly towards the hill, not directly across it. This gives you a more stable stance.
- Plant the uphill pole – Plant your uphill pole first. Push down firmly, then plant the downhill pole. The uphill pole acts as a brake, preventing you from sliding downwards.
- Keep your weight back – Lean slightly into the hill. This keeps your weight over your feet and reduces the risk of your feet sliding out from under you.
5. Additional gear – ice tips and microspikes
- Ice tips (crampon-style adapters) – For very hard, polished ice, a standard carbide tip can still skid. You can fit a small ice tip adapter (a steel ring that fits over the tip) to provide extra bite on solid ice. These are available for many Leki and Black Diamond poles.
- Microspikes – On continuous steep ice, your poles are a support aid, not a substitute for traction on your boots. Microspikes (chain crampons) on your boots are essential for safety. They provide the grip needed to walk on icy ground, while your poles provide the stability.
6. Safety considerations
- Check the weather – The Lake District weather can change rapidly. Check the avalanche forecast and the wind speed before heading out.
- Stay flexible – If conditions are too severe, turn back. The fells will still be there tomorrow.
- Let someone know your route – Always leave a route plan with someone responsible.
- Carry microspikes – Even if the conditions look okay, always have them in your pack.
7. Final verdict
Using trekking poles on icy and snowy trails in the Lake District requires proper preparation and technique. Fit snow baskets, check your locks, and use the correct planting technique. On ice, plant vertically and use firm downward pressure. On snow, use a steady rhythm and double plant on slopes. For continuous steep ice, microspikes are essential. With the right approach, your poles will significantly improve your stability and safety, allowing you to enjoy the stunning winter landscapes safely. Always respect the conditions and be prepared to turn back if necessary.


