




How to fix a trekking pole that keeps collapsing under heavy load?
A trekking pole that collapses under load is more than an annoyance—it's a genuine safety hazard, especially on steep descents or when you're carrying a heavy pack. The good news is that most collapsing issues can be fixed with simple cleaning, adjustment, or component replacement. Here's a comprehensive guide to diagnosing and fixing the problem.
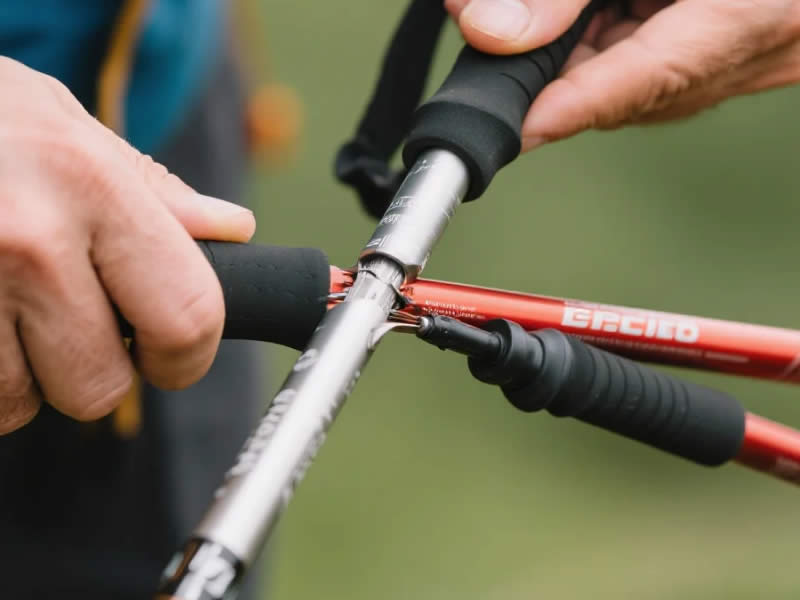
1. First, Identify Your Lock Type
Before you can fix a slipping lock, you need to know what you're working with. There are three main types:
- Lever Locks (Cam Locks) – This is the most common type on quality poles, found on brands like Leki (SpeedLock), Black Diamond (FlickLock), and Decathlon. They use an external mechanical clamp that tightens around the outer shaft when a lever is closed.
- Twist Locks – More common on budget or older poles, these use an internal expanding mechanism that presses against the inside of the shaft when twisted.
- Push-Button Locks – Found on folding (Z-pole) designs. A small button clicks into a hole in the outer shaft to lock the sections.
2. Fixing Lever Locks (Most Common)
If your lever-lock pole is collapsing, the fix is usually straightforward.
a. Clean the Mechanism – Mud, grit, or moisture on the locking surfaces is the most common cause of slipping.
- Open the lever fully and rinse the clamp and pivot area with water.
- Use a small brush (like an old toothbrush) to remove any compacted dirt.
- Wipe the shaft where the clamp sits to remove any dirt or grease.
- Dry everything thoroughly.
b. Adjust the Tension – If cleaning doesn't work, the lock needs to be tightened.
- For Leki SpeedLock or similar dial systems: Turn the tension dial clockwise to increase the clamping force.
- For Black Diamond FlickLock: Use a 2.5 mm or 3 mm hex key to tighten the screw on the side of the lever. Turn it clockwise.
- For other lever locks: Make quarter-turn adjustments to the tension screw until the lever closes with a firm, positive click.
- The lever should snap closed with a definitive click and require firm pressure to close.
- Test the pole by extending it and putting your full body weight on it.
c. Check for Worn Parts – If cleaning and adjusting don't work, the mechanism itself may be damaged.
- Check the teeth on the clamp; if they are worn or rounded, the lock assembly needs replacing.
- Look for a cracked lever housing or plastic components. These parts are replaceable.
3. Fixing Twist Locks
Twist locks are more prone to slipping, especially when wet or dirty.
a. Deep Clean – Dirt and moisture are the main culprits.
- Unscrew the twist lock fully by rotating it anticlockwise.
- Remove the inner shaft and clean the plastic cam, the threads, and the inside of the outer tube with a brush and warm, soapy water.
- Dry everything completely before reassembling. Moisture reduces friction and causes slipping.
b. Tighten Firmly – Reassemble the pole.
- Hold the lower section and twist the upper section clockwise as hard as you can by hand.
- Do not use pliers, as you can crack the plastic cam.
- Test the pole under load.
c. Check the Expander – The plastic expander can wear down over time, reducing friction.
- If cleaning and tightening don't work, the plastic cam (expander) is likely worn and needs replacing.
- Replacement expanders are available from some brands or online.
4. Fixing Push-Button Locks (Folding Poles)
These locks are less common but can still slip or fail.
a. Clean the Button – Grit and mud can jam the button.
- Rinse the button mechanism with water while pressing it in and out to free any grit.
b. Check the Spring and Hole – If the button is stuck, tap it gently. A weak spring or a worn locking hole may require replacing the entire section.
5. Additional Checks and Fixes
If the above steps don't work, the problem might lie elsewhere.
- Remove Oil/Grease – If any oil or grease has been applied to the inner shaft or locking surfaces, it will cause slipping. Clean these surfaces thoroughly with isopropyl alcohol to remove all residue.
- Check for Bent or Damaged Shafts – A bent inner shaft or a dented outer tube can prevent proper clamping.
- For aluminium: Roll the pole on a flat surface to check for a bend. Minor bends can sometimes be gently straightened by hand or with a padded vise.
- For carbon fibre: Do not attempt to straighten. A cracked or bent carbon shaft is compromised and must be replaced.
- Check for Over-Extension – Ensure the pole is not extended past its maximum limit mark.
- Replace Worn Parts – If the locking mechanism is damaged, many brands sell replacement parts like lever lock assemblies or twist-lock repair kits.
6. A Temporary Trail Fix
If a lock fails on the trail and you can't fix it permanently, wrap a small piece of duct tape around the inner shaft. This can add enough friction to get you to the end of your hike.
7. The Golden Rule for Safety
Never hike with a pole that you know is slipping. A sudden collapse under load can cause a serious fall, especially on steep or unstable terrain. Prioritise your safety—if you can't fix the problem on the trail, it's better to use one pole or turn back than to risk an injury. Happy hiking!




