




How to sharpen blunt trekking pole carbide tips at home?
A trekking pole’s carbide tip is your best friend on icy trails, rocky scrambles, and muddy slopes—until it goes blunt. Instead of slipping dangerously or struggling for grip, you can restore that sharp bite right at your workbench. But carbide is not like steel; it’s extremely hard but brittle. Sharpening it incorrectly can crack the tip or shorten its life. This guide walks you through the safe, effective method, the tools you need, and the signs that tell you when to stop sharpening and start replacing.
Why do carbide tips go blunt?
Carbide tungsten is second only to diamond in hardness, yet it doesn’t “roll” like steel—it micro‑fractures. Constant contact with rocks, gravel, and pavement causes tiny chips and flattening at the point. The tip becomes rounded or flat, reducing penetration. On wet rock or ice, a blunt tip skids sideways, robbing you of stability. Regular maintenance keeps the tip aggressive without sacrificing durability.
Tools you’ll need (and what to avoid)
- Diamond file – coarse grit (150–200) for shaping, fine grit (400) for honing. Diamond is the only material that effectively cuts carbide.
- Vise or clamp – to hold the pole steady.
- Safety glasses – carbide fragments can fly.
- Marker pen – to mark the facets you’ve worked on.
- Soft cloth – for cleaning after sharpening.
Avoid using a bench grinder with a standard stone—it generates excessive heat and can shatter the carbide. Also avoid steel files; they’ll just glide over the hard surface without removing material.
Step‑by‑step sharpening guide
1. Clean the tip thoroughly
Soak the tip in warm soapy water for 5 minutes, then scrub with an old toothbrush to remove dirt and grease. Dry completely. Any contamination will clog the file and reduce cutting action.
2. Secure the pole
Clamp the pole near the tip (protect the shaft with a rag) so it doesn’t wobble. Work in a well‑lit area.
3. Identify the original grind
Most carbide tips have three or four flat facets converging to a point. Use a marker to colour one facet—this helps you track your progress.
4. File each facet evenly
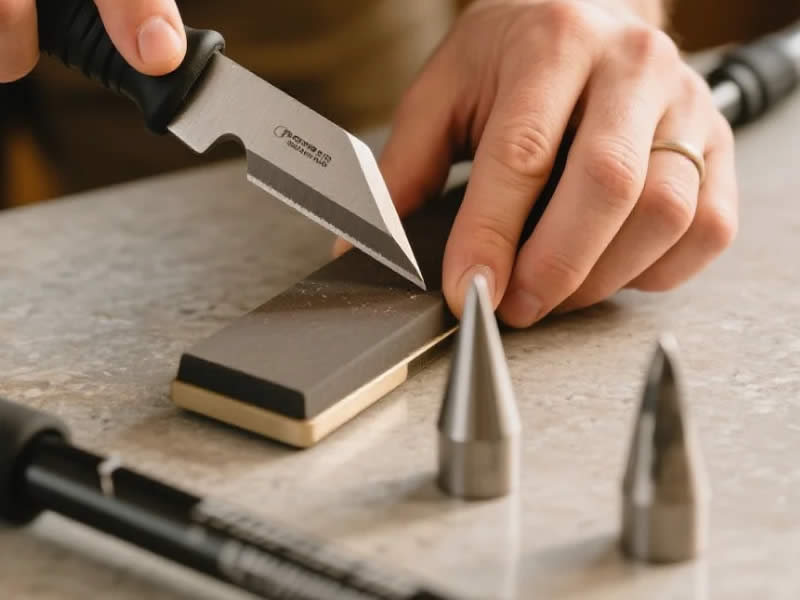
Hold the diamond file at the same angle as the original facet (about 30–45° from the centre axis). Push the file forward in long, even strokes—never back‑and‑forth because that can chip the edge. Apply light to moderate pressure; carbide is hard, so let the diamond do the work. After 8–10 strokes, check the marker: if it’s removed, you’re cutting. Move to the next facet and repeat. Keep the strokes uniform across all facets to maintain symmetry.
5. Hone the point
Once all facets are bright and uniform, switch to the fine diamond side (or a fine diamond stone). Give each facet 3–4 light strokes to smooth the cutting edge. This reduces micro‑burrs and extends tip life.
6. Test the sharpness
Gently press the tip against a piece of scrap wood—it should dig in without slipping. On a hard surface, it should feel like it “bites” when you twist the pole.
7. Clean and protect
Wipe off all metal dust with a damp cloth. Apply a drop of light oil to the tip (optional) to prevent rust on the steel collar, but wipe it dry before your next hike—oil attracts grit.
Critical safety warnings
- Wear safety glasses – carbide chips are razor‑sharp and can fly into your eyes.
- Keep the tip cool – if you feel heat, stop and let it cool. Overheating (above 400°C) can weaken the brazing that holds the carbide to the steel base, causing the tip to fall out.
- Do not grind dry with a power tool – unless you have a diamond wheel and coolant, stick to hand filing. Power grinding overheats quickly and creates stress fractures.
When to replace instead of sharpen
Not every blunt tip is salvageable. Replace the carbide tip if:
- The point is completely rounded with no facets visible—you’d have to remove too much material, weakening the bond.
- There are deep chips or cracks – filing may propagate the crack, and the tip could break off mid‑hike.
- The carbide insert wobbles – if it’s loose in its metal housing, sharpening won’t fix the play; buy a new tip (most poles have replaceable tips).
- After 3–4 sharpening sessions – carbide has a limited thickness; once the exposed part becomes too short, it loses grip.
Most manufacturers recommend replacing tips after every 200–300 miles of rocky terrain. Sharpening can extend that to 400 miles, but only if done sparingly.
Preventive care to slow blunting
- Avoid pavement – walking on asphalt or concrete wears carbide faster than anything else. Remove the rubber protective tips when off‑trail, but never use bare carbide on roads.
- Store poles with tip covers – prevents accidental contact with hard floors.
- Clean after every hike – dried mud hides abrasives that accelerate wear.
- Rotate two sets of tips – if your poles are modular, swap worn tips with fresh ones and sharpen the old set when you have leisure time.
Final verdict
Sharpening carbide tips at home is quick, safe, and highly effective—provided you use a diamond file, work patiently, and never overheat the metal. A sharp tip gives you confident footing, reduces fatigue (because you don’t compensate for slips), and saves you the cost of frequent replacements. But remember: sharpening is a maintenance act, not a miracle cure. When the tip is too short or cracked, invest in a new one—your knees and safety are worth far more than a few dollars.
Now grab your diamond file, set up your vise, and give your poles that factory‑fresh bite. Happy (and secure) hiking!




