




How to refurbish old rusted trekking poles for continued use?
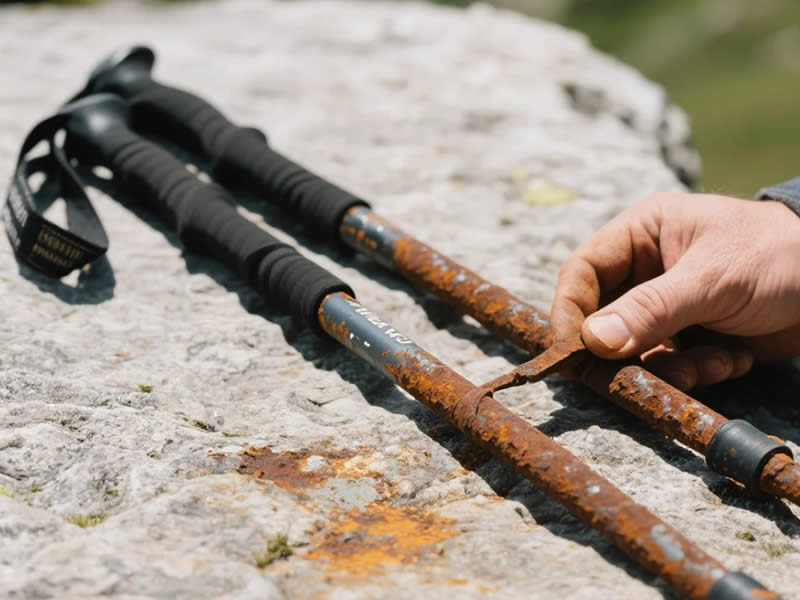
That pair of trekking poles sitting in the corner of your garage—once your trusted companions on countless trails—now looks more like a relic from a shipwreck. Orange‑brown patches bloom around the locking collars, the baskets are brittle, and the tips are worn to nubs. Before you toss them in the recycling bin, consider this: many rusted poles can be brought back to life with a few hours of careful work. Refurbishing not only saves money and reduces waste, but it also gives you a deeply satisfying sense of restoration. However—and this is a critical however—not every rusted pole is salvageable. This guide will help you assess the damage, perform a safe restoration, and know exactly when to say goodbye.
Understanding rust on trekking poles
First, let’s clear up a common misconception: aluminium does not rust. It oxidises, but that oxidation forms a protective, dull grey layer that actually stops further corrosion. What you see as “rust” on aluminium tubes is usually dirt, sap, or transferred iron particles from steel components. The real rust occurs on steel parts: lock springs, lever pivot pins, screws, and sometimes the internal expander nuts. Carbon fibre poles are immune to rust but can suffer from epoxy degradation if moisture penetrates micro‑cracks.
So when you inspect your poles, differentiate between surface staining (cosmetic) and structural rust (dangerous). Surface rust on screws or springs can be cleaned; deep pitting on tube walls—especially if the tube is steel (rare in modern poles)—or severe corrosion around the locking area demands immediate retirement.
Safety first: when NOT to refurbish
Before gathering tools, perform a safety assessment:
- Check tube integrity – Run your fingers along the entire length of each section. If you feel soft spots, bulges, or see holes perforating the metal, the pole is compromised. Discard it.
- Test the lock mechanism – If the lever or twist‑lock feels gritty or won’t tighten evenly, but the tubes are sound, you can replace the hardware. If the tube itself is deformed or rust‑thinned around the lock area, replace the section or the entire pole.
- Carbon fibre warning – If you see white stress marks, delamination, or a spongy feel when you squeeze the tube, it has internal structural damage—refurbishing is impossible.
If the poles pass these checks, proceed with restoration.
Tools and materials you’ll need
- Fine steel wool (grade 0000) or 400‑600 grit wet/dry sandpaper – for removing surface rust.
- Rust converter (phosphoric acid‑based) – for treating pitted steel parts; converts iron oxide to a stable black layer.
- Isopropyl alcohol – for degreasing.
- Small wire brush or old toothbrush.
- Dry graphite powder or candle wax – for lubrication (never oil).
- Replacement parts – new carbide tips, baskets, and lock springs if original ones are too corroded.
- Soft cloths, rubber gloves, and a work mat.
- Optional: clear lacquer or anti‑rust spray for steel parts.
Step‑by‑step refurbishment process
1. Disassemble completely
Separate all sections. Remove baskets, tips, and any rubber grip covers. For twist‑locks, unscrew the expander nut and pull out the internal cone. For lever‑locks, remove the lever cam assembly if possible. Lay every part out in order—this helps you remember reassembly.
2. Clean off loose grime
Wash all tubes with warm, soapy water and a soft brush to remove dried mud and salts. Rinse and dry thoroughly. This step reveals the true extent of rust and avoids scratching the metal during abrasion.
3. Remove surface rust from tubes
If your tubes are aluminium, any orange stains are likely superficial. Use fine steel wool or sandpaper lightly—do not scour aggressively, as you’ll remove the anodised coating. Wipe with alcohol; the shine should return. For steel tubes (very rare), you may need more aggressive sanding, but always finish with fine grit to smooth the surface.
4. Treat steel hardware with rust converter
Remove the lock springs, screws, and pivot pins. If they are heavily rusted, soak them in a rust converter solution according to the product instructions. After treatment, rinse and dry. Alternatively, if the springs are pitted or weak, buy new ones (many brands sell repair kits). Never reuse a spring that has lost its tension—it will cause lock slippage.
5. Clean internal threads and locking surfaces
Use a small wire brush to clean the threads inside the expander nut. For lever cams, clean the friction pads with a toothbrush and soapy water. Ensure no rust particles remain—they act as abrasives that wear down the tube surfaces.
6. Lubricate correctly
Apply a tiny pinch of dry graphite powder to the threads of the twist‑lock expander—this prevents galling without attracting dirt. On the sliding tube surfaces, rub candle wax or a PTFE dry spray. Never use WD‑40, oil, or grease on any part that comes into contact with the tube walls or locking surfaces—it causes slippage and attracts grit.
7. Replace consumable parts
If the carbide tips are blunt or chipped, replace them. If the baskets are cracked, swap them. These are inexpensive and dramatically improve performance.
8. Reassemble and adjust tension
Put the sections back in the correct order. For twist‑locks, tighten the collar until it holds your weight, then back off a quarter‑turn. For lever‑locks, adjust the screw so the lever closes with moderate firmness (about 2‑3 cm of lever travel). Test each joint separately by pushing down with your full body weight—the pole should not slip.
9. Protect against future rust
After reassembly, wipe all steel parts (screws, lever pivots) with a cloth lightly dampened with anti‑rust oil, but immediately wipe off any excess so it doesn’t migrate to the tube surfaces. Some hikers apply a clear nail polish to the screw heads for extra protection.
Testing and break‑in
Once refurbished, take the poles on a short, easy hike with a light pack. Extend and retract them several times while walking to ensure smooth action. Listen for squeaks—if present, you may have missed residual dirt or need a thin wax layer. Over the first few miles, retighten the locks as the components settle. After that, your poles should perform like new.
When refurbishing isn’t worth it
- If the tubes have deep rust pits (more than 1 mm deep) or holes.
- If the anodised coating is flaking off aluminium, exposing bare metal that will oxidise again quickly.
- If replacement parts (especially locking hardware) are unavailable and the originals are too damaged—sometimes a new pole is cheaper than the sum of parts.
- If the grip foam is crumbling and the shaft underneath is also corroded—replace the upper section or the entire pole.
Preventive maintenance to avoid future rust
- Dry poles thoroughly after every wet hike and store them disassembled.
- Apply a thin wax layer to the tube surfaces annually.
- Check steel screws and springs every season; replace them at the first sign of rust.
- Avoid leaving poles in a damp basement or car trunk—moisture is the enemy.
Final verdict
Refurbishing old rusted trekking poles is a rewarding DIY project that can extend the life of your gear by years—but only if the structural integrity is intact. Surface rust on hardware is cosmetic; deep corrosion on tubing is terminal. With the right tools, patience, and a willingness to replace worn consumables, you can turn those neglected poles into reliable hiking companions again. Remember: your safety is paramount. When in doubt, err on the side of caution and invest in new poles or sections.
Now, give those old poles a second chance—they’ve earned it.




