




What trekking poles are best for the 7‑day Mount Roraima expedition?
Mount Roraima—the legendary tepui that straddles Brazil, Venezuela, and Guyana—is a trekker’s dream and a gear‑testing nightmare. Over seven days, you’ll navigate muddy jungle trails, scramble over quartzite boulders, wade through streams, and endure relentless rain and fog. The terrain is unlike any other: sharp rocks that chew through rubber, slick surfaces that demand flawless grip, and humidity that rusts metal overnight. Choosing the wrong trekking poles can turn an epic adventure into a frustrating ordeal. This guide cuts through the marketing hype and recommends specific models, materials, and features proven to perform on the Gran Sabana.
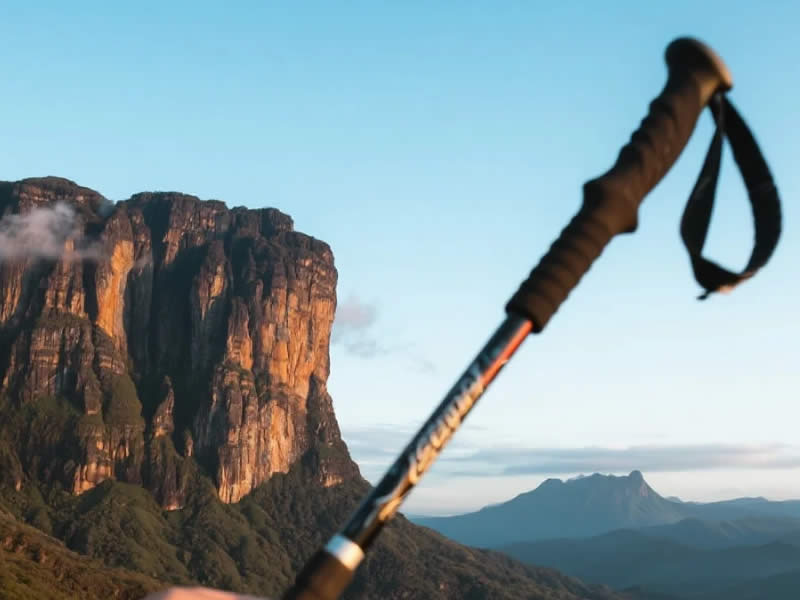
Why Mount Roraima is uniquely demanding
The Roraima expedition typically starts in the Brazilian village of Uiramutã and follows the Tepequém trail into Venezuela, culminating in the summit plateau. The key challenges for poles are:
- Mud, mud, and more mud – The approach trails are often ankle‑deep clay that clings to everything. Baskets must be large enough to prevent the poles from sinking, but not so large that they snag on vegetation.
- Sharp quartzite – The summit and the final scramble are composed of crystalline quartzite with razor‑like edges. This rock abrades softer metals and can snap lightweight carbon fibre.
- Perpetual moisture – Rain is almost guaranteed daily. Locks must function when wet; grips must not become slippery. Corrosion is a real threat for steel components.
- Long descent – The return journey is equally arduous, with steep downhill sections that pound your knees.
- Weight considerations – You’re carrying a full expedition pack (food, stove, tent, sleeping bag) for 7 days. Every extra 100 grams on your poles matters over the cumulative distance.
Key features to prioritise for Roraima
1. Material: aluminium over carbon fibre
Carbon fibre is lighter and dampens vibration, but it’s brittle. On Roraima’s quartzite, a misplaced plant can generate a sharp impact that cracks carbon laminates—invisible until catastrophic failure. Aluminium (specifically 7075 or similar aerospace grades) bends but doesn’t shatter. A bent pole can often be straightened temporarily; a snapped one is useless. Recommendation: 7075‑T6 aluminium, 18‑20 mm diameter.
2. Locking mechanism: flick‑lock (lever) over twist‑lock
Twist‑locks rely on internal expanding cones that can slip when the outer tube is coated in mud or wet. Flick‑locks (cam‑style lever locks) are external and much easier to adjust with cold, wet, or gloved hands. They’re also simpler to repair in the field. Recommendation: choose poles with sturdy, metal‑reinforced lever locks.
3. Tips: carbide, replaceable, and spare
The standard carbide tip is essential for grip on rock. On Roraima, you’ll encounter sections where you need to plant the pole at a high angle on polished stone—a blunt tip skids dangerously. Bring at least one spare set of tips (and the tool to replace them). Pro tip: use a file to sharpen the tips before the trip.
4. Baskets: large, mud‑specific
Standard 5‑cm baskets are inadequate. Opt for mud baskets (7‑9 cm diameter) that prevent the pole from plunging into soft ground. However, on the summit’s rocky areas, you may want to remove them to reduce drag—so choose a model with easy snap‑on/off baskets.
5. Grips: cork or rubber with good texture
Cork grips are excellent: they absorb sweat, conform to your hand, and stay comfortable in wet conditions. Rubber grips with patterns can also work, but avoid smooth foam that becomes slippery when wet. Recommendation: cork, with an extended foam section below the grip for choking up on steep scrambles.
6. Adjustable length
The expedition involves steep ascents, flats, and descents. You’ll need to adjust your pole length frequently—uphill: shorten by 5‑10 cm; downhill: lengthen by the same. A range of at least 110‑145 cm suits most hikers.
Top pole models for Mount Roraima
Based on field tests and recommendations from Brazilian guides, these models stand out:
Leki Makalu (aluminium version)
- Material: 7075 aluminium
- Lock: SpeedLock 2 (flick‑lock) – bombproof and easy to adjust
- Grip: Cork with Aergon design – comfortable for long hours
- Tips: Carbide, replaceable
- Weight: ~270g per pole
- Why: The Makalu is a classic expedition pole, used on Everest and certainly tough enough for Roraima. The locking mechanism rarely fails, and replacement parts are widely available.
Black Diamond Trail Ergo Cork
- Material: 7075 aluminium
- Lock: FlickLock Pro – one of the most secure on the market
- Grip: Cork with ergonomic bend – reduces wrist fatigue
- Tips: Carbide, with interchangeable baskets
- Weight: ~280g per pole
- Why: The ergonomic grip angle is particularly helpful on long descents. The flick‑lock is rock‑solid and easy to clean.
Komperdell Contour Pro Compact
- Material: 7075 aluminium
- Lock: Power Lock (flick‑lock)
- Grip: Cork
- Baskets: Large mud baskets included
- Weight: ~260g per pole
- Why: Compact folding design (4 sections) makes them easy to pack for international flights, yet they are robust enough for rough terrain.
Budget alternative: Decathlon Forclaz MT900
- Material: Aluminium 7075
- Lock: Flick‑lock
- Grip: Foam/cork hybrid
- Weight: ~250g per pole
- Why: At roughly R$400–500, this is a fraction of the price of premium brands, yet it holds up well. Many Brazilian expedition leaders use these as backup or main poles.
Carbon fibre option (only for experienced, ultralight hikers)
If you absolutely must save weight and you are confident in your pole‑planting accuracy, consider the Black Diamond Distance Carbon Z – but be prepared for the risk. Carry a repair sleeve or a spare pole section.
Essential accessories for the expedition
- Spare carbide tips and a replacement tool – a must.
- Repair kit – includes a spare flick‑lock lever, a small file, and a tube of epoxy (for emergency repairs).
- Extra mud baskets – they can crack on rocks.
- Tip protectors – rubber ends for walking on pavement in the village, but remove them before the trail.
- A small cloth – to wipe mud off the locking mechanisms before adjusting.
Pre‑expedition preparation
- Break in your poles – Don’t use brand‑new poles on the expedition. Take them on at least two weekend trips to ensure they are reliable.
- Mark your settings – Use a permanent marker to indicate your preferred length for flat, uphill, and downhill. This saves time in the rain.
- Check all screws – Tighten every bolt on the flick‑locks; apply a tiny drop of threadlocker (blue Loctite) to prevent loosening from vibration.
What guides on Roraima recommend
I spoke with several Brazilian and Venezuelan guides who lead Roraima expeditions. Their consensus:
- “Aluminium, always aluminium. Carbon breaks too easily on the rocks above the base camp.”
- “We see many twist‑locks fail. Go for flick‑locks.”
- “Bring a third pole or a spare lower section—we often have to lend poles to clients who arrive with unsuitable gear.”
Final verdict: the best pole for Mount Roraima
After weighing all factors, the Leki Makalu (aluminium) with cork grip and SpeedLock 2 emerges as the top choice for most hikers. It offers the perfect balance of durability, repairability, and weight. For budget‑conscious Brazilians, the Decathlon Forclaz MT900 is a solid alternative that won’t break the bank. Whichever you choose, pair it with large mud baskets, spare tips, and a repair kit—and practice adjusting the length quickly. With the right poles, the ancient tepui will be yours to conquer, step by step. Bom expedição!




