




What are the best trekking poles for wildlife photographers to use as a monopod?
For wildlife photographers, a trekking pole that doubles as a monopod is a game‑changer: it reduces pack weight, provides essential walking support on uneven terrain, and offers a stable platform for a heavy telephoto lens. The key is a sturdy, flick‑lock pole with a standard 1/4"‑20 camera screw mount, allowing you to attach your camera directly (or with a small adapter) and then detach it quickly to frame a shot. This article reviews the top models, explains the critical features to look for, and provides practical advice for using a pole‑monopod in the field.
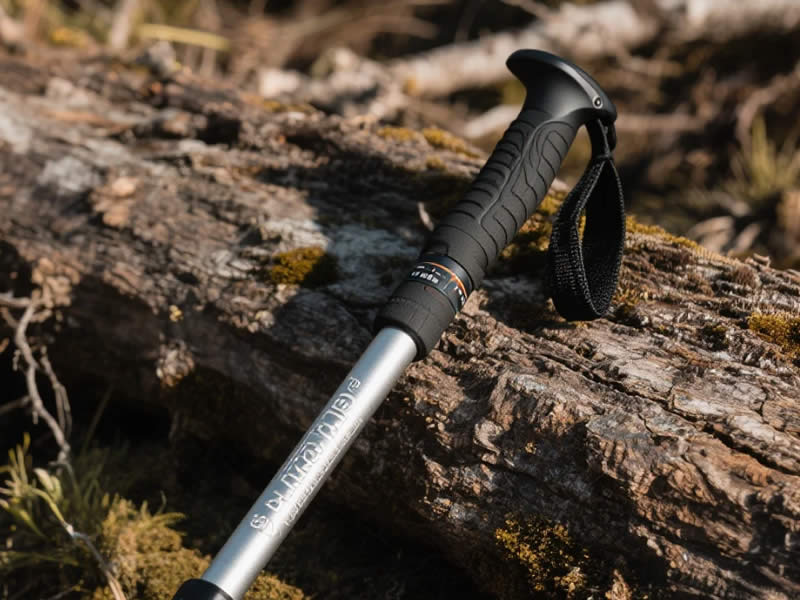
Why a pole‑monopod makes sense
Wildlife photographers often hike long distances to reach hides or vantage points. A dedicated monopod adds weight and bulk, while a trekking pole is already in your hand. By adding a simple camera mount, you convert your walking aid into a stable support for your camera. This is particularly useful for shooting with a 200‑600mm or similar telephoto lens, which benefits from added stability. The pole can also double as a boom for a lightweight flash or an audio recorder.
The three top picks for 2025
1. Black Diamond Trail Pro Trekking Pole
The Black Diamond Trail Pro is the gold standard for this dual‑use application. It features:
- FlickLock Pro: The most secure and reliable lever‑lock on the market. It holds rock‑solid, even under the weight of a heavy camera and lens. This is critical—a wobbly lock ruins a monopod shot.
- Durable aluminium shaft: The 7075‑T6 aluminium is rigid, providing a stable platform for your lens. It is more stable than carbon fibre under load.
- Compatibility: While it doesn't come with a camera mount, a third‑party 1/4"‑20 adapter (like the Trailpix or Ultrapod systems) can be attached to the top of the grip, or you can swap the top cap for a screw‑on mount.
- Weight: ~280g per pole—light enough for long hikes.
Best for: Photographers who prioritise stability and durability over extreme lightness.
2. Leki Micro Vario Carbon
For those who prioritise weight and packability, the Leki Micro Vario Carbon is an excellent choice.
- Ultralight: At ~210g per pole, it is noticeably lighter than the Black Diamond, reducing arm fatigue on long walks.
- Folding design: It folds down to 35‑40cm, making it easy to pack inside a camera bag or attach to the outside of a backpack.
- SpeedLock 2: Leki's flick‑lock system is reliable, but it is slightly less secure under very heavy loads (e.g., a 600mm f/4 lens) than the Black Diamond's FlickLock Pro.
- Compatibility: The top section is designed to accept a camera mount (available from Leki and third‑party brands).
Best for: Photographers who walk long distances and want a pole that packs small.
3. Budget alternative: Cressi Trekking Pole (with camera mount)
For photographers on a budget, the Cressi trekking pole (and similar generic models) is an option. It often comes with a 1/4"‑20 screw on the top, ready to mount a camera.
- Pros: Very affordable (£25‑35), often includes a built‑in camera mount.
- Cons: The locking mechanism is less robust than premium brands; under a heavy lens, the pole may not lock as securely. The aluminium is lower grade, so it's more prone to bending under heavy use.
- Verdict: Suitable for lightweight camera setups (e.g., a mirrorless camera with a 70‑200mm lens). Avoid it for heavy DSLR or pro‑grade telephoto lenses.
The critical feature: flick‑locks over twist‑locks
For a monopod, a flick‑lock (lever‑lock) is far superior to a twist‑lock.
- Twist‑locks rely on an internal expander. Under the weight of a camera and lens, they can slip—especially if the pole is not perfectly vertical. They can also be slow to adjust in the field.
- Flick‑locks provide a much more positive, clamp‑style grip. You can tighten them firmly and they will hold. They are also faster to adjust, which is essential when you are trying to set up a shot quickly.
Recommendation: Only consider poles with flick‑locks for monopod use.
Material: aluminium vs. carbon
- Aluminium is more rigid and offers a more stable base. It is less likely to flex under a heavy lens. It is also cheaper and more durable if you accidentally drop it.
- Carbon fibre is lighter, but it can flex—especially at the joints—which can cause image blur when using a telephoto lens. It is also more expensive and can be damaged by sharp impacts.
For a pole‑monopod, aluminium is the better choice for most photographers, unless you are carrying a very light camera setup and prioritise weight savings above all else.
The camera mount: options and attachments
You have a few ways to attach your camera:
- Built‑in 1/4"‑20 screw: Some generic poles (like the Cressi) have a screw built into the top cap. This is the simplest option.
- Third‑party adapter: Products like the Ultrapod or Joby attachments can be clamped onto the pole's top section. These often have a quick‑release plate, allowing you to detach the camera quickly.
- Custom modification: You can swap the top cap of a Black Diamond or Leki pole with a camera‑mount top (available from aftermarket suppliers).
- Arca‑Swiss clamp: Attach a small Arca‑Swiss quick‑release clamp to the top of the pole. This is the most secure and fastest method—you can mount your camera in seconds and remove it equally quickly.
Tip: Use a small, lightweight clamp (like the Desmond DPL‑50). It weighs under 50g and holds a camera securely.
Practical field technique
Using a pole as a monopod requires a different technique than a dedicated monopod.
- Brace against your body: A monopod works best when you lean it slightly forward and brace it against your leg or your hip. This creates a stable tripod of your body, the pole, and your camera.
- Use the strap: Attach your camera's strap around your neck or shoulder. If the pole slips, the strap prevents a fall.
- Lock the pole first: Before you raise the camera, ensure the flick‑lock is tightened firmly. Adjusting it with a camera attached is awkward.
- Practice detachment: Practice removing your camera from the pole quickly. You need to be able to swing it up to take a shot without fumbling.
Limitations and when to use a dedicated monopod
A trekking pole is a compromise. It is not as stable as a dedicated video monopod (like a Manfrotto or Gitzo) for several reasons:
- Stiffer legs: A dedicated monopod has thicker, stiffer legs designed to hold heavy lenses.
- Better feet: The rubber foot of a monopod provides superior grip on uneven surfaces compared to a trekking pole tip (which is designed for dirt and rock).
- No panning head: A dedicated monopod often has a tilt or panning head, which is essential for tracking moving wildlife.
If you are shooting with a large, heavy lens (e.g., a 500mm f/4 or a 600mm f/4) and need smooth panning, a dedicated monopod is the right tool. If you are walking long distances and need a compact, lightweight support for a lighter setup, a trekking pole is a great solution.
The verdict
For wildlife photographers, the Black Diamond Trail Pro with an aftermarket camera mount is the best overall option, offering exceptional stability and reliability. For those who prioritise weight and packability, the Leki Micro Vario Carbon is an excellent choice. Avoid twist‑locks and carbon poles for heavy lens setups. Always practice detaching your camera quickly and consider a dedicated monopod if you shoot with a pro‑grade, heavy lens. With the right pole, you can reduce your pack weight and gain a stable shooting platform, all in one piece of gear.




