




How to stop the strap buckle from tapping against the shaft while walking?
If you’ve ever hiked with trekking poles, you know the rhythm—plant, push, lift, swing. But sometimes that rhythm is punctuated by an annoying, repetitive click‑clack: the strap buckle tapping against the aluminium or carbon shaft with every step. It’s not just a distraction; that constant impact can scratch the pole’s finish, wear down the buckle, and even distract you from enjoying the trail. The good news is that this is one of the easiest problems to fix—often with items you already have in your pack. In this guide, we’ll explore why the buckle taps, and then give you five proven, step‑by‑step methods to silence it for good.
1. Why Does the Strap Buckle Tap in the First Place?
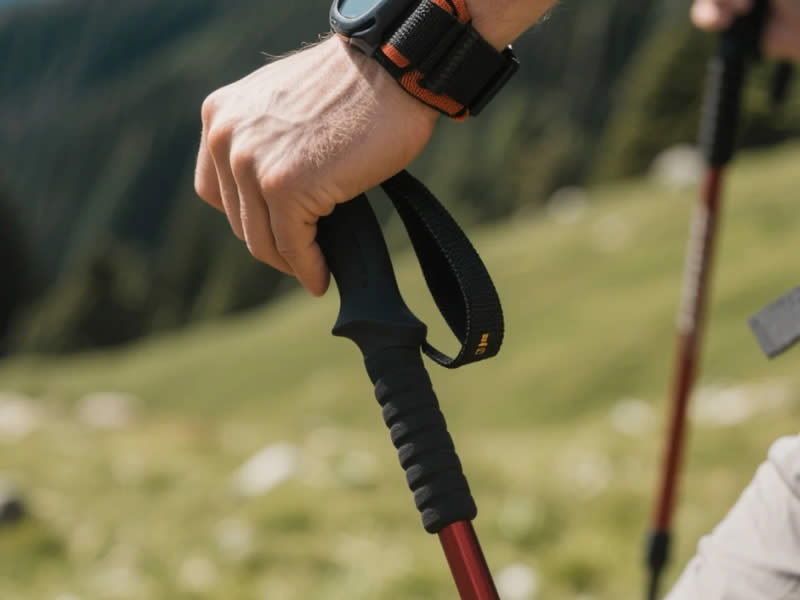
Most trekking and ski poles use a nylon strap with a plastic or metal buckle to secure your hand. The strap loops around your wrist, and the buckle sits on the outside of the shaft. When you walk, the pole swings forward and back. If the strap is too long, too loose, or positioned incorrectly, the buckle acts like a pendulum. As the pole changes direction, inertia keeps the buckle moving, and it strikes the shaft with a sharp tap.
Factors that make tapping worse:
- Excessive strap length – More slack means more swing radius.
- Low buckle position – If the buckle sits near the grip’s base, it has more leverage to hit the shaft.
- Walking speed – Faster cadence increases impact frequency.
- Worn or stiff buckles – Some buckles have sharp edges that create a louder noise.
Understanding the cause leads directly to the cure: reduce slack, reposition, or dampen the impact.
2. Method 1: Shorten and Reposition the Strap (The Permanent Fix)
The most effective solution is to adjust the strap so that the buckle sits above your hand, not below it. Here’s how:
- Loosen the strap completely and slide your hand through from underneath.
- Pull the strap until the buckle rests on the top (dorsal) side of your wrist, near the base of your thumb.
- Tighten the strap so that it’s snug but not cutting off circulation—you should be able to slip one finger between strap and wrist.
- Now, when you grip the pole, the buckle naturally stays on the outer side of your hand, away from the shaft. It no longer has enough length to swing inward.
Test by walking a few paces. If you still hear taps, shorten the strap further by adjusting the sliding buckle or by tying a small knot in the excess webbing. This method eliminates 90% of tapping issues without any additional hardware.
3. Method 2: Use an Elastic Band or Velcro Strap (Quick Trail Fix)
When you’re on the trail and don’t want to re‑thread the strap, grab a rubber band, a hair tie, or a small Velcro cable tie. Wrap it around the buckle and the shaft together, securing the buckle firmly against the pole. This prevents it from moving independently.
- For rubber bands, loop them twice for a snug fit.
- For Velcro, wrap it around the shaft just below the buckle, then fold the buckle down and secure it.
- Ensure the band doesn’t interfere with your grip or the pole’s locking mechanism.
This fix takes 10 seconds and is fully reversible. The only downside is that you need to carry a small band—but many hikers already have one in their repair kit.
4. Method 3: Slide a Silicone O‑Ring Under the Buckle (Dampening)
If the buckle still taps despite shortening, you can absorb the impact with a soft barrier. Take a silicone O‑ring (the same type used for pole joints) and slide it over the strap, positioning it between the buckle and the shaft. When the buckle swings, it hits the rubber ring instead of the metal/carbon tube. The ring acts as a silent bumper.
- Choose an O‑ring with a cross‑section of about 2‑3 mm.
- You can also use a small piece of adhesive felt or a stick‑on rubber pad (often sold as furniture bumpers) attached to the shaft where the buckle hits.
This method is excellent because it doesn’t alter the strap’s function, and it’s virtually invisible.
5. Method 4: Twist the Strap Around the Shaft (No‑Tool Hack)
For an instant, tool‑free solution, simply twist the excess strap once or twice around the pole shaft before tightening the buckle. Here’s how:
- After threading your hand through, take the loose end of the strap and wrap it around the shaft in a single loop.
- Then bring it back to the buckle and tighten as usual.
- This shortens the effective length and creates friction that keeps the buckle from swinging freely.
This works particularly well with flat webbing. However, be careful not to over‑twist, as it can create a pressure point on your hand. Test it; if you feel discomfort, untwist and try a half‑twist instead.
6. Method 5: Replace the Buckle with a Quieter Alternative
If your pole uses a bulky, heavy metal buckle that seems designed to make noise, consider upgrading to a low‑profile plastic side‑release buckle or a cord‑lock toggle. These are lighter, quieter, and often have rounded edges. Many aftermarket strap kits are available for under $10.
- Ensure the new buckle has a smooth, non‑metallic surface.
- Install it by cutting the old strap and sewing or melting the ends (nylon melts easily with a lighter).
This is a more involved fix, but it permanently solves the issue and also reduces strap weight.
7. Preventive Maintenance and Daily Habits
To stop the tap from returning:
- Check strap tension before every hike – straps stretch over time; re‑tighten as needed.
- Clean the buckle – dirt can make it stiff, causing it to snap back harder; wipe with a damp cloth.
- Rotate your grip – sometimes simply changing how you hold the pole (slightly angled) alters the buckle’s swing arc.
- Store poles with straps loosely wrapped – this prevents permanent creases that can affect tension.
8. When Tapping Isn’t the Buckle – Other Noises to Rule Out
Occasionally, hikers mistake other noises for buckle taps. If you’ve tried all the above and still hear a click, check:
- Loose pole sections – tighten twist‑locks or flip‑locks.
- Worn tip or carbide – a loose tip can rattle.
- Basket movement – as discussed in previous guides.
- Strap attachment point – the rivet where the strap connects to the grip might be loose; tighten with a screwdriver.
9. Summary: The Three‑Step Silence Routine
For a guaranteed quiet walk, follow this simple routine before you set out:
- Adjust strap length – shorten so the buckle rests above your wrist.
- Secure the buckle – use a rubber band or twist the strap if needed.
- Test and re‑adjust – take 20 steps; if you hear anything, re‑check.
Final Thoughts
A tapping strap buckle is a minor nuisance that can easily become a major annoyance over a long hike. Fortunately, with the techniques above, you can silence it in under a minute—without special tools or expensive replacements. Whether you choose to shorten the strap, add a dampener, or simply twist the webbing, the result is the same: a peaceful, rhythmic stride that lets you focus on the scenery, not the click. Try these fixes today, and enjoy a quieter, more pleasant trek.




