




How to use trekking poles correctly on steep descents?
A steep, rocky descent is where trekking poles earn their keep – or where poor technique turns them into a hazard. Many walkers plant their poles haphazardly, lean back too far, and end up with aching shoulders, stubbed tips, or a nasty tumble. Used correctly, poles on a downhill transform your centre of gravity, absorb knee‑jarring shock, and give you the confidence of a mountain goat. This guide breaks down the biomechanics, step‑by‑step technique, and terrain‑specific adjustments so you can descend safely, efficiently, and without joint pain.
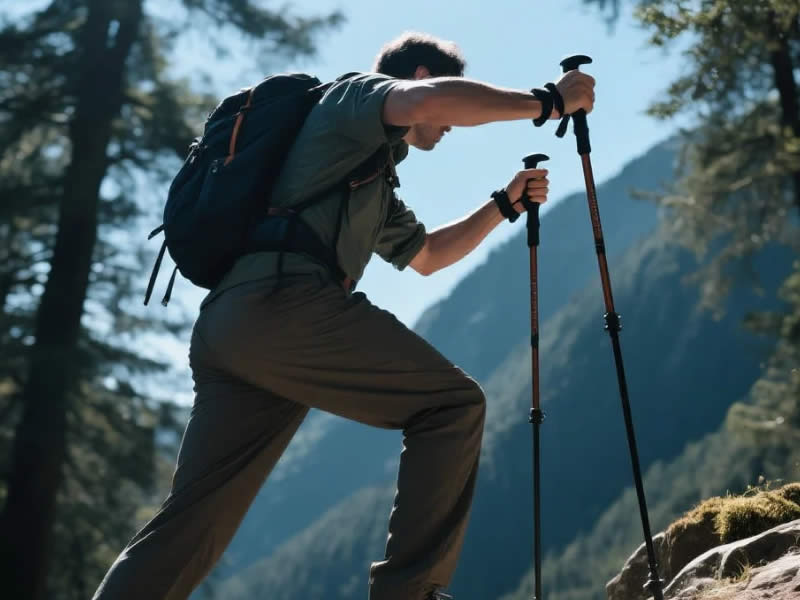
Why descents demand a different technique
On the flat, poles assist forward motion. On a steep downhill, they act as brakes and shock absorbers. Your knees experience up to three times your body weight per stride when descending; poles can reduce that impact by 20‑25%. But the key is length, planting angle, and rhythm – all of which change as the gradient increases.
Step 1: Adjust your pole length for downhill
Lengthen your poles by 5–10 cm from your flat‑terrain setting. Why? Because your feet are now lower than your hands relative to the slope – you need the tips to reach the ground without overextending your shoulders. A quick rule: stand on a steep section, plant the tip a full arm’s length ahead, and bend your elbow to about 100‑110° (slightly more open than the 90° on the flat). That extra length lets you brace forward without hunching.
Action tip: Don’t just set and forget – carry a small measuring mark on your shaft. Before a descent, twist your locks and extend to that mark. It takes 5 seconds and saves your knees for miles.
Step 2: The planting sequence – ahead, not beside
The most common mistake is planting the poles beside or slightly behind your feet. This pushes your weight backward, making you lean away from the slope – a sure way to slip. Instead:
- Plant each pole about a foot (30 cm) ahead of your downhill foot.
- Angled slightly backwards – so the tip bites into the ground and you push against it.
- Alternate with your steps – left pole with right foot, right pole with left foot (standard diagonal gait). On very steep ground, plant both poles together for a secure “three‑point” stance (two poles + one foot).
This forward plant keeps your torso leaning into the slope – a controlled forward tilt that uses gravity, not muscle, to control your speed.
Step 3: Strap usage – let them carry the load
Your hands should not grip the poles tightly. Instead:
- Put your hand up through the strap from below, then grip the handle – the strap runs across your palm.
- On each plant, drop your wrist down so the strap takes the weight, not your fingers.
- Your thumb and forefinger should only guide the pole; the ring and little fingers can relax.
This “strap weight‑bearing” technique prevents hand fatigue and blisters, and it allows a natural “push‑off” that propels you forward rather than braking too hard.
Step 4: Short, shuffling steps – avoid over‑striding
A long downhill stride forces you to plant the pole too far forward, losing leverage. Instead:
- Take short, quick steps – almost a shuffle.
- Keep your poles moving in sync with your cadence: plant, push, lift, plant.
- Think “rhythm over reach” – each plant should feel like a gentle tap, not a jarring stab.
On loose scree or wet grass, shorten your stride further and use double‑planting – both poles hit the ground simultaneously before each step – for maximum stability.
Step 5: Terrain variations – mud, rock, and side‑hills
Muddy or soft ground
Use mud baskets (wide, with slots) to prevent the pole sinking too deep. Plant with a slightly steeper angle to get a firm bite before you push. If you sink, twist the pole gently to release it – don’t yank, or you’ll strain your wrist.
Rocky or boulder fields
You can’t jam a pole between rocks – that’s how carbon snaps. Instead, plant on flat rock faces or in crevices. Use a sharp carbide tip and a vertical or slightly forward angle – never at a sideways angle, which stresses the shaft. On slabby rock, rubber ferrules (included with many poles) give extra grip – swap them on.
Side‑hill traverses
When the trail contours across a steep slope, your uphill leg is shorter than your downhill leg. Shorten the uphill pole by 5 cm and lengthen the downhill pole by 5 cm – this keeps your shoulders level. Plant the downhill pole farther out for stability, and the uphill pole closer to your body.
Step 6: The “three‑point” rule for sketchy sections
On extremely steep, loose, or icy descents, adopt the three points of contact method:
- Plant both poles firmly ahead.
- Move one foot down to meet them.
- Then move the other foot.
- Never move a pole and a foot simultaneously – always have at least three contact points (two poles + one foot, or one pole + two feet) on the slope.
This may feel slow, but it’s the safest way to negotiate a 40°+ gully or greasy trail.
Step 7: Braking vs. pushing – find the balance
Many users over‑brake – they push down hard with each plant, which slows them down but tires the triceps. The ideal technique uses the poles to modulate speed, not stop it. Plant, let the pole take some weight, then push off gently to transfer momentum forward. You should feel a smooth, gliding motion, not a series of jarring halts. Practice on a moderate slope until you can descend without your heels hammering the ground.
Common mistakes to avoid
- Holding the poles too high – gripping above the cork, reducing leverage. Always grip at the top of the handle.
- Locking your elbows – keep a soft bend to absorb shock; rigid arms transmit impact to your neck.
- Dragging the poles – they should lift cleanly between plants; dragging wears tips and reduces control.
- Forgetting to shorten when the slope eases – as the terrain flattens, return to your base length; extended poles on the flat make you lean back.
- Using the same length for both poles on a traverse – a recipe for a twisted ankle.
How to practice
- Find a gentle grassy slope (10‑15°) and walk down with your adjusted poles. Focus on planting ahead and leaning forward.
- Increase to a steeper, loose‑surface path. Use double‑planting and short steps.
- On a rocky descent, slow down and consciously choose each plant point – never rush.
- After 5‑10 descents, the movement becomes muscle memory.
Advanced tip: the “pole vault” descent
For very long, sustained descents (e.g., Alpine passes), some experienced walkers use a “pole vault” – they plant both poles far ahead, swing their body between them, and use the poles’ spring to “float” downwards. This requires excellent lock strength and aluminium shafts (carbon can snap under this load). Not recommended for beginners, but it shows the range of techniques possible once you master the basics.
The mental side – trust your poles
Many hesitant descenders plant too cautiously, losing the benefit. Once you’ve adjusted length and practised the strap technique, trust the poles. They are your outriggers – they widen your base and lower your centre of gravity. A confident, rhythmic descent is not only faster but safer, because hesitation often causes slips.
Final checklist before any steep drop
- ✅ Poles extended +5‑10 cm from flat setting.
- ✅ Locks firmly tightened – check both sections.
- ✅ Baskets appropriate for the ground (mud/rock/snow).
- ✅ Straps adjusted and hand threaded correctly.
- ✅ Carbide tips sharp – dull tips slip on wet rock.
- ✅ Plan your line – look 3‑4 steps ahead for plant points.
Over to you
The next time you stand at the top of a steep, scree‑strewn path, don’t dread it – use it as a chance to refine your technique. Start with short, controlled descents, lengthen your poles, lean into the slope, and let the straps do the work. Within a few outings, you’ll descend faster, with less knee pain and far more enjoyment. And remember – what goes up must come down, but with proper pole technique, coming down can be the best part of the walk.




