




How to repair a stuck twist-lock trekking pole?
Few things are more frustrating than reaching the trailhead, extending your poles, and finding that one twist-lock is seized solid – refusing to budge. A stuck lock can ruin a day's walking. But before you write off your pole or resort to brute force (which often snaps the mechanism), know that most stuck twist-locks can be repaired with patience, the right technique, and a few simple tools. This guide walks you through the causes, the step‑by‑step repair process, and the prevention habits that keep your poles turning freely for years.
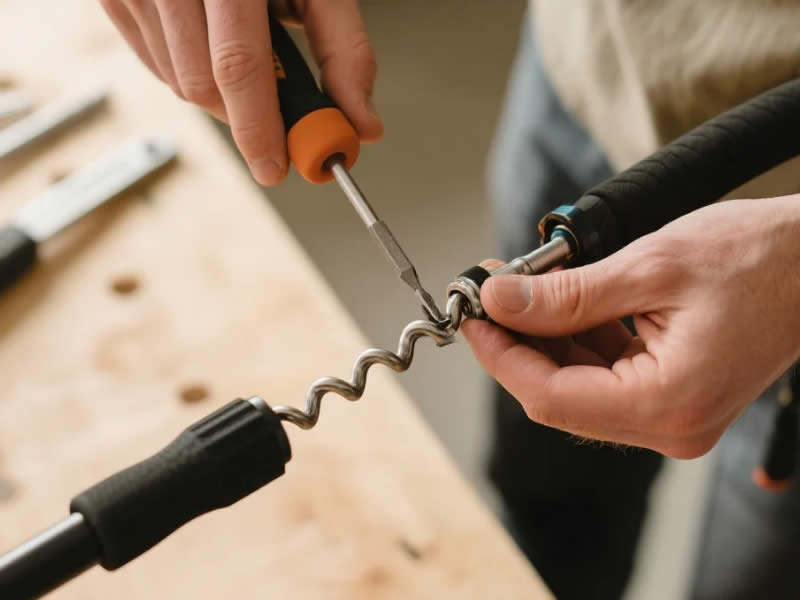
Why do twist-locks get stuck?
Twist-locks work by expanding a plastic or rubber wedge inside the outer tube when you rotate the lower section clockwise. Over time, several factors can cause them to seize:
- Moisture and corrosion – water seeps into the joint, causing light rust or oxidation on the aluminium or steel components. The expanding wedge becomes bonded to the inner wall.
- Dirt and grit – fine sand or mud works its way between the wedge and the tube wall, jamming the mechanism like a brake pad.
- Over-tightening – if you've been over-enthusiastic with tightening, the wedge can become compressed beyond its normal range, creating a mechanical lock that won't release.
- Temperature changes – flying to a cold climate or moving from a warm house to a freezing hillside can cause differential expansion (aluminium and plastic contract at different rates), jamming the lock.
- Lack of use – poles left collapsed and stored for months can have the wedge "set" in a compressed position, sticking to the inner wall.
Understanding the cause helps you choose the right approach – but the repair steps are similar for all.
Step 1: Try gentle force – the rubber glove trick
Before reaching for tools or penetrating oil, try this simple trick:
- Put on rubber gloves or use a rubber jar-opener pad – this gives you extra grip on the smooth metal shaft.
- Hold the upper section firmly with one hand and the lower section with the other.
- Twist counter‑clockwise (most twist-locks tighten clockwise to lock; counter-clockwise releases). Apply steady, increasing pressure – not a jerking motion.
- If it moves even a fraction, you're winning. Gently work it back and forth, slightly tightening and loosening, to break the bond.
Why gloves? Your hands can slip on cold or wet metal, and a sudden release can cause you to lose control and scratch the pole. Gloves give you consistent grip and protect your palms.
Step 2: Apply penetrating oil – patience is key
If gentle force fails, the lock needs lubrication. But choose your lubricant carefully – standard oil attracts dirt, making future problems worse. Use:
- WD‑40 or a similar penetrating oil – its low viscosity allows it to seep into the tightest gaps.
- Silicone spray – less aggressive on plastics and rubbers.
How to apply:
- Extend the pole slightly (if possible) to expose a small gap at the joint.
- Hold the pole vertically, upper section down, and apply 3‑4 drops of oil directly onto the seam where the two sections meet.
- Let it sit for 5‑10 minutes – the oil needs time to penetrate the threads and the wedge interface.
- While waiting, gently tap the joint with a wooden or rubber mallet – vibrations can help the oil work deeper.
After the wait, try the rubber glove twist again. Often, the oil breaks the bond and the pole releases smoothly.
Step 3: Heat and cold – the thermal shock method
For stubborn corrosion, thermal expansion can free the lock. The principle: aluminium expands more than the plastic wedge when heated, and contracts more when cooled, breaking the bond.
- Heat: Use a hairdryer (not a heat gun – too hot for carbon) on the outer tube around the joint for 30‑60 seconds. The aluminium expands slightly, loosening its grip on the wedge. Then twist immediately.
- Cold: If heat doesn't work, try cooling the inner tube with an ice pack or a spray of compressed air (held upside down). The inner section contracts, shrinking away from the outer wall. Combine with a heat application to the outer section for maximum differential.
Be cautious: If your pole is carbon fibre, avoid extreme heat – carbon resin can soften above 80°C. For carbon poles, rely on oil and patience rather than thermal methods.
Step 4: Remove the lower section completely (if it frees slightly)
Once you've broken the initial lock, you may still find the lower section won't slide freely. Now it's time to remove it entirely to clean the components.
- Twist the section fully loose (counter-clockwise until it stops).
- Pull firmly – the wedge should slide out with the lower section. If it resists, repeat the oil and heat process.
Warning: Some twist-locks have a separate wedge that can fall off inside the tube. Work over a towel to catch any loose parts.
Step 5: Clean and inspect the components
With the pole disassembled, you'll see the expanding wedge (usually a plastic or nylon sleeve with a threaded section) and the inner wall of the upper tube.
- Clean the wedge with a cloth and isopropyl alcohol – remove all dirt, old grease, and oxidation. Inspect for cracks, flattening, or deformations. If the wedge is worn, replace it (most brands sell spare parts).
- Clean the inner tube – use a long-handled brush or a cloth wrapped around a dowel to wipe down the inside of the upper section. Pay attention to any ridges or burrs.
- Lightly sand any rough spots on the wedge with fine (400‑grit) sandpaper – smooth surfaces reduce future sticking. Avoid sanding the threaded part.
Step 6: Reassemble with proper lubrication
This step is crucial for preventing immediate re-sticking.
- Apply a tiny amount of silicone grease to the wedge surface (the part that contacts the inner tube). A smear the size of a grain of rice is enough. Do not use oil – it will attract dirt.
- Insert the lower section and twist clockwise until you feel resistance – that's the wedge engaging with the inner wall.
- Tighten just enough so the pole holds firmly when you push down on a hard surface. Over‑tightening is the #1 cause of future jamming. The rule of thumb: tighten until it feels snug, then a quarter-turn more – no further.
How to prevent twist-locks from sticking again
- After every wet or muddy walk, extend the poles fully and dry them indoors – never store them collapsed when damp.
- Apply silicone spray to the exposed shaft (not the lock) once a month – it prevents corrosion.
- Loosen the locks slightly when storing the poles for long periods – this relieves pressure on the wedge and the internal threads.
- If you fly, loosen the locks before packing – pressure changes can cause them to seize.
When to give up and replace
If you've tried oil, heat, cold, and cleaning – and the wedge is still stuck or the thread is damaged – it's time for a new section or a new pole. Most brands sell replacement lower sections with pre-fitted wedges, costing £15‑30. The effort of forcing a completely seized lock often damages the internal thread, making future use unreliable. Sometimes, a replacement is safer than a repair.
Final thought – patience pays
A stuck twist-lock tests your patience, but it's rarely a terminal fault. With the systematic approach above – gentle force, penetrating oil, optional heat/cold, disassembly, thorough cleaning, and careful reassembly – you can resurrect most seized poles. More importantly, regular maintenance prevents the problem from recurring. A well-cared-for twist-lock will serve you for many miles, locking firmly when you need it and releasing smoothly when you don't. Happy fixing – and even happier walking.




