




How to use trekking poles for river crossings?
A river crossing can be one of the most exhilarating – and dangerous – moments on a hillwalk. The water may look innocent from the bank, but once you step in, the current can sweep you off your feet in an instant. Trekking poles are your best allies in these situations, transforming from walking aids into stability anchors. Used correctly, they turn a wobbly, nerve‑wracking traverse into a controlled, methodical crossing. This guide covers every aspect – from preparation to technique – so you can cross safely and confidently.
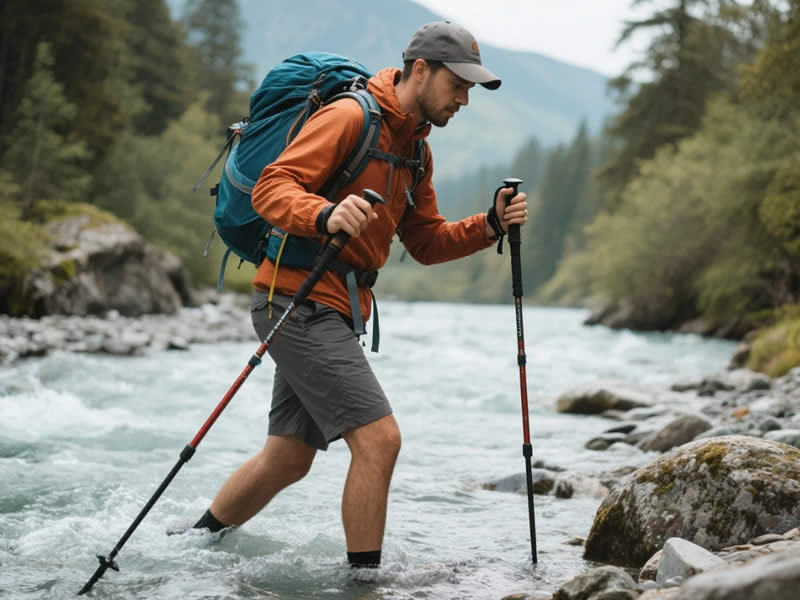
Before you even step into the water
The decision to cross should never be rushed. Take at least five minutes to:
- Observe the flow – look for the widest and shallowest section. Water flows faster in narrow channels; wider sections are usually calmer.
- Check for downstream hazards – waterfalls, large boulders, or strainers (fallen trees) that could trap you if you fall.
- Unclip your rucksack's waist belt and chest strap – this is non‑negotiable. If you fall, you need to be able to shed your pack instantly. A trapped pack can pin you underwater.
- Loosen your shoulder straps slightly – so you can shrug the pack off if needed.
- Decide on your line – plan exactly where you'll enter, cross, and exit.
Pole preparation – adjust for depth
Before crossing, adjust your poles to suit the water depth:
- Lengthen both poles by 5‑10 cm from your flat‑terrain length. This gives you extra reach to plant firmly upstream, even in deeper water.
- Remove mud baskets – they create drag in moving water and can catch on submerged rocks. Snow baskets are even worse – take them off. Only keep the smallest, low‑profile baskets if you're on a soft riverbed.
- Check tip condition – sharp carbide tips grip better on wet rock and gravel.
- If you have rubber tip protectors, you can use them on rocky slabs (they add grip on smooth stone), but remove them on gravel or sand where you need the carbide to bite.
The golden rule – face upstream
Always face upstream (against the current). This is counter‑intuitive – you might think facing downstream gives you more control, but it actually makes it harder to brace. When you face upstream:
- The current pushes water against the front of your poles, not the sides – this locks them in place.
- You can lean into the current, using its force to stabilise you.
- Your poles act as a tripod, with two points of contact ahead of you and your feet behind.
The "tripod" technique – your stable platform
This is the core skill for river crossings:
- Plant both poles firmly upstream – about 30‑50 cm ahead of your feet, angled slightly back toward you. The tips should dig into the riverbed.
- Lean into the current – your body weight should press down on the poles, creating a stable three‑point structure (two poles + one foot that remains planted).
- Move one foot sideways (not forward) – slide your downstream foot a short step across, keeping it flat and feeling for a secure foothold.
- Transfer your weight onto that foot – keep the poles planted.
- Bring your other foot alongside – now you have three points again.
- Lift and replant the poles – move them a little further upstream, and repeat the sequence.
Key principles:
- Move sideways or diagonally downstream – never straight across, because the current will push you off line. A diagonal line (downstream and across) uses the current's force to help you, not fight you.
- Keep three points of contact at all times – two poles and one foot, or two feet and one pole – never lift both feet simultaneously.
- Take short, shuffling steps – don't stride; you'll lose your centre of gravity.
- Keep your knees slightly bent – this lowers your centre of gravity and helps absorb unexpected shifts.
Reading the riverbed – adjust your foot placement
The riverbed can vary from smooth rock to shifting gravel to large, slippery boulders. Adapt your technique:
- On gravel or sand – plant your feet flat and feel for a solid base before shifting weight. The carbide tips of your poles will grip well here.
- On mossy or algae‑covered rock – these are the slipperiest surfaces. Place your feet with care, feeling for rough patches. Use rubber tip protectors on your poles for added grip on rock.
- On large, uneven boulders – step from boulder to boulder, using your poles to test each one before committing your weight. Always have one pole firmly planted before you move your foot.
Water depth – know your limit
Never cross water deeper than mid‑thigh (about knee to mid‑thigh for most adults). Above that, the force of the water increases exponentially and your centre of gravity becomes too high relative to your base of support. Even with poles, you risk being swept away.
A simple rule: if the water reaches the top of your thighs, turn back. If the current is fast and the water is above your knees, be extremely cautious. It's better to take a longer detour or wait for the water level to drop than to risk a crossing.
Crossing solo vs. in a group
- Solo – use the tripod technique, but be extra cautious. Consider using a "tandem" crossing where you angle your body more into the current and take very small steps.
- In a group – the strongest person goes first, planting their poles and creating a stable anchor. The second person holds onto the first's pack strap or waist belt, and so on. This creates a human chain that shares the load and provides mutual support.
What to do if you lose your footing
If you stumble or the current knocks you off balance:
- Immediately lean into your poles – don't try to stand upright; push down hard on the upstream pole to brace yourself.
- Lower your centre of gravity – bend your knees deeper, almost into a crouch.
- Regain three points – freeze, find a foothold, and systematically get back to the tripod stance.
- If you fall – keep your feet downstream, raise them to the surface, and try to ferry yourself to the bank using your poles as stabilisers. Do not try to stand up in fast water – it's almost impossible.
After the crossing – immediate steps
Once you're safely on the bank:
- Drain water from your boots (if they're not waterproof, you'll need to empty them).
- Wipe your poles dry with a cloth to prevent corrosion – especially the locking mechanisms and tip threads.
- Re‑attach mud baskets if you removed them.
- Adjust your poles back to your normal walking length.
- Re‑clip your rucksack's waist belt and chest strap.
Common mistakes to avoid
- Facing downstream – you'll be pushed sideways and your poles will offer little resistance.
- Lifting both poles at once – you lose your tripod; always keep at least one pole planted.
- Striding too far – long steps increase your lever arm and make you more likely to topple.
- Gripping the poles too tightly – a death grip fatigues your hands and prevents the natural wrist‑strap weight transfer. Keep a relaxed, firm hold.
- Wearing waterproof socks or gaiters that trap water – they can become waterlogged and heavy; lighter footwear is better for crossings.
- Crossing with a tight waist belt – if you fall, you can't escape your pack. Always unclip.
Final checklist – before every river crossing
- □
- □
- □
- □
- □
- □
- □
Practice makes confident
If you're new to river crossings, find a shallow, slow‑moving stream on a summer day and practise the tripod technique. Build muscle memory before you face a fast, cold mountain river. With practice, the movements become automatic – and you'll cross with calm efficiency, your poles working as a stable, reliable extension of your body.




