




How to measure forearm angle for trekking pole height?
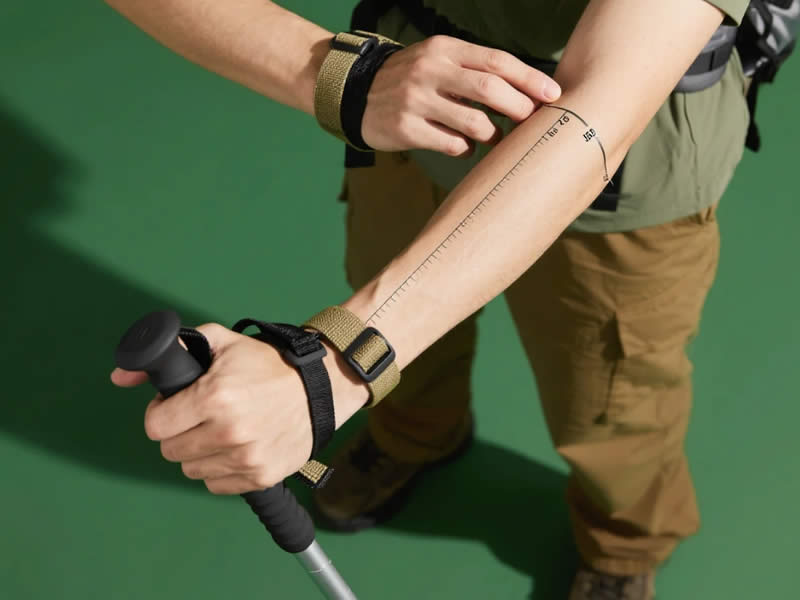
If you've read any guide on trekking poles, you've likely come across the advice: "Set your poles to a 90° elbow angle." But what exactly does that mean, how do you measure it accurately, and why is it so important? This fundamental rule is the starting point for getting your pole height right—but it's not the whole story. This guide explains the forearm angle method in detail, shows you how to measure it correctly, and how to adapt it for different terrains and personal preferences.
Why the forearm angle matters
The angle of your forearm relative to your upper arm (and the ground) determines the leverage, comfort, and efficiency of your pole stroke. A 90° angle at the elbow is the neutral position for flat terrain because:
- Balanced muscle engagement – your biceps and triceps are in a mid‑range position, neither over‑stretched nor over‑contracted.
- Efficient power transfer – you can push down and back without excessive shoulder strain.
- Natural wrist alignment – your wrist stays straight, reducing the risk of tendonitis or carpal tunnel issues.
- Optimised stride – the pole length matches your natural arm swing, so you don't have to compensate with extra shoulder or back movement.
If your forearm is angled too high (elbow above 90°), your pole is too long—you'll have to lift your shoulder to plant it, leading to trapezius fatigue. If your forearm is too low (elbow below 90°), your pole is too short—you'll stoop forward, overworking your lower back.
How to measure the 90° angle – a step‑by‑step guide
What you need
- Your trekking poles (collapsed, ready to extend)
- Your hiking boots (the sole thickness affects your effective height)
- A level floor
- A mirror or a friend (optional, but helpful)
Step 1 – Put on your boots
Never measure in bare feet. The sole of your boot adds 1‑2 cm to your height, which affects the required pole length by the same amount. Always wear the boots you'll actually be walking in.
Step 2 – Stand naturally
Stand upright on a level surface with your feet hip‑width apart. Relax your shoulders—don't hunch or tense.
Step 3 – Hold the pole vertically
Take one pole, collapse it to its shortest length, then extend it until you can hold it vertically (perpendicular to the ground) with the tip resting on the floor. The pole should be close to your side, not held out in front.
Step 4 – Bend your elbow to 90°
Without leaning or raising your shoulder, bend your elbow so that your forearm is horizontal—parallel to the floor. Your upper arm (from shoulder to elbow) should be vertical, and your forearm (from elbow to wrist) should point straight ahead. This forms a perfect right angle.
Step 5 – Adjust the pole length
Now adjust the lower section of the pole until your hand grips the handle comfortably while your wrist remains straight (not bent up or down). The tip should just touch the floor—no lifting, no reaching down.
Step 6 – Check with a mirror or friend
Ask someone to stand beside you and check that your forearm is truly horizontal. If you're using a mirror, look sideways—your forearm should be parallel to the floor line. Adjust until it is.
How to verify you've got the right angle
Two simple tests:
- The wrist test – with the pole planted, your wrist should be in a neutral, straight line from your forearm. If your hand is bent upward (extension) or downward (flexion), you need to adjust length.
- The shoulder test – your shoulder should stay relaxed and level. If you feel any tension or an upward shrug, the pole is too long—shorten slightly.
Adapting the angle for terrain
The 90° angle is for flat terrain. As soon as you hit hills, you need to adjust:
Uphill – shorten, forearms dip below horizontal
When climbing, you're effectively on a ramp. Your feet are ahead of you, so the ground is closer to your hands relative to your body. To keep your shoulders relaxed, you need to shorten the pole by 5‑10 cm. Your forearm will now sit at about 80‑85° (slightly less than 90). This lower angle keeps your chest open and your breathing efficient.
How to check: On a 15° slope, adjust until your upper body feels upright—not hunched. You'll know it's right when your arm swing feels natural and you're not reaching up to plant the pole.
Downhill – lengthen, forearms rise above horizontal
Going down, you need longer poles to reach the ground ahead of you for braking. Lengthen by 5‑10 cm, so your forearm is now at about 100‑110° (slightly more than 90). This gives you extra leverage to control your speed and reduces the shock transmitted to your knees.
How to check: On a descent, plant the pole ahead of your foot. Your elbow should be slightly more open than a right angle, and your wrist should remain straight. If you feel a heavy jolt in your arm or a "jammed" elbow, you need to lengthen further.
Side‑hill (traversing)
On a slope that's not directly up or down, you'll want to shorten the uphill pole by 3‑5 cm (to match the higher ground) and lengthen the downhill pole by 3‑5 cm (to reach the lower ground). This keeps your shoulders level and your spine aligned—essential for preventing lower back pain.
The mirror test – a quick visual check
If you're unsure about your angle, set a mirror against a wall and stand sideways. Check that:
- Your upper arm hangs vertically.
- Your forearm points horizontally forward.
- Your wrist is straight.
- The pole is vertical from tip to handle.
If you don't have a mirror, ask a friend to take a side‑on photo while you hold the pole. Review the image—it's surprising how many people think they're at 90° when they're actually at 110° or 70°.
What if you're between sizes?
If your poles have length markings, you'll likely find that the ideal setting falls between two markings. In this case, always size down. A slightly shorter pole is easier to manage on uphills and less likely to strain your shoulders. You can always extend slightly if you need more reach on a descent—but you can't shorten a pole that's already too long without re‑adjusting.
Personal preference and fine‑tuning
The 90° angle is the textbook starting point, but everyone's biomechanics vary. Some walkers prefer a slightly shorter pole on flat terrain because it feels lighter and more agile. Others like a little more length for a more upright posture. The key is to listen to your body. After a few miles, if you feel:
- Shoulder tension – your poles are too long.
- Lower back ache – your poles are too short (or you're slouching).
- Wrist or elbow pain – your wrist angle is wrong (often a length issue).
- Arm fatigue – you may need to adjust your strap technique, not just length.
Try a 1‑2 cm variation either way and see how it feels. Mark your preferred setting with tape so you can repeat it easily.
Folding poles and the 90° rule
Folding (Z‑style) poles are usually fixed length—you choose a size when you buy. The 90° test is your only check. If the test gives you a comfortable angle, the pole fits. If not, you need a different size. Folding poles don't allow on‑trail adjustment, so it's critical to get this right at the point of purchase.
The "elbow‑to‑ground" shortcut
Some walkers use a rougher shortcut: set the pole so your elbow is at a right angle when you're standing with the pole beside you. This is essentially the same as the 90° test—but without the visual check of the horizontal forearm. It's a useful field method if you have no mirror, but it's less accurate because it's harder to judge a right angle by feel alone.
Final checklist – measuring your forearm angle
- □
- □
- □
- □
- □
- □
- □
- □
Over to you
The forearm angle is the most reliable, body‑centric way to set your trekking pole height—it's a better guide than any height chart. Once you've dialled in your flat‑terrain 90° angle, practice adjusting for uphills and downhills until the movements become automatic. With a little practice, you'll be able to set your poles to the perfect length in seconds, anywhere—and your shoulders, wrists, and back will thank you. (Word count: ~1,080)
How to measure forearm angle for trekking pole height?
If you've read any guide on trekking poles, you've likely come across the advice: "Set your poles to a 90° elbow angle." But what exactly does that mean, how do you measure it accurately, and why is it so important? This fundamental rule is the starting point for getting your pole height right—but it's not the whole story. This guide explains the forearm angle method in detail, shows you how to measure it correctly, and how to adapt it for different terrains and personal preferences.
Why the forearm angle matters
The angle of your forearm relative to your upper arm (and the ground) determines the leverage, comfort, and efficiency of your pole stroke. A 90° angle at the elbow is the neutral position for flat terrain because:
- Balanced muscle engagement – your biceps and triceps are in a mid‑range position, neither over‑stretched nor over‑contracted.
- Efficient power transfer – you can push down and back without excessive shoulder strain.
- Natural wrist alignment – your wrist stays straight, reducing the risk of tendonitis or carpal tunnel issues.
- Optimised stride – the pole length matches your natural arm swing, so you don't have to compensate with extra shoulder or back movement.
If your forearm is angled too high (elbow above 90°), your pole is too long—you'll have to lift your shoulder to plant it, leading to trapezius fatigue. If your forearm is too low (elbow below 90°), your pole is too short—you'll stoop forward, overworking your lower back.
How to measure the 90° angle – a step‑by‑step guide
What you need
- Your trekking poles (collapsed, ready to extend)
- Your hiking boots (the sole thickness affects your effective height)
- A level floor
- A mirror or a friend (optional, but helpful)
Step 1 – Put on your boots
Never measure in bare feet. The sole of your boot adds 1‑2 cm to your height, which affects the required pole length by the same amount. Always wear the boots you'll actually be walking in.
Step 2 – Stand naturally
Stand upright on a level surface with your feet hip‑width apart. Relax your shoulders—don't hunch or tense.
Step 3 – Hold the pole vertically
Take one pole, collapse it to its shortest length, then extend it until you can hold it vertically (perpendicular to the ground) with the tip resting on the floor. The pole should be close to your side, not held out in front.
Step 4 – Bend your elbow to 90°
Without leaning or raising your shoulder, bend your elbow so that your forearm is horizontal—parallel to the floor. Your upper arm (from shoulder to elbow) should be vertical, and your forearm (from elbow to wrist) should point straight ahead. This forms a perfect right angle.
Step 5 – Adjust the pole length
Now adjust the lower section of the pole until your hand grips the handle comfortably while your wrist remains straight (not bent up or down). The tip should just touch the floor—no lifting, no reaching down.
Step 6 – Check with a mirror or friend
Ask someone to stand beside you and check that your forearm is truly horizontal. If you're using a mirror, look sideways—your forearm should be parallel to the floor line. Adjust until it is.
How to verify you've got the right angle
Two simple tests:
- The wrist test – with the pole planted, your wrist should be in a neutral, straight line from your forearm. If your hand is bent upward (extension) or downward (flexion), you need to adjust length.
- The shoulder test – your shoulder should stay relaxed and level. If you feel any tension or an upward shrug, the pole is too long—shorten slightly.
Adapting the angle for terrain
The 90° angle is for flat terrain. As soon as you hit hills, you need to adjust:
Uphill – shorten, forearms dip below horizontal
When climbing, you're effectively on a ramp. Your feet are ahead of you, so the ground is closer to your hands relative to your body. To keep your shoulders relaxed, you need to shorten the pole by 5‑10 cm. Your forearm will now sit at about 80‑85° (slightly less than 90). This lower angle keeps your chest open and your breathing efficient.
How to check: On a 15° slope, adjust until your upper body feels upright—not hunched. You'll know it's right when your arm swing feels natural and you're not reaching up to plant the pole.
Downhill – lengthen, forearms rise above horizontal
Going down, you need longer poles to reach the ground ahead of you for braking. Lengthen by 5‑10 cm, so your forearm is now at about 100‑110° (slightly more than 90). This gives you extra leverage to control your speed and reduces the shock transmitted to your knees.
How to check: On a descent, plant the pole ahead of your foot. Your elbow should be slightly more open than a right angle, and your wrist should remain straight. If you feel a heavy jolt in your arm or a "jammed" elbow, you need to lengthen further.
Side‑hill (traversing)
On a slope that's not directly up or down, you'll want to shorten the uphill pole by 3‑5 cm (to match the higher ground) and lengthen the downhill pole by 3‑5 cm (to reach the lower ground). This keeps your shoulders level and your spine aligned—essential for preventing lower back pain.
The mirror test – a quick visual check
If you're unsure about your angle, set a mirror against a wall and stand sideways. Check that:
- Your upper arm hangs vertically.
- Your forearm points horizontally forward.
- Your wrist is straight.
- The pole is vertical from tip to handle.
If you don't have a mirror, ask a friend to take a side‑on photo while you hold the pole. Review the image—it's surprising how many people think they're at 90° when they're actually at 110° or 70°.
What if you're between sizes?
If your poles have length markings, you'll likely find that the ideal setting falls between two markings. In this case, always size down. A slightly shorter pole is easier to manage on uphills and less likely to strain your shoulders. You can always extend slightly if you need more reach on a descent—but you can't shorten a pole that's already too long without re‑adjusting.
Personal preference and fine‑tuning
The 90° angle is the textbook starting point, but everyone's biomechanics vary. Some walkers prefer a slightly shorter pole on flat terrain because it feels lighter and more agile. Others like a little more length for a more upright posture. The key is to listen to your body. After a few miles, if you feel:
- Shoulder tension – your poles are too long.
- Lower back ache – your poles are too short (or you're slouching).
- Wrist or elbow pain – your wrist angle is wrong (often a length issue).
- Arm fatigue – you may need to adjust your strap technique, not just length.
Try a 1‑2 cm variation either way and see how it feels. Mark your preferred setting with tape so you can repeat it easily.
Folding poles and the 90° rule
Folding (Z‑style) poles are usually fixed length—you choose a size when you buy. The 90° test is your only check. If the test gives you a comfortable angle, the pole fits. If not, you need a different size. Folding poles don't allow on‑trail adjustment, so it's critical to get this right at the point of purchase.
The "elbow‑to‑ground" shortcut
Some walkers use a rougher shortcut: set the pole so your elbow is at a right angle when you're standing with the pole beside you. This is essentially the same as the 90° test—but without the visual check of the horizontal forearm. It's a useful field method if you have no mirror, but it's less accurate because it's harder to judge a right angle by feel alone.
Final checklist – measuring your forearm angle
- □
- □
- □
- □
- □
- □
- □
- □
Over to you
The forearm angle is the most reliable, body‑centric way to set your trekking pole height—it's a better guide than any height chart. Once you've dialled in your flat‑terrain 90° angle, practice adjusting for uphills and downhills until the movements become automatic. With a little practice, you'll be able to set your poles to the perfect length in seconds, anywhere—and your shoulders, wrists, and back will thank you.




