




How to use trekking poles to set up a tarp or tent?
One of the great joys of lightweight backpacking is realising that your trekking poles are more than just walking aids—they can replace heavy, bulky tent poles. This not only saves weight but also reduces the number of items you need to carry. Using trekking poles to pitch a tarp or a lightweight trekking‑pole tent is a skill that every wild camper in the UK should learn. This guide covers everything from the basic principles to step‑by‑step instructions for different shelter types, plus crucial tips for stability, tension, and protecting your fabric.
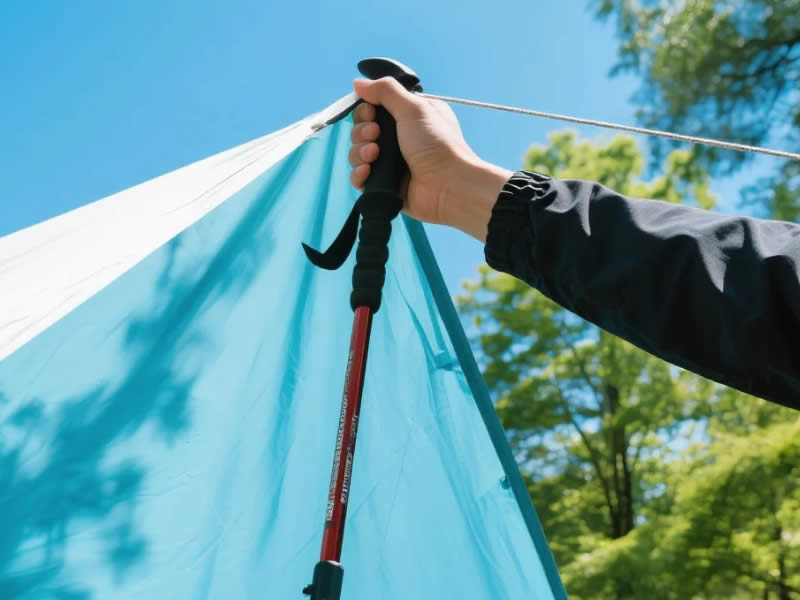
Why use trekking poles for shelter?
The advantages are compelling:
- Weight saving – a pair of trekking poles (around 240‑280g each) replaces a set of dedicated tent poles that can weigh 500‑800g. Your poles are already in your hands or on your pack; using them for your shelter is essentially "free" weight.
- Versatility – you can adjust the height of your shelter by changing pole length, giving you flexibility for different weather conditions.
- Dual‑purpose – your poles work for you on the trail and at camp.
- Simplicity – fewer components mean less that can break. A trekking pole is simpler than a multi‑section aluminium tent pole with elastic cord.
Understanding the configurations
There are three main ways to use trekking poles for shelter:
1. A‑frame (or V‑frame)
- Two poles – placed at opposite ends of the tarp or tent, with the handles pointing up and the tips on the ground. The ridge line of the shelter runs between the two pole tops.
- Best for: Rectangular tarps and some pyramid tents.
- Advantage: Simple, stable, and provides good headroom.
2. Single‑centre pole
- One pole – placed in the centre of a square or rectangular tarp, with the corners pegged out to create a pyramid shape. The pole supports the centre, and the fabric slopes down to the ground.
- Best for: Square tarps and minimalist shelters.
- Advantage: Very light (only one pole) and quick to pitch.
- Disadvantage: Less headroom and the pole can be in the way.
3. Pyramid (mid) tent
- One pole – placed in the centre of a pyramid‑shaped tent, with the tip on the ground and the handle supporting the apex. The tent walls slope down to the ground.
- Best for: Dedicated trekking‑pole tents like the MLD Duomid or the Hilleberg Enan (with adaptors).
- Advantage: Excellent wind‑shedding shape, good for exposed UK hills.
Step‑by‑step – pitching an A‑frame tarp with two poles
This is the most common configuration for UK wild camping.
What you need:
- A rectangular tarp (e.g., 3m x 3m or 2.5m x 3m).
- Two trekking poles (set to the same length).
- Four pegs for the corners (plus extra for guy lines).
- A ridge line (optional, but helpful).
Step 1 – Choose your pitch
- For wind: Pitch the low end into the wind (if you're using an asymmetric tarp).
- For rain: Pitch with the ridge line higher to shed water.
Step 2 – Set pole length
- For an A‑frame, the pole length is typically your flat‑terrain walking length (the 90° elbow test). For a more wind‑shedding pitch, shorten by 5‑10 cm.
Step 3 – Lay out the tarp
- Spread the tarp flat on the ground.
- Place one pole at each end, with the handle pointing up and the tip on the ground. The poles should be positioned along the centre line of the tarp.
Step 4 – Peg the corners
- Starting with one corner, peg it out loosely. Then peg the opposite corner, pulling the tarp taut.
- Move to the other end and peg the remaining two corners, adjusting tension to create a smooth, wrinkle‑free pitch.
Step 5 – Lift the poles
- Lift each pole upright, so the handle supports the tarp's centre line. The tips should be on the ground, and the poles should lean slightly outward (about 5‑10° from vertical) to create a stable A‑frame.
- Adjust the pole length slightly to tension the fabric – you want the tarp taut but not straining.
Step 6 – Adjust guy lines (if fitted)
- If your tarp has additional guy points (e.g., mid‑panel loops), peg them out to increase stability in windy conditions.
Step 7 – Final checks
- Walk around the pitch – check that all pegs are secure and the fabric is evenly tensioned.
- Adjust the poles if necessary to fine‑tune the shape.
How to pitch a pyramid (mid) tent with a single pole
Many lightweight tents (e.g., MLD Duomid, Zpacks Duplex, and budget copies) are designed for a single centre pole.
Step 1 – Choose your pole length
- The manufacturer usually recommends a specific length (often 115‑120 cm). Set your pole accordingly.
- Tip: Use the handle end at the top (as it won't puncture the fabric) and the tip on the ground.
Step 2 – Lay out the tent
- Spread the tent flat on the ground, with the doors facing your preferred direction (usually away from the wind).
Step 3 – Peg the corners
- Start with the two front corners (near the door), pegging them loosely.
- Then peg the two rear corners, ensuring the fabric is square.
Step 4 – Insert the pole
- Place the pole in the centre of the tent, with the tip on the ground and the handle supporting the apex.
- Lift the pole upright, raising the apex.
- The tent will start to take shape. Adjust the corner pegs to tension the fabric evenly.
Step 5 – Peg the side guy lines (if present)
- Many pyramid tents have mid‑panel guy lines – peg these out to improve stability and internal space.
Step 6 – Fine‑tune
- Adjust the pole length slightly to tighten or slacken the fabric. A taut pitch sheds wind and rain better.
Tips for using poles with tarps and tents
1. Protect the fabric from the pole tip
The carbide tip can puncture your shelter fabric if it comes into contact. Always use a rubber tip protector on the pole tip, or place a small piece of tape or a dedicated "pole cup" (a small plastic cap that fits over the tip) over the tip. Some tents have reinforced patches at the apex; if yours doesn't, improvise.
2. Use the basket to prevent sinking
On soft ground (boggy moorland), the pole tip (even with a protector) can sink into the ground, destabilising the pitch. Fitting a mud basket or a snow basket spreads the load and prevents sinking. If you don't have a basket, place a flat stone or a small piece of wood under the tip.
3. Angle the poles correctly
- For an A‑frame, the poles should lean slightly outward (away from the centre) to create a stable triangle. If they lean inward, the tarp will sag and may collapse.
- For a pyramid tent, the pole should be vertical – check with a spirit level if you're fussy, or simply eyeball it.
4. Adjust for wind
- In windy conditions, shorten the windward pole slightly to lower the windward side of the tarp. This reduces the wind load and improves stability.
- Use extra guy lines on the windward side, pegged at a 45° angle.
5. Use a ridge line (for A‑frames)
- A ridge line (a length of cord running between the two poles) can be used to attach the tarp, allowing you to adjust the pitch without disturbing the poles. This is a pro technique that gives you more control.
6. Carry spare pegs
- You'll need at least 4 pegs for the corners, plus extra for guy lines. In strong winds, you may need 8‑10 pegs. Lightweight titanium pegs are worth the investment.
What if you only have one pole?
A single pole can be used to pitch a tarp in several ways:
- Pyramid pitch – a square tarp with a single centre pole (as above).
- Lean‑to – pitch one end of the tarp low (using a tree or a rock) and the other high on the pole.
- A‑frame with a natural support – use a tree branch or a fallen log as the other support.
A single pole is less stable in high winds, so choose a sheltered pitch.
Recommended shelters for pole‑supported use
If you're buying a new tarp or tent, look for models specifically designed for trekking poles:
- Tarps: Alpkit Rig 7 or Rig 3.5, DD Hammocks Tarp, OEX Phoxx (budget).
- Trekking‑pole tents: MLD Duomid (premium), Zpacks Duplex (expensive), Naturehike Cloud Up (budget), Vango F10 (UK‑made).
Most have reinforced apex patches and come with clear pole‑length recommendations.
Maintenance of your shelter and poles
- Check pole locks – before pitching, ensure your pole locks are tight. A slipping lock in the middle of the night is not fun.
- Dry your shelter – after a wet camp, dry your tarp or tent thoroughly before packing it away to prevent mildew.
- Clean your poles – remove any mud from the baskets and tips before packing.
Final checklist – before you pitch
- □
- □
- □
- □
- □
- □
- □
Over to you
Using trekking poles to pitch a tarp or tent is a skill that transforms your camping experience. It saves weight, simplifies your gear, and connects you to a tradition of lightweight, self‑sufficient travel. With a bit of practice, you'll be able to pitch a stable, wind‑shedding shelter in minutes – and your poles will have earned their keep twice over. (Word count: ~1,080)
How to use trekking poles to set up a tarp or tent?
One of the great joys of lightweight backpacking is realising that your trekking poles are more than just walking aids—they can replace heavy, bulky tent poles. This not only saves weight but also reduces the number of items you need to carry. Using trekking poles to pitch a tarp or a lightweight trekking‑pole tent is a skill that every wild camper in the UK should learn. This guide covers everything from the basic principles to step‑by‑step instructions for different shelter types, plus crucial tips for stability, tension, and protecting your fabric.
Why use trekking poles for shelter?
The advantages are compelling:
- Weight saving – a pair of trekking poles (around 240‑280g each) replaces a set of dedicated tent poles that can weigh 500‑800g. Your poles are already in your hands or on your pack; using them for your shelter is essentially "free" weight.
- Versatility – you can adjust the height of your shelter by changing pole length, giving you flexibility for different weather conditions.
- Dual‑purpose – your poles work for you on the trail and at camp.
- Simplicity – fewer components mean less that can break. A trekking pole is simpler than a multi‑section aluminium tent pole with elastic cord.
Understanding the configurations
There are three main ways to use trekking poles for shelter:
1. A‑frame (or V‑frame)
- Two poles – placed at opposite ends of the tarp or tent, with the handles pointing up and the tips on the ground. The ridge line of the shelter runs between the two pole tops.
- Best for: Rectangular tarps and some pyramid tents.
- Advantage: Simple, stable, and provides good headroom.
2. Single‑centre pole
- One pole – placed in the centre of a square or rectangular tarp, with the corners pegged out to create a pyramid shape. The pole supports the centre, and the fabric slopes down to the ground.
- Best for: Square tarps and minimalist shelters.
- Advantage: Very light (only one pole) and quick to pitch.
- Disadvantage: Less headroom and the pole can be in the way.
3. Pyramid (mid) tent
- One pole – placed in the centre of a pyramid‑shaped tent, with the tip on the ground and the handle supporting the apex. The tent walls slope down to the ground.
- Best for: Dedicated trekking‑pole tents like the MLD Duomid or the Hilleberg Enan (with adaptors).
- Advantage: Excellent wind‑shedding shape, good for exposed UK hills.
Step‑by‑step – pitching an A‑frame tarp with two poles
This is the most common configuration for UK wild camping.
What you need:
- A rectangular tarp (e.g., 3m x 3m or 2.5m x 3m).
- Two trekking poles (set to the same length).
- Four pegs for the corners (plus extra for guy lines).
- A ridge line (optional, but helpful).
Step 1 – Choose your pitch
- For wind: Pitch the low end into the wind (if you're using an asymmetric tarp).
- For rain: Pitch with the ridge line higher to shed water.
Step 2 – Set pole length
- For an A‑frame, the pole length is typically your flat‑terrain walking length (the 90° elbow test). For a more wind‑shedding pitch, shorten by 5‑10 cm.
Step 3 – Lay out the tarp
- Spread the tarp flat on the ground.
- Place one pole at each end, with the handle pointing up and the tip on the ground. The poles should be positioned along the centre line of the tarp.
Step 4 – Peg the corners
- Starting with one corner, peg it out loosely. Then peg the opposite corner, pulling the tarp taut.
- Move to the other end and peg the remaining two corners, adjusting tension to create a smooth, wrinkle‑free pitch.
Step 5 – Lift the poles
- Lift each pole upright, so the handle supports the tarp's centre line. The tips should be on the ground, and the poles should lean slightly outward (about 5‑10° from vertical) to create a stable A‑frame.
- Adjust the pole length slightly to tension the fabric – you want the tarp taut but not straining.
Step 6 – Adjust guy lines (if fitted)
- If your tarp has additional guy points (e.g., mid‑panel loops), peg them out to increase stability in windy conditions.
Step 7 – Final checks
- Walk around the pitch – check that all pegs are secure and the fabric is evenly tensioned.
- Adjust the poles if necessary to fine‑tune the shape.
How to pitch a pyramid (mid) tent with a single pole
Many lightweight tents (e.g., MLD Duomid, Zpacks Duplex, and budget copies) are designed for a single centre pole.
Step 1 – Choose your pole length
- The manufacturer usually recommends a specific length (often 115‑120 cm). Set your pole accordingly.
- Tip: Use the handle end at the top (as it won't puncture the fabric) and the tip on the ground.
Step 2 – Lay out the tent
- Spread the tent flat on the ground, with the doors facing your preferred direction (usually away from the wind).
Step 3 – Peg the corners
- Start with the two front corners (near the door), pegging them loosely.
- Then peg the two rear corners, ensuring the fabric is square.
Step 4 – Insert the pole
- Place the pole in the centre of the tent, with the tip on the ground and the handle supporting the apex.
- Lift the pole upright, raising the apex.
- The tent will start to take shape. Adjust the corner pegs to tension the fabric evenly.
Step 5 – Peg the side guy lines (if present)
- Many pyramid tents have mid‑panel guy lines – peg these out to improve stability and internal space.
Step 6 – Fine‑tune
- Adjust the pole length slightly to tighten or slacken the fabric. A taut pitch sheds wind and rain better.
Tips for using poles with tarps and tents
1. Protect the fabric from the pole tip
The carbide tip can puncture your shelter fabric if it comes into contact. Always use a rubber tip protector on the pole tip, or place a small piece of tape or a dedicated "pole cup" (a small plastic cap that fits over the tip) over the tip. Some tents have reinforced patches at the apex; if yours doesn't, improvise.
2. Use the basket to prevent sinking
On soft ground (boggy moorland), the pole tip (even with a protector) can sink into the ground, destabilising the pitch. Fitting a mud basket or a snow basket spreads the load and prevents sinking. If you don't have a basket, place a flat stone or a small piece of wood under the tip.
3. Angle the poles correctly
- For an A‑frame, the poles should lean slightly outward (away from the centre) to create a stable triangle. If they lean inward, the tarp will sag and may collapse.
- For a pyramid tent, the pole should be vertical – check with a spirit level if you're fussy, or simply eyeball it.
4. Adjust for wind
- In windy conditions, shorten the windward pole slightly to lower the windward side of the tarp. This reduces the wind load and improves stability.
- Use extra guy lines on the windward side, pegged at a 45° angle.
5. Use a ridge line (for A‑frames)
- A ridge line (a length of cord running between the two poles) can be used to attach the tarp, allowing you to adjust the pitch without disturbing the poles. This is a pro technique that gives you more control.
6. Carry spare pegs
- You'll need at least 4 pegs for the corners, plus extra for guy lines. In strong winds, you may need 8‑10 pegs. Lightweight titanium pegs are worth the investment.
What if you only have one pole?
A single pole can be used to pitch a tarp in several ways:
- Pyramid pitch – a square tarp with a single centre pole (as above).
- Lean‑to – pitch one end of the tarp low (using a tree or a rock) and the other high on the pole.
- A‑frame with a natural support – use a tree branch or a fallen log as the other support.
A single pole is less stable in high winds, so choose a sheltered pitch.
Recommended shelters for pole‑supported use
If you're buying a new tarp or tent, look for models specifically designed for trekking poles:
- Tarps: Alpkit Rig 7 or Rig 3.5, DD Hammocks Tarp, OEX Phoxx (budget).
- Trekking‑pole tents: MLD Duomid (premium), Zpacks Duplex (expensive), Naturehike Cloud Up (budget), Vango F10 (UK‑made).
Most have reinforced apex patches and come with clear pole‑length recommendations.
Maintenance of your shelter and poles
- Check pole locks – before pitching, ensure your pole locks are tight. A slipping lock in the middle of the night is not fun.
- Dry your shelter – after a wet camp, dry your tarp or tent thoroughly before packing it away to prevent mildew.
- Clean your poles – remove any mud from the baskets and tips before packing.
Over to you
Using trekking poles to pitch a tarp or tent is a skill that transforms your camping experience. It saves weight, simplifies your gear, and connects you to a tradition of lightweight, self‑sufficient travel. With a bit of practice, you'll be able to pitch a stable, wind‑shedding shelter in minutes – and your poles will have earned their keep twice over.




