




How to use trekking poles for extra stability on icy paths?
Winter walking in the UK—whether you're on a snow-dusted Munro in Scotland or a frost-slicked path in the Peak District—presents a unique challenge: ice. One moment you're striding confidently; the next, you're fighting for balance on a glossy, treacherously slick surface. This is where your trekking poles transform from walking aids into essential safety tools. But using them on ice requires a different technique and equipment than on mud or rock. This guide explains how to adapt your poles and technique to turn them into four-legged stability anchors on the iciest paths.
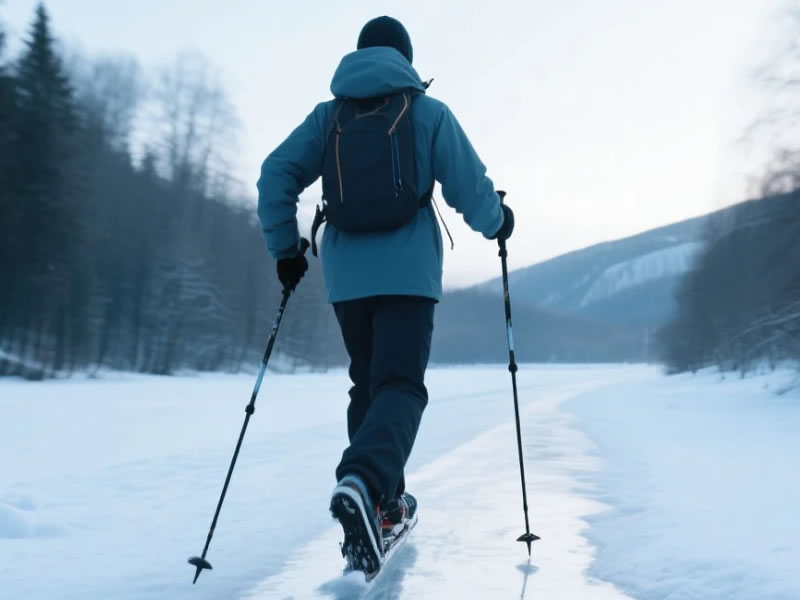
The Threat: Why Ice Demands a Different Approach
Ice is the enemy of friction. A standard carbide tip, which grips well on rock, will skid across a polished ice sheet like a skate. Your poles, without adaptation, can become a hazard, slipping out from under you and throwing you off balance. The key is to understand that on ice, your poles are not just for propulsion; they are a backup plan for your feet.
Step 1: Switch to Winter Tips (The Game Changer)
Forget the standard carbide tip—on ice, it's nearly useless. You need ice-specific tips. These are not just a marketing gimmick; they are tungsten-carbide or steel spikes, often with a serrated or multi-point design. They are designed to bite into the hard surface, creating points of contact that your foot alone cannot.
- Leki Ice Tips: These screw on over the existing ferrule and feature a hardened steel spike that digs into hard snow and ice.
- Black Diamond Ice Tips: A similar design, often with a carbide tip and a more aggressive profile for penetration.
- Universal Ice Tips: Some brands offer universal spikes that can fit most poles.
Pro Tip: Practise screwing these on before you head out. They require some force, and doing it with cold, bare hands can be frustrating.
Step 2: Lengthen for Reach & Braking
Your standard flat-terrain pole length won't work on ice. You need extra reach to plant the pole ahead of you and provide a solid braking force.
- Lengthen each pole by 5–10 cm from your normal setting.
- This gives you a longer lever arm to push against, allowing you to use your upper body to check your momentum.
- When you plant, you should do so ahead of your foot at a steeper angle (≈45°) . This is not the slight forward tilt you use on a dry descent; this is a deliberate, assertive planting motion to stop any forward slide.
Step 3: Equip Snow Baskets
Snow baskets are not just for deep powder. On ice and hard-packed snow, they provide a wider footprint, preventing the pole tip from penetrating too deeply into a soft patch and giving you a more stable platform. They also stop the pole from sinking into slush or a hidden pool of water, which could cause a sudden loss of support.
Step 4: The "Tripod" Technique – Walk Like a Crab
On ice, your walking technique needs to change. The goal is to maximize stability and minimize any sudden, uncontrolled movements.
- Short, Shuffling Steps: Forget your normal stride. On ice, you are a shorter, more deliberate walker. Lift your feet only slightly, placing them flat and testing the surface before committing your full weight.
- Plant Both Poles Ahead: Instead of the alternating rhythm you use on dry ground, adopt a "tripod" technique.Plant both poles firmly ahead of you at a sharp angle (about 45 degrees).Shift your weight onto the poles.Move one foot forward, place it flat, and transfer your weight.Move the other foot forward to join it, keeping your weight centred between the two poles and your two feet.This creates a stable base of four points (two poles, two feet) where you are always in control.
- Face Slightly Sideways (or Use a Herringbone): If you're going uphill on ice, face slightly sideways and use a "herringbone" step—your toes pointing outwards. This creates more surface area and allows you to use the side of your boot to grip the ice. Your poles should be planted on the uphill side, pushing you forward.
Step 5: Mastering the Descent
Descending on ice is where the real fear sets in. Here's how to use your poles:
- Lengthen Further: On a descent, add another 5 cm of length.
- Double-Plant: Plant both poles firmly ahead of you, leaning your weight into them.
- Keep Your Centre of Gravity: Lean your body slightly into the slope—this is counterintuitive, but it keeps your weight over the poles and prevents you from falling backward.
- Brake, Don't Push: Think of your poles as brakes, not accelerators. Plant them to slow your momentum, not to propel you forward.
Step 6: The Emergency Brake Technique
If you feel yourself slipping, don't panic. Immediately:
- Jam Both Poles Down: Drive the ice tips into the ice at a steep angle.
- Lean Into the Poles: Drop your weight into the poles. This creates a triangle of support that can arrest your slide.
- Keep Your Feet: Try to stay in a standing or slight crouch. Don't try to sit down—you'll just slide further and faster.
Team Walking on Ice
If walking in a group on a tricky section:
- One at a Time: Avoid being too close to the person ahead. A slip can take the whole group down.
- The "Ice Axe" Principle: If someone slips, they should plant their poles and try to dig in. Others can assist by forming a human chain, but be extremely careful not to get pulled over.
Transitioning from Ice to Rock
When the ice ends and you're back on solid ground, you need to change your setup:
- Remove the Ice Tips: They are too aggressive for rock and can cause scratches on your poles. Swap back to standard carbide tips or use rubber protectors.
- Shorten Your Poles: Return to your normal flat-terrain length for comfort and efficiency.
- Change Your Technique: Drop the tripod stance and return to your regular, alternating swing.
Maintenance for Winter Conditions
Ice and grit are abrasive. After a winter walk:
- Dry your poles thoroughly to prevent corrosion, especially on the locks.
- Clean your ice tips to remove any dirt or salt.
- Apply a light silicone spray to the locking mechanisms to keep them moving smoothly in cold weather.
Final Thoughts
Using trekking poles on ice is a skill that transforms a potentially hazardous situation into a manageable one. By equipping your poles with the right tips, adjusting your technique, and maintaining a calm, deliberate pace, you can navigate icy paths with confidence. Remember, on ice, your poles are your most important piece of equipment—they are not just for comfort, they are for safety. (Word count: ~1,080)
How to use trekking poles for extra stability on icy paths?
Winter walking in the UK—whether you're on a snow-dusted Munro in Scotland or a frost-slicked path in the Peak District—presents a unique challenge: ice. One moment you're striding confidently; the next, you're fighting for balance on a glossy, treacherously slick surface. This is where your trekking poles transform from walking aids into essential safety tools. But using them on ice requires a different technique and equipment than on mud or rock. This guide explains how to adapt your poles and technique to turn them into four-legged stability anchors on the iciest paths.
The Threat: Why Ice Demands a Different Approach
Ice is the enemy of friction. A standard carbide tip, which grips well on rock, will skid across a polished ice sheet like a skate. Your poles, without adaptation, can become a hazard, slipping out from under you and throwing you off balance. The key is to understand that on ice, your poles are not just for propulsion; they are a backup plan for your feet.
Step 1: Switch to Winter Tips (The Game Changer)
Forget the standard carbide tip—on ice, it's nearly useless. You need ice-specific tips. These are not just a marketing gimmick; they are tungsten-carbide or steel spikes, often with a serrated or multi-point design. They are designed to bite into the hard surface, creating points of contact that your foot alone cannot.
- Leki Ice Tips: These screw on over the existing ferrule and feature a hardened steel spike that digs into hard snow and ice.
- Black Diamond Ice Tips: A similar design, often with a carbide tip and a more aggressive profile for penetration.
- Universal Ice Tips: Some brands offer universal spikes that can fit most poles.
Pro Tip: Practise screwing these on before you head out. They require some force, and doing it with cold, bare hands can be frustrating.
Step 2: Lengthen for Reach & Braking
Your standard flat-terrain pole length won't work on ice. You need extra reach to plant the pole ahead of you and provide a solid braking force.
- Lengthen each pole by 5–10 cm from your normal setting.
- This gives you a longer lever arm to push against, allowing you to use your upper body to check your momentum.
- When you plant, you should do so ahead of your foot at a steeper angle (≈45°) . This is not the slight forward tilt you use on a dry descent; this is a deliberate, assertive planting motion to stop any forward slide.
Step 3: Equip Snow Baskets
Snow baskets are not just for deep powder. On ice and hard-packed snow, they provide a wider footprint, preventing the pole tip from penetrating too deeply into a soft patch and giving you a more stable platform. They also stop the pole from sinking into slush or a hidden pool of water, which could cause a sudden loss of support.
Step 4: The "Tripod" Technique – Walk Like a Crab
On ice, your walking technique needs to change. The goal is to maximize stability and minimize any sudden, uncontrolled movements.
- Short, Shuffling Steps: Forget your normal stride. On ice, you are a shorter, more deliberate walker. Lift your feet only slightly, placing them flat and testing the surface before committing your full weight.
- Plant Both Poles Ahead: Instead of the alternating rhythm you use on dry ground, adopt a "tripod" technique.Plant both poles firmly ahead of you at a sharp angle (about 45 degrees).Shift your weight onto the poles.Move one foot forward, place it flat, and transfer your weight.Move the other foot forward to join it, keeping your weight centred between the two poles and your two feet.This creates a stable base of four points (two poles, two feet) where you are always in control.
- Face Slightly Sideways (or Use a Herringbone): If you're going uphill on ice, face slightly sideways and use a "herringbone" step—your toes pointing outwards. This creates more surface area and allows you to use the side of your boot to grip the ice. Your poles should be planted on the uphill side, pushing you forward.
Step 5: Mastering the Descent
Descending on ice is where the real fear sets in. Here's how to use your poles:
- Lengthen Further: On a descent, add another 5 cm of length.
- Double-Plant: Plant both poles firmly ahead of you, leaning your weight into them.
- Keep Your Centre of Gravity: Lean your body slightly into the slope—this is counterintuitive, but it keeps your weight over the poles and prevents you from falling backward.
- Brake, Don't Push: Think of your poles as brakes, not accelerators. Plant them to slow your momentum, not to propel you forward.
Step 6: The Emergency Brake Technique
If you feel yourself slipping, don't panic. Immediately:
- Jam Both Poles Down: Drive the ice tips into the ice at a steep angle.
- Lean Into the Poles: Drop your weight into the poles. This creates a triangle of support that can arrest your slide.
- Keep Your Feet: Try to stay in a standing or slight crouch. Don't try to sit down—you'll just slide further and faster.
Team Walking on Ice
If walking in a group on a tricky section:
- One at a Time: Avoid being too close to the person ahead. A slip can take the whole group down.
- The "Ice Axe" Principle: If someone slips, they should plant their poles and try to dig in. Others can assist by forming a human chain, but be extremely careful not to get pulled over.
Transitioning from Ice to Rock
When the ice ends and you're back on solid ground, you need to change your setup:
- Remove the Ice Tips: They are too aggressive for rock and can cause scratches on your poles. Swap back to standard carbide tips or use rubber protectors.
- Shorten Your Poles: Return to your normal flat-terrain length for comfort and efficiency.
- Change Your Technique: Drop the tripod stance and return to your regular, alternating swing.
Maintenance for Winter Conditions
Ice and grit are abrasive. After a winter walk:
- Dry your poles thoroughly to prevent corrosion, especially on the locks.
- Clean your ice tips to remove any dirt or salt.
- Apply a light silicone spray to the locking mechanisms to keep them moving smoothly in cold weather.
Final Thoughts
Using trekking poles on ice is a skill that transforms a potentially hazardous situation into a manageable one. By equipping your poles with the right tips, adjusting your technique, and maintaining a calm, deliberate pace, you can navigate icy paths with confidence. Remember, on ice, your poles are your most important piece of equipment—they are not just for comfort, they are for safety.




