




What length trekking poles for a child aged 10?
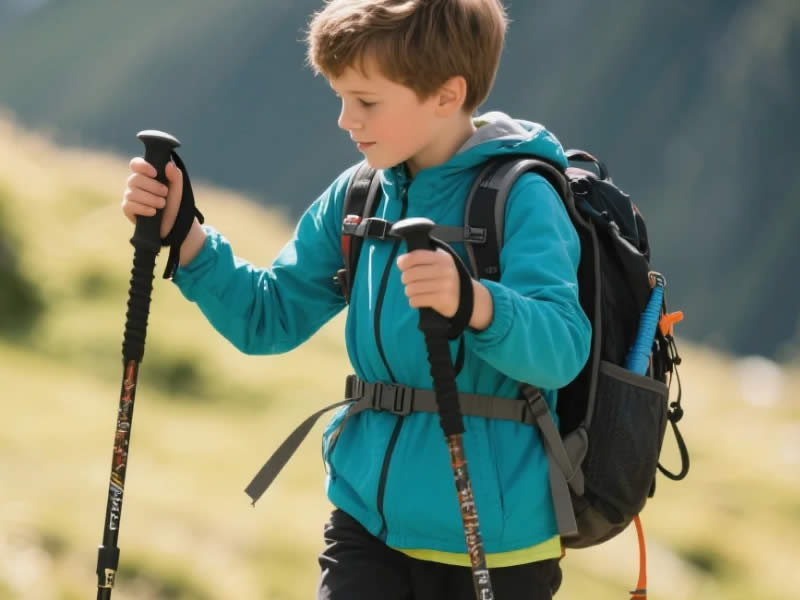
Getting your 10‑year‑old their first pair of trekking poles is a brilliant way to share your love of the hills, boost their confidence on uneven ground, and protect their developing joints. But you can't just hand them a pair of adult poles and expect them to work. Children's proportions, strength, and stride length are completely different. The short answer is that a 10‑year‑old will typically need poles between 85 cm and 100 cm, but the 90° elbow test is the only reliable way to get the perfect fit. This guide covers everything you need to know—from sizing and choosing the right features to teaching them how to use poles safely and effectively.
The Golden Rule: The 90° Elbow Test
Forget the height charts for a moment—they are only a starting point. The 90° elbow test is the gold standard because it accounts for your child's individual arm length, torso proportions, and boot sole thickness.
Here's how to do it:
- Put on the boots they'll be walking in – these add height.
- Stand on a level surface with the child standing up straight.
- Hold the pole vertically with the tip resting on the ground beside their foot.
- Bend their elbow to a clean 90° angle – their forearm should be perfectly horizontal, parallel to the ground.
- Adjust the pole until their hand grips the handle comfortably with a straight wrist.
For a 10‑year‑old of average height (around 140 cm / 4'7"), the result of this test is usually between 85 cm and 100 cm. However, this is just a baseline – your child's unique build may require a different length.
The Height Formula – A Starting Point
If you want a quick mathematical guide, use the standard formula: Height (cm) × 0.68.
- For a 140 cm (4'7") child: 140 × 0.68 = 95 cm.
- For a 130 cm (4'3") child: 130 × 0.68 = 88 cm.
- For a 150 cm (4'11") child: 150 × 0.68 = 102 cm.
Caution: This formula is a useful starting point, but it assumes average proportions. A child with long arms or a long torso will need a different length. Always use the 90° test as your final check.
Why a Proper Fit Matters for Kids
Getting the length right is even more critical for children than for adults. A poorly fitted pole can cause:
- Shoulder and back strain – too long, and they'll hunch their shoulders, which can lead to fatigue and discomfort.
- Loss of control – too short, and they'll have to stoop, reducing the pole's effectiveness and potentially causing them to trip.
- Reduced confidence – if the poles don't feel right, they'll quickly become a hindrance rather than a help, putting them off future walks.
The goal is to make the poles feel like a natural extension of their arms, so they can focus on the walk, not the equipment.
Adjusting Length for the Terrain
Once you have the flat‑terrain length, you need to teach your child how to adjust for hills – a skill that will serve them for life.
Uphill
Shorten by 5‑7 cm – this keeps their shoulders relaxed and their chest open, making breathing easier. They should plant the pole ahead of them with a slightly bent elbow.
Downhill
Lengthen by 5‑10 cm – this gives them the reach they need to brake and absorb shock, protecting their knees. They should plant the pole ahead of their foot, leaning slightly into it.
Teaching trick: Mark each setting (flat, uphill, downhill) with a small piece of tape or a permanent marker. This lets them adjust their own poles quickly and confidently.
Choosing the Right Poles for a 10‑Year‑Old
Beyond length, several features are crucial for a child's first poles.
1. Weight – Light is Right
Kids have less upper‑body strength than adults, so heavy poles will tire them out quickly. Aim for under 200g per pole. Lighter poles are easier to swing, reducing fatigue and making the walk more enjoyable. Consider aluminium for durability, but look for lighter models with thinner shafts.
2. Locking Mechanism – Lever‑Locks
Lever‑locks are far easier for small hands to operate than twist‑locks. They require less finger strength and dexterity. Twist‑locks can be frustrating for a child, especially if they're cold and wet. Lever‑locks are also more reliable in muddy conditions.
3. Grip – Small, Comfortable, and Safe
Adult grips are too big for a 10‑year‑old's hands, forcing them to over‑grip and causing fatigue. Look for child‑specific models with narrower grips and thinner straps. Cork grips are ideal because they become tacky when wet, but good foam grips are also fine.
4. Baskets – Mud Baskets for UK Conditions
For UK walking, mud baskets are essential. They prevent the pole from sinking into soft ground, which is especially helpful for a lighter child. Some child‑specific poles come with smaller baskets – they are usually fine.
5. Tips – Replaceable and Sharp
Ensure the poles have replaceable carbide tips. A worn tip is a safety hazard on wet rock. Teach your child to check the tips before a walk.
Teaching Your Child to Walk with Poles
Poles are a new skill for a child, so be patient and make it fun.
1. The Straight Wrist Rule
Show them how to hold the pole with a straight wrist. If their wrist is bent, the pole is either too long or too short. A neutral wrist is the first sign of a correct fit.
2. Plant Ahead, Not Beside
Demonstrate planting the pole ahead of their foot, at a slight backward angle, and then pushing off. Many children plant the pole beside their foot, which doesn't provide any propulsion or support.
3. The Rhythm
Start with the simple rhythm: left pole with the right foot, right pole with the left foot. Practice on flat ground until it becomes natural. You can even sing a simple song to help them get into a rhythm.
4. The Strap Trick
Teach them to put their hand up through the strap and grip the handle. This uses the strap to bear the weight, not their grip, saving their hands from chafing.
5. Safety First
Always use rubber tip protectors when walking near roads, in car parks, or in busy areas. It prevents accidents and protects the tips. Show them how to collapse the poles and carry them safely.
Recommended Child‑Friendly Pole Models
- Leki Kid Trek – A fantastic, dedicated kids' pole with a narrow grip, lightweight aluminium, and the excellent SpeedLock 2 mechanism. Around £60‑70.
- Decathlon Forclaz Junior – The best value option. Lightweight, with a comfortable foam grip and reliable lever‑locks. Around £25‑30.
- Black Diamond Distance Z – Not a child‑specific pole, but its lightweight folding design and small foam grips (in the shorter lengths) can work well. Around £120.
A Quick Note on Growth
Children grow fast. Your 10‑year‑old might need a longer pole next year. This is why a highly adjustable telescopic pole is better than a fixed‑length folding pole for a growing child. You can extend them over time.
The Final Checklist
- □
- □
- □
- □
- □
- □
- □
- □
- □
Over to You
Getting your 10‑year‑old their own pair of properly fitted trekking poles is one of the best investments you can make in their outdoor enjoyment. It will give them confidence, stability, and a sense of "proper" walking gear. Use the 90° elbow test to size them, choose child‑friendly features, and take time to teach them the basics. Before you know it, they'll be striding ahead of you on the hills, poles swinging rhythmically, hooked on the outdoors for life. (Word count: ~1,080)
What length trekking poles for a child aged 10?
Getting your 10‑year‑old their first pair of trekking poles is a brilliant way to share your love of the hills, boost their confidence on uneven ground, and protect their developing joints. But you can't just hand them a pair of adult poles and expect them to work. Children's proportions, strength, and stride length are completely different. The short answer is that a 10‑year‑old will typically need poles between 85 cm and 100 cm, but the 90° elbow test is the only reliable way to get the perfect fit. This guide covers everything you need to know—from sizing and choosing the right features to teaching them how to use poles safely and effectively.
The Golden Rule: The 90° Elbow Test
Forget the height charts for a moment—they are only a starting point. The 90° elbow test is the gold standard because it accounts for your child's individual arm length, torso proportions, and boot sole thickness.
Here's how to do it:
- Put on the boots they'll be walking in – these add height.
- Stand on a level surface with the child standing up straight.
- Hold the pole vertically with the tip resting on the ground beside their foot.
- Bend their elbow to a clean 90° angle – their forearm should be perfectly horizontal, parallel to the ground.
- Adjust the pole until their hand grips the handle comfortably with a straight wrist.
For a 10‑year‑old of average height (around 140 cm / 4'7"), the result of this test is usually between 85 cm and 100 cm. However, this is just a baseline – your child's unique build may require a different length.
The Height Formula – A Starting Point
If you want a quick mathematical guide, use the standard formula: Height (cm) × 0.68.
- For a 140 cm (4'7") child: 140 × 0.68 = 95 cm.
- For a 130 cm (4'3") child: 130 × 0.68 = 88 cm.
- For a 150 cm (4'11") child: 150 × 0.68 = 102 cm.
Caution: This formula is a useful starting point, but it assumes average proportions. A child with long arms or a long torso will need a different length. Always use the 90° test as your final check.
Why a Proper Fit Matters for Kids
Getting the length right is even more critical for children than for adults. A poorly fitted pole can cause:
- Shoulder and back strain – too long, and they'll hunch their shoulders, which can lead to fatigue and discomfort.
- Loss of control – too short, and they'll have to stoop, reducing the pole's effectiveness and potentially causing them to trip.
- Reduced confidence – if the poles don't feel right, they'll quickly become a hindrance rather than a help, putting them off future walks.
The goal is to make the poles feel like a natural extension of their arms, so they can focus on the walk, not the equipment.
Adjusting Length for the Terrain
Once you have the flat‑terrain length, you need to teach your child how to adjust for hills – a skill that will serve them for life.
Uphill
Shorten by 5‑7 cm – this keeps their shoulders relaxed and their chest open, making breathing easier. They should plant the pole ahead of them with a slightly bent elbow.
Downhill
Lengthen by 5‑10 cm – this gives them the reach they need to brake and absorb shock, protecting their knees. They should plant the pole ahead of their foot, leaning slightly into it.
Teaching trick: Mark each setting (flat, uphill, downhill) with a small piece of tape or a permanent marker. This lets them adjust their own poles quickly and confidently.
Choosing the Right Poles for a 10‑Year‑Old
Beyond length, several features are crucial for a child's first poles.
1. Weight – Light is Right
Kids have less upper‑body strength than adults, so heavy poles will tire them out quickly. Aim for under 200g per pole. Lighter poles are easier to swing, reducing fatigue and making the walk more enjoyable. Consider aluminium for durability, but look for lighter models with thinner shafts.
2. Locking Mechanism – Lever‑Locks
Lever‑locks are far easier for small hands to operate than twist‑locks. They require less finger strength and dexterity. Twist‑locks can be frustrating for a child, especially if they're cold and wet. Lever‑locks are also more reliable in muddy conditions.
3. Grip – Small, Comfortable, and Safe
Adult grips are too big for a 10‑year‑old's hands, forcing them to over‑grip and causing fatigue. Look for child‑specific models with narrower grips and thinner straps. Cork grips are ideal because they become tacky when wet, but good foam grips are also fine.
4. Baskets – Mud Baskets for UK Conditions
For UK walking, mud baskets are essential. They prevent the pole from sinking into soft ground, which is especially helpful for a lighter child. Some child‑specific poles come with smaller baskets – they are usually fine.
5. Tips – Replaceable and Sharp
Ensure the poles have replaceable carbide tips. A worn tip is a safety hazard on wet rock. Teach your child to check the tips before a walk.
Teaching Your Child to Walk with Poles
Poles are a new skill for a child, so be patient and make it fun.
1. The Straight Wrist Rule
Show them how to hold the pole with a straight wrist. If their wrist is bent, the pole is either too long or too short. A neutral wrist is the first sign of a correct fit.
2. Plant Ahead, Not Beside
Demonstrate planting the pole ahead of their foot, at a slight backward angle, and then pushing off. Many children plant the pole beside their foot, which doesn't provide any propulsion or support.
3. The Rhythm
Start with the simple rhythm: left pole with the right foot, right pole with the left foot. Practice on flat ground until it becomes natural. You can even sing a simple song to help them get into a rhythm.
4. The Strap Trick
Teach them to put their hand up through the strap and grip the handle. This uses the strap to bear the weight, not their grip, saving their hands from chafing.
5. Safety First
Always use rubber tip protectors when walking near roads, in car parks, or in busy areas. It prevents accidents and protects the tips. Show them how to collapse the poles and carry them safely.
Recommended Child‑Friendly Pole Models
- Leki Kid Trek – A fantastic, dedicated kids' pole with a narrow grip, lightweight aluminium, and the excellent SpeedLock 2 mechanism. Around £60‑70.
- Decathlon Forclaz Junior – The best value option. Lightweight, with a comfortable foam grip and reliable lever‑locks. Around £25‑30.
- Black Diamond Distance Z – Not a child‑specific pole, but its lightweight folding design and small foam grips (in the shorter lengths) can work well. Around £120.
A Quick Note on Growth
Children grow fast. Your 10‑year‑old might need a longer pole next year. This is why a highly adjustable telescopic pole is better than a fixed‑length folding pole for a growing child. You can extend them over time.
The Final Checklist
- □ Child wears walking boots.
- □ Perform the 90° elbow test – get the flat length.
- □ Mark flat, uphill, and downhill lengths.
- □ Choose lightweight aluminium poles (under 200g).
- □ Choose lever‑locks over twist‑locks.
- □ Check for a comfortable, narrow grip.
- □ Ensure mud baskets are fitted.
- □ Teach the rhythm: left pole, right foot.
- □ Carry spare rubber tip protectors.
Over to You
Getting your 10‑year‑old their own pair of properly fitted trekking poles is one of the best investments you can make in their outdoor enjoyment. It will give them confidence, stability, and a sense of "proper" walking gear. Use the 90° elbow test to size them, choose child‑friendly features, and take time to teach them the basics. Before you know it, they'll be striding ahead of you on the hills, poles swinging rhythmically, hooked on the outdoors for life.




