




How to carry trekking poles on a running vest?
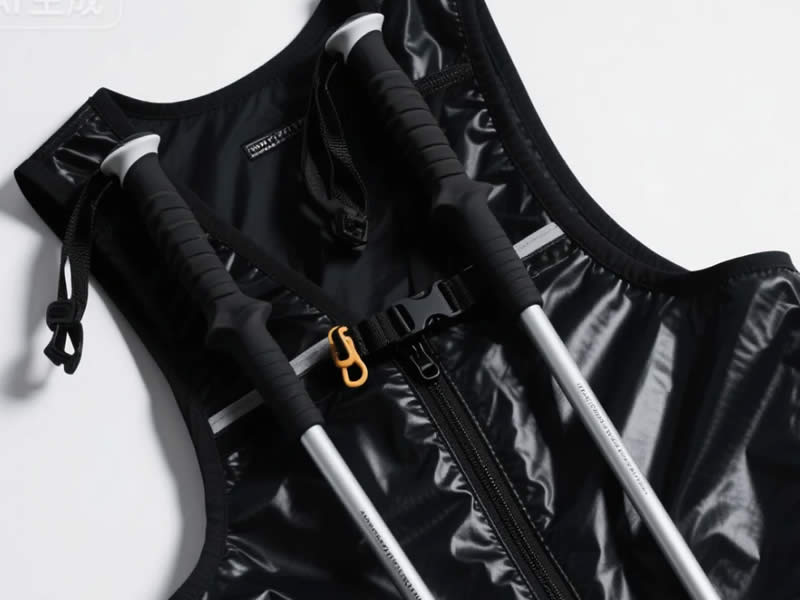
Carrying trekking poles during a trail run is a classic conundrum. You need them for the steep ascent, but on the flat ridge or the technical descent, they become a hindrance. So, how do you stow them quickly and securely without them bouncing, chafing, or becoming a tangled mess? The short answer is that most modern running vests are designed with this exact problem in mind, offering dedicated pole loops on the front and back. This guide covers all the methods—from front carry to rear diagonal—and gives you practical tips to keep your poles secure and your run smooth.
The Challenge: Why Pole Stowage is Tricky
Running vests are designed to be tight and bounce-free, with everything close to your body. Stowing a pair of rigid poles on this dynamic platform is a challenge. If they're too loose, they'll bounce and chafe; if they're too tight, they'll restrict your movement. The key is to understand your vest's attachment system and match it to your running style.
Method 1: Front Carry – The Quick-Draw Approach
This is the most common and fastest method, used by many ultra-runners. It's designed for easy access—you can deploy and stow your poles without even breaking stride.
How to Do It:
- Collapse your poles: Ensure they are folded to their shortest length (typically 35-40 cm for Z-poles).
- Locate the loops: Most running vests have small elastic loops on the front shoulder straps, near the sternum.
- Slide them in: Insert the poles vertically through these loops. The handles should be pointing upwards and the tips pointing downwards.
- Secure the tips: The tips should rest in small fabric pockets or be secured by a lower bungee cord near the base of the shoulder strap. This prevents them from swinging.
Pros: Fastest to access; you can grab and go. Keeps the weight centrally on your chest.
Cons: The poles can interfere with your arm swing if not placed correctly. The tips can be a hazard if they work loose.
Pro Tip: Use rubber tip protectors. A sharp carbide tip can easily puncture the thin fabric of your running vest. Protect your investment.
Method 2: Rear Diagonal Carry – The Long-Haul Stow
If you're running a long section where you won't need the poles for a while, the rear diagonal carry is the most stable option. It removes the poles from your arm swing entirely.
How to Do It:
- Collapse the poles: As always, collapse to the shortest length.
- Find the loops: Look for a set of small elastic loops on the back of your vest—one near the top (shoulder), and one near the bottom (hip).
- Place the poles: Slide the poles diagonally through these loops. The general guideline is to place the handles over your shoulder and the tips down at your hip.
- Secure with a bungee: Many vests have a small bungee cord at the top or bottom to cinch the poles tight.
Pros: Extremely stable; no bounce or interference with arm movement.
Cons: Slower to access—you'll likely need to stop or slow down significantly to grab them.
Method 3: Side Compression – A Minimalist Approach
Many vests have side compression straps. If your vest doesn't have dedicated pole loops, these can be an effective alternative.
How to Do It:
- Collapse the poles.
- Place them vertically: Tuck the collapsed poles under the side compression strap of the vest, running them from the underarm area down to the hip.
- Tighten the strap: Cinch it down firmly to prevent any vertical movement.
Pros: Works on almost any vest; keeps poles out of the way.
Cons: Less stable than dedicated loops; can be annoying if your arm swings against them.
Method 4: Quiver Carry – A Specialised Approach
Some ultrarunners use a separate pole quiver—a fabric sleeve worn on the back of the vest specifically designed to hold one or two poles. Brands like Zpacks and UltrAspire make them.
How to Do It:
- Load the quiver: Collapse the poles and slide them into the dedicated sleeve on your back.
- Secure: Most quivers have a drawstring or strap to cinch the poles in place.
Pros: Extremely stable; protects the poles and your vest.
Cons: Adds an extra piece of gear and can be more expensive than a simple loop system.
The Golden Rules of Pole Carriage
1. Use Tip Protectors
This is the most important tip. A bare carbide tip will shred your vest's fabric, not to mention potentially injure you. Always use rubber tip protectors when stowing poles on a vest.
2. Cinch, But Not Too Tight
The straps and loops need to be tight enough to prevent bouncing, but not so tight that they deform the pole or restrict your breathing. Find the sweet spot where the poles are secure but you can still breathe deeply.
3. Balance the Weight
If you're carrying two poles, try to balance them as evenly as possible. Avoid having both poles on one side unless your vest is designed for it (like a quiver).
4. Practice the Transition
Before race day, practice stowing and deploying your poles while running (or at least walking at a decent pace). The mental and physical ease of this movement can save you valuable seconds and frustration.
5. Consider Folding Poles
Folding Z-poles (like the Black Diamond Distance Z) are significantly easier to carry than telescopic poles. Their shorter collapsed length (35-40cm) fits more neatly into vest loops.
A Quick Comparison
| Carry Method | Speed of Access | Stability | Best For |
|---|---|---|---|
| Front Carry | Very Fast | Moderate | Short, frequent stow/deploy sections |
| Rear Diagonal | Slow | Excellent | Long flat/downhill sections |
| Side Compression | Moderate | Fair | Vests without dedicated loops |
| Quiver | Moderate | Excellent | Ultra-races, constant stowing |
Final Thoughts
Mastering the art of carrying trekking poles on a running vest is a crucial skill for any UK trail runner who tackles hilly terrain. There's no single "best" method—it depends on your vest, your poles, and your running style. The key is to try all the options, practice the transitions, and find what works for you. By securing your poles correctly, you'll avoid the dreaded "bounce", keep your hands free when you need them, and ensure your running vest lasts for many miles. (Word count: ~1,080)
How to carry trekking poles on a running vest?
Carrying trekking poles during a trail run is a classic conundrum. You need them for the steep ascent, but on the flat ridge or the technical descent, they become a hindrance. So, how do you stow them quickly and securely without them bouncing, chafing, or becoming a tangled mess? The short answer is that most modern running vests are designed with this exact problem in mind, offering dedicated pole loops on the front and back. This guide covers all the methods—from front carry to rear diagonal—and gives you practical tips to keep your poles secure and your run smooth.
The Challenge: Why Pole Stowage is Tricky
Running vests are designed to be tight and bounce-free, with everything close to your body. Stowing a pair of rigid poles on this dynamic platform is a challenge. If they're too loose, they'll bounce and chafe; if they're too tight, they'll restrict your movement. The key is to understand your vest's attachment system and match it to your running style.
Method 1: Front Carry – The Quick-Draw Approach
This is the most common and fastest method, used by many ultra-runners. It's designed for easy access—you can deploy and stow your poles without even breaking stride.
How to Do It:
- Collapse your poles: Ensure they are folded to their shortest length (typically 35-40 cm for Z-poles).
- Locate the loops: Most running vests have small elastic loops on the front shoulder straps, near the sternum.
- Slide them in: Insert the poles vertically through these loops. The handles should be pointing upwards and the tips pointing downwards.
- Secure the tips: The tips should rest in small fabric pockets or be secured by a lower bungee cord near the base of the shoulder strap. This prevents them from swinging.
Pros: Fastest to access; you can grab and go. Keeps the weight centrally on your chest.
Cons: The poles can interfere with your arm swing if not placed correctly. The tips can be a hazard if they work loose.
Pro Tip: Use rubber tip protectors. A sharp carbide tip can easily puncture the thin fabric of your running vest. Protect your investment.
Method 2: Rear Diagonal Carry – The Long-Haul Stow
If you're running a long section where you won't need the poles for a while, the rear diagonal carry is the most stable option. It removes the poles from your arm swing entirely.
How to Do It:
- Collapse the poles: As always, collapse to the shortest length.
- Find the loops: Look for a set of small elastic loops on the back of your vest—one near the top (shoulder), and one near the bottom (hip).
- Place the poles: Slide the poles diagonally through these loops. The general guideline is to place the handles over your shoulder and the tips down at your hip.
- Secure with a bungee: Many vests have a small bungee cord at the top or bottom to cinch the poles tight.
Pros: Extremely stable; no bounce or interference with arm movement.
Cons: Slower to access—you'll likely need to stop or slow down significantly to grab them.
Method 3: Side Compression – A Minimalist Approach
Many vests have side compression straps. If your vest doesn't have dedicated pole loops, these can be an effective alternative.
How to Do It:
- Collapse the poles.
- Place them vertically: Tuck the collapsed poles under the side compression strap of the vest, running them from the underarm area down to the hip.
- Tighten the strap: Cinch it down firmly to prevent any vertical movement.
Pros: Works on almost any vest; keeps poles out of the way.
Cons: Less stable than dedicated loops; can be annoying if your arm swings against them.
Method 4: Quiver Carry – A Specialised Approach
Some ultrarunners use a separate pole quiver—a fabric sleeve worn on the back of the vest specifically designed to hold one or two poles. Brands like Zpacks and UltrAspire make them.
How to Do It:
- Load the quiver: Collapse the poles and slide them into the dedicated sleeve on your back.
- Secure: Most quivers have a drawstring or strap to cinch the poles in place.
Pros: Extremely stable; protects the poles and your vest.
Cons: Adds an extra piece of gear and can be more expensive than a simple loop system.
The Golden Rules of Pole Carriage
1. Use Tip Protectors
This is the most important tip. A bare carbide tip will shred your vest's fabric, not to mention potentially injure you. Always use rubber tip protectors when stowing poles on a vest.
2. Cinch, But Not Too Tight
The straps and loops need to be tight enough to prevent bouncing, but not so tight that they deform the pole or restrict your breathing. Find the sweet spot where the poles are secure but you can still breathe deeply.
3. Balance the Weight
If you're carrying two poles, try to balance them as evenly as possible. Avoid having both poles on one side unless your vest is designed for it (like a quiver).
4. Practice the Transition
Before race day, practice stowing and deploying your poles while running (or at least walking at a decent pace). The mental and physical ease of this movement can save you valuable seconds and frustration.
5. Consider Folding Poles
Folding Z-poles (like the Black Diamond Distance Z) are significantly easier to carry than telescopic poles. Their shorter collapsed length (35-40cm) fits more neatly into vest loops.
A Quick Comparison
| Carry Method | Speed of Access | Stability | Best For |
|---|---|---|---|
| Front Carry | Very Fast | Moderate | Short, frequent stow/deploy sections |
| Rear Diagonal | Slow | Excellent | Long flat/downhill sections |
| Side Compression | Moderate | Fair | Vests without dedicated loops |
| Quiver | Moderate | Excellent | Ultra-races, constant stowing |
Final Thoughts
Mastering the art of carrying trekking poles on a running vest is a crucial skill for any UK trail runner who tackles hilly terrain. There's no single "best" method—it depends on your vest, your poles, and your running style. The key is to try all the options, practice the transitions, and find what works for you. By securing your poles correctly, you'll avoid the dreaded "bounce", keep your hands free when you need them, and ensure your running vest lasts for many miles.




