




What is the correct way to plant trekking poles when walking?
So, you've got a shiny new pair of trekking poles. You've adjusted the length and fiddled with the wrist straps. Now comes the moment of truth: how do you actually use them? It seems simple—you just put them on the ground, right? The short answer is yes, but the "how" is everything. A correct planting technique transforms your poles from a pair of sticks into a powerful, efficient propulsion system. This guide covers the biomechanics, the rhythm, and the specific techniques for different terrains to ensure you get the most out of your poles.
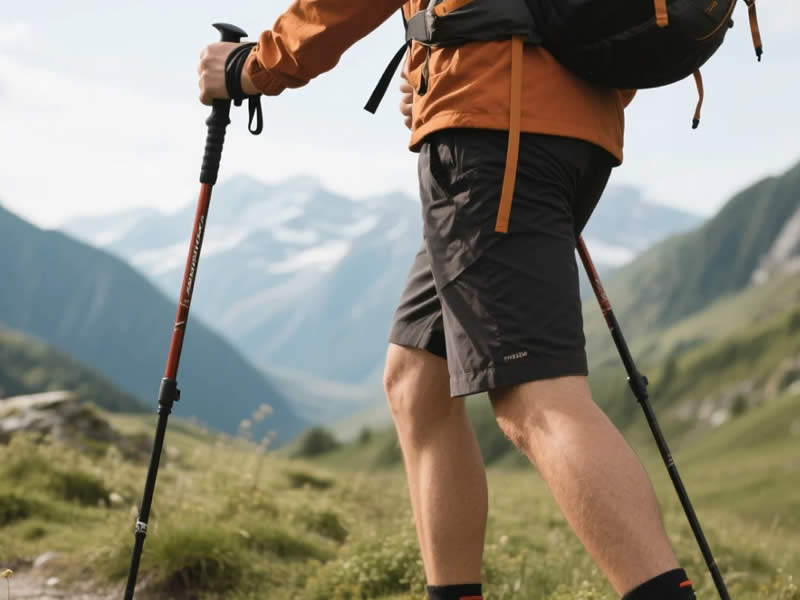
The Golden Rule: The Diagonal Gait
This is the foundational movement of trekking pole walking. It's the same rhythm your arms naturally make when you walk without poles.
Left pole with right foot; right pole with left foot.
This isn't arbitrary. This diagonal gait creates a stable, alternating rhythm that helps you maintain balance. It's the most efficient and natural way to move. When you push with your left arm, your right leg is moving forward, creating a smooth, flowing motion that reduces the load on your spine.
The "Where" of Planting
Plant the pole ahead, not beside.
This is the most common error. Many beginners plant the pole almost directly alongside their foot, or even slightly behind it. This does nothing for propulsion. It provides a bit of stability but no forward momentum.
The Correct Position:
- On Flat Ground: Place the tip of the pole on the ground roughly 30-50 cm (12-20 inches) ahead of your foot. This should feel like a comfortable, natural reach.
- At an Angle: The pole should be at a slight backward angle. The tip should hit the ground first, with the handle closer to your body.
The "How" of Planting – The "Push and Glide"
The planting action is not a single movement; it's a two-part process:
- The Plant: As your foot moves forward, the pole tip touches the ground.
- The Push: Immediately after the tip touches, you push down and back with your arm, using the strap as the primary lever. Your hand is just a guide.
- The Glide: The push propels your body forward. The momentum carries you into the next stride.
Why This Works: You are using the ground to create forward thrust. Your arms are not just moving up and down; they are actively contributing to your speed and efficiency.
The Grip and Strap Technique
Your grip is more important than you might think. A tight, clenched grip is a drain on your energy and a recipe for blisters.
- The Light Grip: Imagine you are holding a baby bird. Your grip should be firm enough to guide the pole but relaxed enough that your forearm muscles aren't straining.
- Strap Power: The strap should be the primary load-bearer. Your hand should be only a guide. Let the strap take your weight; your fingers should just be resting on the handle.
- The Follow-Through: As you push, your hand should open slightly on the backstroke, allowing the strap to pull the pole back. This saves your grip strength.
Terrain-Specific Planting Techniques
The basic technique is the same, but the angle and the purpose of the plant change with the terrain.
Uphill
- The Angle: When climbing, you are planting the pole on a slope. The pole angle needs to be steeper to push upwards.
- The Purpose: On an ascent, the plant is primarily for propulsion. You are using your arms to help pull yourself up.
- The Technique: Shorten your poles by 5-7 cm. Plant the pole firmly ahead, and push down and back to help lift your body weight up the hill.
Downhill
- The Angle: The pole is planted ahead of you, at a flatter angle, to act as a brake.
- The Purpose: On a descent, the plant is primarily for stability and braking. You are using the poles to control your speed and reduce the impact on your knees.
- The Technique: Lengthen your poles by 5-10 cm. Plant the pole ahead, push down, and use it to absorb the shock of your step. This is where the "tripod" technique (planting both poles together) is most useful.
Sidehill (Traversing)
- The Adjustments: When crossing a slope, you are walking with one foot uphill and one downhill.
- The Technique: Lengthen the downhill pole and shorten the uphill pole. This keeps your shoulders level and your weight centred, preventing you from leaning into the hill.
Muddy Ground
- The Purpose: The plant is for testing the ground and maintaining balance.
- The Technique: Use your pole to probe the ground ahead of you. Plant the pole vertically to reduce the chance of it sinking.
The "Crutch" vs. "Propulsion" Mindset
This is the single biggest mental shift you need to make.
- The "Crutch" Mentality: You are leaning heavily on your poles, using them as a crutch to support your weight. This is tiring and inefficient. Your arms are working hard, but they are not contributing to forward motion.
- The "Propulsion" Mentality: You are using your poles to actively push you forward. The poles are like an extra set of legs, driving your body along the trail. This is the efficient, powerful, and correct way to walk with poles.
Common Mistakes to Avoid
- Planting Too Late: If you plant after your foot is already on the ground, you've missed the power stroke.
- Over-Striding: Don't reach too far ahead. This strains your shoulders and reduces the power of the push.
- Planting Too Close: Planting beside or behind your foot means you're getting no propulsion.
- Swinging Your Poles in Arcs: The plant should be a straight, efficient motion. Wasting energy by swinging the poles out to the side is inefficient.
- Heavy Grip: A death grip is a sign you're using the "crutch" technique.
The Perfect Rhythm
Once you have the basics, the goal is to find a steady, rhythmic pattern.
- Start Slow: On your first few walks with poles, focus on getting the diagonal gait correct.
- Listen to Your Body: Your rhythm will feel natural when you are moving efficiently. You shouldn't be fighting the poles.
- Practice on Flat Ground: Master the technique on a flat, easy path before you take it onto steep hills.
Final Checklist
- □
- □
- □
- □
- □
Over to You
Using trekking poles correctly is a skill, but it's one that's easily learned. With a bit of practice, you'll stop thinking about the mechanics and simply move with a powerful, efficient, and fluid rhythm. Remember, the poles are not a crutch—they are an engine. (Word count: ~1,080)
What is the correct way to plant trekking poles when walking?
So, you've got a shiny new pair of trekking poles. You've adjusted the length and fiddled with the wrist straps. Now comes the moment of truth: how do you actually use them? It seems simple—you just put them on the ground, right? The short answer is yes, but the "how" is everything. A correct planting technique transforms your poles from a pair of sticks into a powerful, efficient propulsion system. This guide covers the biomechanics, the rhythm, and the specific techniques for different terrains to ensure you get the most out of your poles.
The Golden Rule: The Diagonal Gait
This is the foundational movement of trekking pole walking. It's the same rhythm your arms naturally make when you walk without poles.
Left pole with right foot; right pole with left foot.
This isn't arbitrary. This diagonal gait creates a stable, alternating rhythm that helps you maintain balance. It's the most efficient and natural way to move. When you push with your left arm, your right leg is moving forward, creating a smooth, flowing motion that reduces the load on your spine.
The "Where" of Planting
Plant the pole ahead, not beside.
This is the most common error. Many beginners plant the pole almost directly alongside their foot, or even slightly behind it. This does nothing for propulsion. It provides a bit of stability but no forward momentum.
The Correct Position:
- On Flat Ground: Place the tip of the pole on the ground roughly 30-50 cm (12-20 inches) ahead of your foot. This should feel like a comfortable, natural reach.
- At an Angle: The pole should be at a slight backward angle. The tip should hit the ground first, with the handle closer to your body.
The "How" of Planting – The "Push and Glide"
The planting action is not a single movement; it's a two-part process:
- The Plant: As your foot moves forward, the pole tip touches the ground.
- The Push: Immediately after the tip touches, you push down and back with your arm, using the strap as the primary lever. Your hand is just a guide.
- The Glide: The push propels your body forward. The momentum carries you into the next stride.
Why This Works: You are using the ground to create forward thrust. Your arms are not just moving up and down; they are actively contributing to your speed and efficiency.
The Grip and Strap Technique
Your grip is more important than you might think. A tight, clenched grip is a drain on your energy and a recipe for blisters.
- The Light Grip: Imagine you are holding a baby bird. Your grip should be firm enough to guide the pole but relaxed enough that your forearm muscles aren't straining.
- Strap Power: The strap should be the primary load-bearer. Your hand should be only a guide. Let the strap take your weight; your fingers should just be resting on the handle.
- The Follow-Through: As you push, your hand should open slightly on the backstroke, allowing the strap to pull the pole back. This saves your grip strength.
Terrain-Specific Planting Techniques
The basic technique is the same, but the angle and the purpose of the plant change with the terrain.
Uphill
- The Angle: When climbing, you are planting the pole on a slope. The pole angle needs to be steeper to push upwards.
- The Purpose: On an ascent, the plant is primarily for propulsion. You are using your arms to help pull yourself up.
- The Technique: Shorten your poles by 5-7 cm. Plant the pole firmly ahead, and push down and back to help lift your body weight up the hill.
Downhill
- The Angle: The pole is planted ahead of you, at a flatter angle, to act as a brake.
- The Purpose: On a descent, the plant is primarily for stability and braking. You are using the poles to control your speed and reduce the impact on your knees.
- The Technique: Lengthen your poles by 5-10 cm. Plant the pole ahead, push down, and use it to absorb the shock of your step. This is where the "tripod" technique (planting both poles together) is most useful.
Sidehill (Traversing)
- The Adjustments: When crossing a slope, you are walking with one foot uphill and one downhill.
- The Technique: Lengthen the downhill pole and shorten the uphill pole. This keeps your shoulders level and your weight centred, preventing you from leaning into the hill.
Muddy Ground
- The Purpose: The plant is for testing the ground and maintaining balance.
- The Technique: Use your pole to probe the ground ahead of you. Plant the pole vertically to reduce the chance of it sinking.
The "Crutch" vs. "Propulsion" Mindset
This is the single biggest mental shift you need to make.
- The "Crutch" Mentality: You are leaning heavily on your poles, using them as a crutch to support your weight. This is tiring and inefficient. Your arms are working hard, but they are not contributing to forward motion.
- The "Propulsion" Mentality: You are using your poles to actively push you forward. The poles are like an extra set of legs, driving your body along the trail. This is the efficient, powerful, and correct way to walk with poles.
Common Mistakes to Avoid
- Planting Too Late: If you plant after your foot is already on the ground, you've missed the power stroke.
- Over-Striding: Don't reach too far ahead. This strains your shoulders and reduces the power of the push.
- Planting Too Close: Planting beside or behind your foot means you're getting no propulsion.
- Swinging Your Poles in Arcs: The plant should be a straight, efficient motion. Wasting energy by swinging the poles out to the side is inefficient.
- Heavy Grip: A death grip is a sign you're using the "crutch" technique.
The Perfect Rhythm
Once you have the basics, the goal is to find a steady, rhythmic pattern.
- Start Slow: On your first few walks with poles, focus on getting the diagonal gait correct.
- Listen to Your Body: Your rhythm will feel natural when you are moving efficiently. You shouldn't be fighting the poles.
- Practice on Flat Ground: Master the technique on a flat, easy path before you take it onto steep hills.
Final Checklist
- □ Keep a light, relaxed grip.
- □ Plant the pole 30-50 cm ahead of your foot.
- □ Push down and back using the strap.
- □ Maintain the left/right diagonal rhythm.
- □ Adjust the pole length for the terrain.
Over to You
Using trekking poles correctly is a skill, but it's one that's easily learned. With a bit of practice, you'll stop thinking about the mechanics and simply move with a powerful, efficient, and fluid rhythm. Remember, the poles are not a crutch—they are an engine.




