




How to replace the carbide tip on a trekking pole?
A worn carbide tip is a safety hazard. It will slip on wet rock, reducing your grip and increasing the risk of a fall. Replacing the tip is a simple, cost‑effective maintenance task that can extend the life of your trekking poles by years. The short answer is that most tips are either screw‑in or press‑fit, and both are easy to replace with a few basic tools and a little patience. This guide covers the step‑by‑step process for both types, what tools you'll need, and some essential tips to get the job done right.
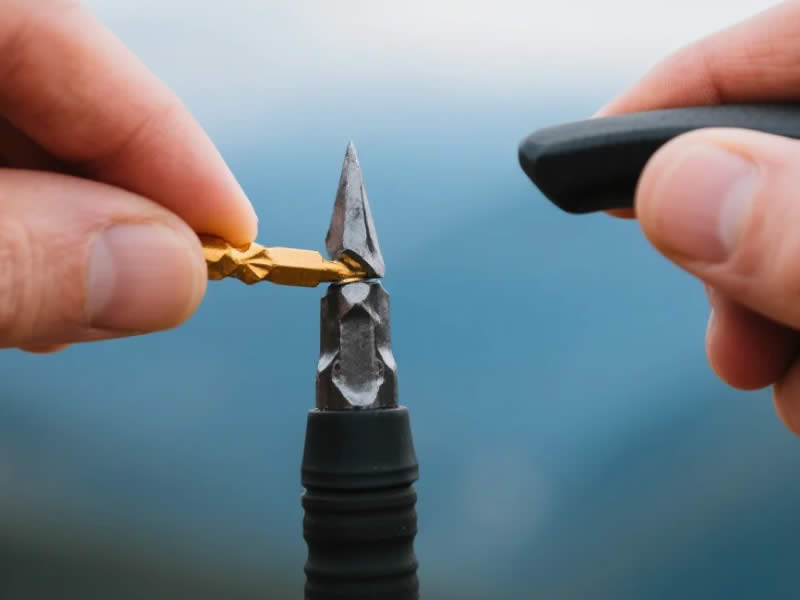
Why Replace a Worn Tip?
A carbide tip is the final point of contact between you and the ground. As it wears down, its ability to grip rock, ice, and hard-packed terrain diminishes. A worn tip will:
- Slip on wet rock – potentially causing a fall.
- Become ineffective on soft ground – failing to dig in for traction.
- Wear down the ferrule – if you continue to use a flat tip, the metal ferrule (the part the tip screws into) can start to wear against the ground, eventually damaging the pole.
The Rule: Replace the tip as soon as you see it has flattened or lost its sharp point. Don't wait until it's completely rounded off.
Identifying Your Tip Type: Screw‑In vs. Press‑Fit
Before you start, you need to know what you're dealing with. Look at the base of the tip where it meets the ferrule.
1. Screw‑In Tips
- Appearance: You'll see a visible thread on the tip, or you can see a slot on the side of the tip where a tool can grip it.
- Common Brands: Most premium poles (Black Diamond, Leki, Komperdell) use screw‑in tips.
- How They Work: They are threaded and screw into the ferrule.
2. Press‑Fit Tips
- Appearance: The tip is smooth where it meets the ferrule, with no visible threads.
- Common Brands: Some budget poles and older models use press‑fit tips.
- How They Work: They are pushed into the ferrule and held in place by friction (and often a small amount of adhesive).
How to Replace a Screw‑In Tip
What You Need:
- New screw‑in tip (ensure it matches your pole brand).
- Pliers (or a small wrench).
- A cloth (to protect the finish).
- Isopropyl alcohol (for cleaning).
Step 1: Remove the Old Tip
- Grip the tip firmly with a pair of pliers or a small wrench.
- Protect the finish – place a cloth between the pliers and the tip to prevent scratching.
- Twist counter‑clockwise (lefty‑loosey) to unscrew the old tip. It may be tight, so apply firm, steady pressure. If it's very stubborn, a squirt of penetrating oil (like WD‑40) on the thread can help.
Step 2: Clean the Threads
- Wipe the threads on the ferrule with a cloth to remove any dirt, old thread‑lock, or corrosion.
- Use a little isopropyl alcohol to ensure the surface is clean.
Step 3: Install the New Tip
- Screw the new tip on clockwise (righty‑tighty).
- Tighten it firmly by hand, then give it an extra quarter‑turn with the pliers. Do not over‑tighten—you can strip the threads.
Pro Tip: Some brands (like Leki) recommend applying a tiny drop of thread‑lock to the new tip before screwing it on to prevent it from working loose.
How to Replace a Press‑Fit Tip
Press‑fit tips require a different approach, as they are held in place by friction.
What You Need:
- New press‑fit tip.
- A mug of boiling water.
- A cloth or pliers.
- A soft‑faced hammer (or a regular hammer and a block of wood).
Step 1: Soften the Adhesive
Press‑fit tips are often secured with a small amount of glue or adhesive. The best way to soften this is with heat.
- Boil a kettle of water.
- Submerge the tip (the metal part) in the boiling water for 30‑60 seconds. This softens the glue and expands the metal slightly, making it easier to remove.
Step 2: Remove the Old Tip
- Using a cloth to protect your hands and improve your grip, pull the tip firmly to remove it. It may require some force. If it doesn't come off easily, you can use pliers with a cloth pad to protect the finish.
Step 3: Clean the Ferrule
- Dry the ferrule with a cloth.
- Clean the area with isopropyl alcohol to remove any old adhesive.
Step 4: Install the New Tip
- Position the new tip over the ferrule.
- Push it on firmly. You can do this by hand, or place a block of wood over the tip and tap it gently with a hammer until it is fully seated. You should feel it click into place.
Pro Tip: If the new tip feels a little loose, you can apply a tiny drop of superglue or a specialised adhesive to the ferrule before fitting it.
A Note on Replacement Tips
Always buy the correct tip for your pole brand. Generic tips may not have the same thread pitch or diameter, which can lead to wobbling, slipping, or damage.
- Black Diamond: Use genuine Black Diamond FlickLock tips.
- Leki: Use genuine Leki tips (often labelled "Flex Tip").
- Komperdell: Use genuine Komperdell tips.
- Decathlon: Use their own-brand replacement tips.
Pro Tips and Tricks
The "Boiling Water" Trick
This works for both screw‑in and press‑fit tips. Submerging the tip in boiling water softens any adhesive and expands the metal, making removal significantly easier.
Stubborn Screw‑In Tips
If a screw‑in tip is completely stuck, you can try:
- Penetrating Oil: Apply a few drops of penetrating oil and leave it for 10 minutes.
- Heat: Use a hairdryer to warm the ferrule. The heat will expand the metal, freeing the thread.
Testing the New Tip
After fitting the new tip, give the pole a firm push on a hard surface to ensure it is secure. If it wobbles or feels loose, it's not properly seated.
When to Replace the Tip
Check the tip before every walk. The moment you see any flattening of the carbide point, it's time to order a replacement. A worn tip is a false economy—the cost of a replacement tip is small compared to the risk of a fall on a wet descent.
Final Checklist
- □ Identify the tip type (screw‑in or press‑fit).
- □ Purchase the correct replacement for your pole brand.
- □ Use the boiling water trick for stubborn tips.
- □ Clean the threads/ferrule thoroughly.
- □ Fit the new tip securely (screw in or press firmly).
- □ Test the pole on a hard surface.
Over to You
Replacing a worn carbide tip is one of the simplest and most important maintenance tasks for your trekking poles. It's a five-minute job that can significantly improve your safety on the hill. With the right tools and a little patience, you can extend the life of your poles and ensure they perform reliably for many more miles.




