


How to Adjust Hiking Poles for Height
Getting the correct pole length is not a mere detail—it’s the foundation of reaping the full benefits of your trekking poles. Properly adjusted poles maximize efficiency, enhance stability, and prevent strain on your joints. If your poles are set too long or too short, you risk discomfort, reduced effectiveness, and even injury. This guide will walk you through the simple, precise steps to find your perfect fit for any terrain.
Recommended trekking pole purchase link: https://s.click.aliexpress.com/e/_c4M7OWaN
The Golden Rule: The 90-Degree Elbow Angle
The standard starting point for adjusting hiking poles is to achieve a 90-degree bend at your elbow when the pole tip is planted on the ground directly beside your foot.
Step-by-Step Process:
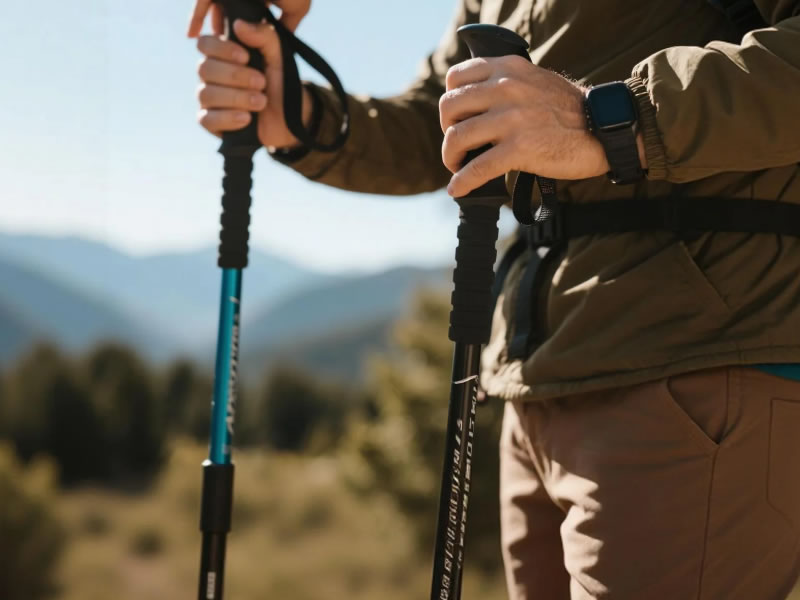
- Loosen the locks: Extend all telescoping sections of your pole, but do not lock them yet.
- Grip the handle: Hold the pole in your hand, placing your hand under the strap (threading your hand up from the bottom).
- Plant the tip: Stand upright on level ground and let the pole tip touch the ground directly beside your foot.
- Adjust and check: With your arm hanging naturally at your side, adjust the pole length until your elbow forms a perfect right angle (90 degrees). Your forearm should be parallel to the ground.
- Secure the locks: Tighten the locking mechanisms firmly. Most modern lever locks (FlickLock type) provide a clear, secure feel. If using twist locks, ensure they are very snug to prevent slippage.
Terrain-Specific Adjustments: Adapting for the Trail
The "90-degree rule" is your baseline for flat terrain. True mastery comes from dynamically adjusting for ascents and descents.
- For Uphill Sections: Shorten your poles by 5-10 cm (2-4 inches). A shorter pole prevents you from overreaching and allows for a powerful push-off behind you, engaging your triceps and chest to propel you upward with less leg strain.
- For Downhill Sections: Lengthen your poles by 5-10 cm (2-4 inches). Longer poles help you plant your tip further ahead and below you, creating better stability and allowing you to control your descent. They let your arms absorb more impact, significantly reducing the brutal braking force on your knees and quadriceps.
Pro Tips and Common Mistakes to Avoid
- Adjust from the Top Section First: Most three-section poles have length markings. Adjust the top section first for large changes, then fine-tune with the lower section.
- Keep Sections Equal: Ensure both poles are adjusted to the same length and that the exposed portion of each telescoping section is roughly equal for balanced strength.
- Re-check Frequently: On long hikes with varied terrain, get in the habit of making quick adjustments at the base of a major climb or descent.
- Avoid the "T-Rex" or "Reaching" Arm Positions: A too-short pole forces your arms into an inefficient, bent position ("T-Rex"). A too-long pole overextends your arm, eliminating the helpful 90-degree angle and reducing control.
- Use Your Straps Correctly: Proper strap use is part of the adjustment. Your weight should transfer through your palm to the strap, not through a tight grip. This allows for effective power transfer regardless of minor length variations.
Conclusion: Adjustment is an Active Skill
Learning how to adjust your hiking poles for height is a fundamental skill that transforms them from simple sticks into active tools for propulsion and protection. By starting with the 90-degree elbow rule on flat ground and then intelligently shortening for uphills and lengthening for downhills, you align your body for optimal biomechanical efficiency.
Take a moment before your next hike to practice these adjustments. Your shoulders, knees, and overall hiking endurance will thank you as you move more confidently and comfortably over every mile of your journey.


