


Proper Hiking Pole Length Calculator: Your Key to Comfort and Power on the Trail
Using hiking poles is one of the easiest ways to enhance your stability, speed, and endurance on the trail. However, their benefits are entirely dependent on one critical factor: using the correct length. An improperly sized pole can lead to wrist, shoulder, and elbow pain, and it robs you of the power and stability you're seeking. This guide will serve as your comprehensive "hiking pole length calculator," explaining the proven methods to find your perfect fit for any terrain.
Recommended trekking pole purchase link: https://s.click.aliexpress.com/e/_c4M7OWaN
The Gold Standard: The 90-Degree Rule
The most reliable and widely recommended method for calculating hiking pole length is the 90-Degree Rule. This simple technique ensures your body is in a biomechanically efficient position for walking on flat ground.
How to do it:
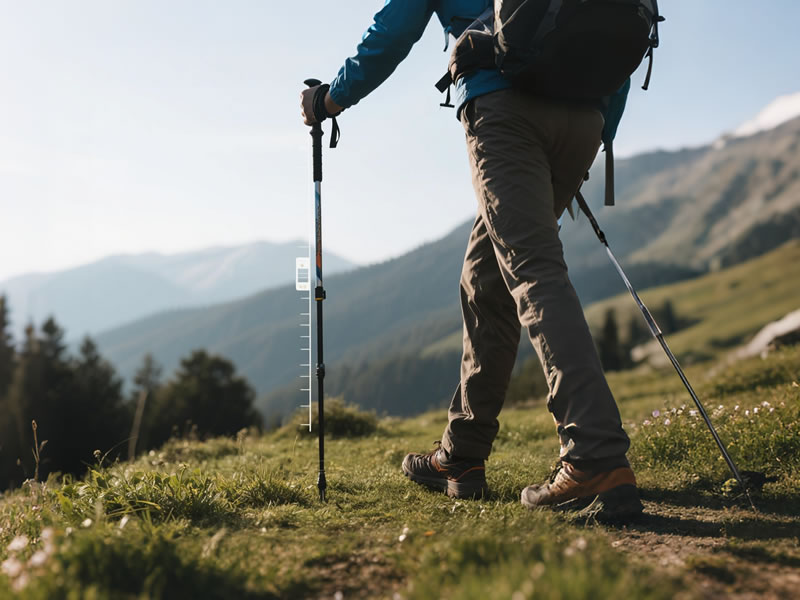
- Stand upright on a level surface wearing your regular hiking shoes.
- Hold the pole with your hand through the wrist strap, gripping the handle.
- Place the tip of the pole on the ground directly beside your foot.
- Your elbow should be bent at a perfect 90-degree angle, forming an "L" shape.
If your elbow is bent more than 90 degrees, the pole is too short. If it's bent less, the pole is too long. This position allows for an effective arm swing and optimal power transfer without straining your joints.
The Quick Math Formula: A Great Starting Point
If you don't have adjustable poles in hand yet, you can use a simple mathematical formula to get a very accurate estimate of your ideal pole length.
The Formula: Your Height (in inches) x 0.68 = Pole Length (in centimeters)
For example, a person who is 5'10" (70 inches) would calculate: 70 x 0.68 = 47.6 inches. This converts to approximately 121 cm.
This calculation is remarkably consistent with the 90-degree rule and provides an excellent baseline number to set your adjustable poles to before fine-tuning.
The On-Trail Test: Fine-Tuning Your Fit
While the 90-degree rule is perfect for flat terrain, a true "hiking pole length calculator" must account for the varying angles of the trail. This is where adjustable poles shine.
- For Uphill Sections: Shorten your poles. This allows you to maintain an upright posture and push off effectively without overreaching behind you. A reduction of 5-10 cm (2-4 inches) is often ideal for steep ascents.
- For Downhill Sections: Lengthen your poles. This is crucial for reducing the impact on your knees and improving stability on the descent. The longer pole acts as a reliable outrigger, allowing you to place your tip securely while keeping your body more upright. An increase of 5-10 cm (2-4 inches) is common.
A good practice is to stop at the top of a climb to lengthen your poles for the descent, and vice-versa.
Common Mistakes to Avoid
- Setting Poles Too Long: This forces your shoulders to hunch, leading to muscle fatigue and strain.
- Ignoring the Wrist Strap: The proper technique is to slide your hand up through the strap from below, then grip the handle. The strap, not your grip, should bear most of the weight. This prevents tendon strain in your wrists.
- Forgetting to Re-Adjust: Using the same length for all terrain negates a key benefit of adjustable poles. Make adjustments a habit.
Conclusion: Your Personalized Fit
Think of this guide as your dynamic hiking pole length calculator. Start with the 90-degree rule or the height formula to establish your baseline for flat ground. Then, embrace the power of adjustment on the trail to conquer hills with greater ease and protect your joints. Taking a few moments to dial in the perfect length will transform your hiking poles from simple sticks into powerful, trail-taming tools that enhance every step of your journey.


