


How to use hiking poles to reduce impact on knees downhill
For many hikers, the descent is the most punishing part of the journey. Each step downhill sends a shockwave of impact through your knees, quads, and joints, often leading to soreness, fatigue, and long-term wear. However, your hiking poles are powerful tools that can dramatically mitigate this strain. When used correctly, they transform your upper body into a shock-absorbing system, effectively reducing the load on your lower body by up to 25%. This guide will walk you through the precise techniques to master the art of the knee-saving descent.
Recommended trekking pole purchase link: https://s.click.aliexpress.com/e/_c4M7OWaN
The Science of Saving Your Joints
When you walk downhill, your knees and quadriceps act as brakes, eccentrically contracting to control your descent. This places immense strain on the knee joints and surrounding muscles. Hiking poles intervene in two crucial ways:
- Load Distribution: They transfer a significant portion of your body weight from your legs to your arms, shoulders, and back.
- Shock Absorption: By planting the poles ahead of you, they create additional points of contact that absorb and dissipate the energy of each step before it travels up your legs.
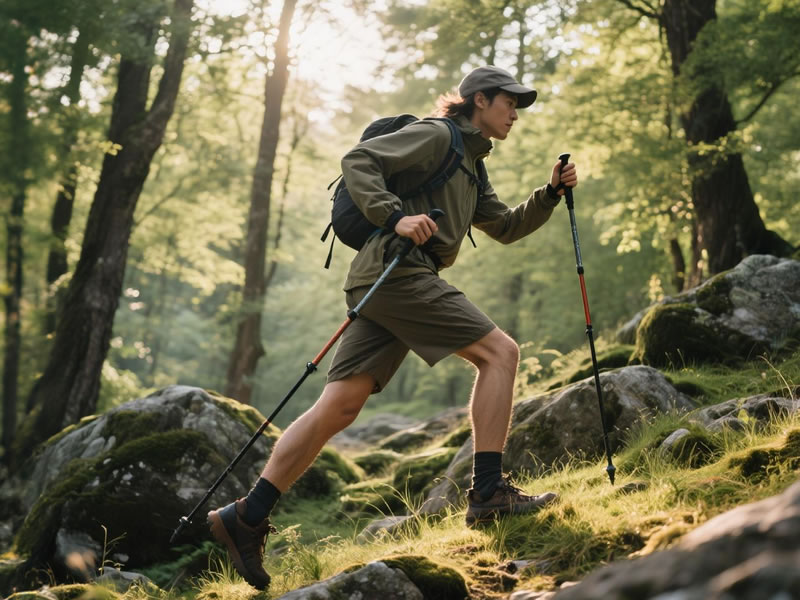
The Two Critical Adjustments for Downhill Technique
1. Lengthen Your Poles for a Proper Upright Posture
On flat ground, your elbows are at a 90-degree angle. For a descent, this is no longer sufficient.
- The Adjustment: Lengthen your poles by 5-10 cm (2-5 inches) from your flat-ground setting.
- The Reason: A longer pole allows you to plant the tip on the trail ahead of you and downhill while maintaining an upright torso. If your poles are too short, you'll be forced to lean forward into a hunched, unstable position, which is less effective and can be dangerous.
2. Master the "Tripod" Planting Rhythm
The core technique for downhill stability is creating a stable "tripod" with your two poles and one foot.
- The Sequence: As you begin a step down, plant both pole tips firmly on the ground ahead of you, slightly wider than your body for stability. They should be far enough ahead that you can comfortably lean your weight onto them.
- The Movement: Step forward with your foot, landing between or just behind the planted poles. As your foot makes contact, your arms are already bearing weight, softening the landing.
- The Rhythm: The pattern is Poles, then Step. This rhythmic planting ensures your poles are always in place to catch your weight, turning a jarring step into a controlled, three-point landing.
Advanced Techniques for Maximum Effectiveness
- The "Double Plant" for Steep or Technical Sections: On very steep or loose terrain, use a deliberate double plant for each step. Plant both poles, take one careful step down, then re-plant both poles again. This maximizes stability and control for every single footfall.
- Push and Glide: Don't just use the poles for balance; use them for propulsion. As you transfer your weight onto the planted poles, give a slight push, which will help "lift" your body weight slightly and slow your forward momentum. This gliding motion further reduces the braking force required by your quads.
- Engage Your Core and Shoulders: The power should come from your larger back and shoulder muscles, not just your biceps. Keep a firm but relaxed grip on the poles, using the wrist straps correctly to transfer force through your skeleton.
Common Mistakes That Reduce Effectiveness
- Poles Too Short: The most common error, leading to a hunched posture and ineffective weight transfer.
- Tapping Instead of Planting: A tentative tap won't provide support. Commit to a firm, weighted plant with each placement.
- Ignoring the Wrist Straps: As covered in our uphill technique guide, you must slide your hand up through the strap and grip the handle. This allows you to push down through your palm without a death grip, leveraging the pole's design for efficient force transfer.
- Planting Too Close: If the poles are planted right next to your feet, they act as simple canes rather than load-bearing anchors. Plant them far enough ahead to create a meaningful lever.
Conclusion: Descend with Confidence and Comfort
Mastering the downhill use of your hiking poles is one of the highest-return skills you can develop on the trail. It’s not just about avoiding next-day soreness; it's about preserving the long-term health of your knees, enabling you to hike farther, tackle more challenging terrain, and enjoy the journey back down as much as the climb up. By lengthening your poles, adopting the "tripod" rhythm, and actively pushing to unload your legs, you turn a jarring, painful descent into a controlled, confident, and knee-friendly glide to the bottom. Your joints will thank you for miles to come.


