


How to Sharpen Walking Pole Tips: Restoring Grip and Safety
The carbide tips on your walking poles are the critical point of contact between you and the trail. Over miles of rocky terrain, these hard-wearing tips gradually become smooth and rounded, compromising your stability and safety on slippery surfaces. While replacement is the ultimate solution, sharpening can effectively extend their life and restore crucial traction. This comprehensive guide will walk you through the entire process, from assessing when sharpening is appropriate to executing the perfect edge restoration, ensuring your next step is a secure one.
Recommended trekking pole purchase link: https://s.click.aliexpress.com/e/_c4M7OWaN
Understanding Carbide Tips: The Why Behind the Process
Before reaching for a file, it's important to understand what you're working with. The "tip" is actually a composite: a tough steel casing with a much harder tungsten carbide insert pressed into the end. Carbide is exceptionally resistant to wear, but it eventually succumbs to abrasion. Sharpening aims to re-establish a sharp, angled edge on this carbide insert, not the surrounding steel.
Assessment: When to Sharpen vs. When to Replace
Knowing when to sharpen and when to simply install a new tip is crucial for your safety.
Sharpen When:
- The carbide tip is still substantial but has visibly rounded edges.
- The tip fails to "bite" confidently on hard rock or slick surfaces.
- You notice a decrease in traction but the carbide insert is not yet flush with the steel collar.
Replace When:
- The carbide insert is cracked or chipped.
- The insert is worn down completely and is flush with or recessed into the steel casing.
- More than 30-40% of the original carbide height is gone. Sharpening a severely worn tip will only shorten its lifespan further.
Gathering Your Sharpening Toolkit
You don't need specialized equipment. A few basic tools will suffice:
- Vise or a Stable Work Surface: Essential for securing the pole safely.
- Metal File: A medium-grit, single-cut file is ideal. A diamond-coated file will also work very well and lasts longer.
- Safety Glasses: Non-negotiable. Carbide and metal filings can easily damage your eyes.
- Rag or Paper Towels: For cleaning up.
- Light Source (Optional): Good lighting helps you see the angle and progress clearly.
The Step-by-Step Sharpening Process
Follow these steps for a safe, effective sharpening session:
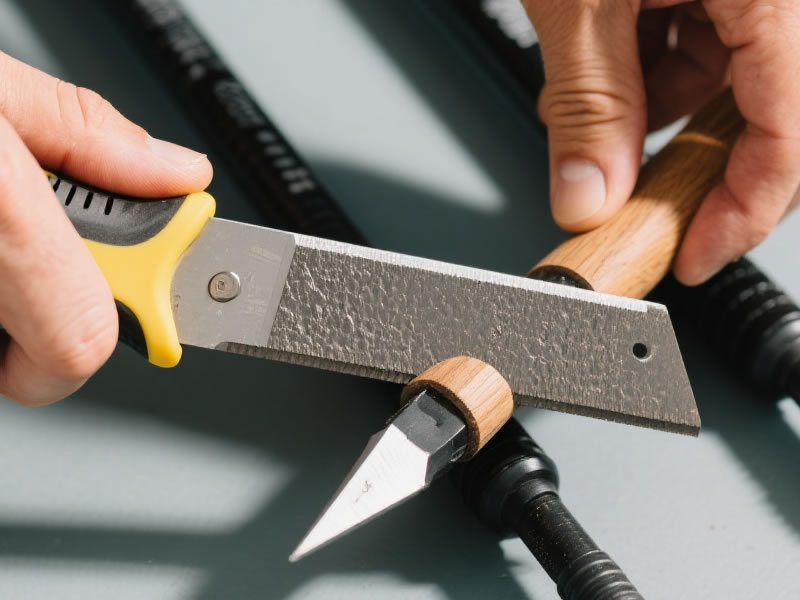
Step 1: Secure the Pole
Clamp the pole shaft securely in a vise. If you don't have a vise, brace it firmly against a solid workbench. The tip must not move during filing. Pad the vise jaws with cloth or rubber to prevent damaging the pole's finish.
Step 2: Identify the Original Angle
Observe the tip closely. Most come from the factory with a beveled edge at approximately 45-60 degrees. Your goal is to replicate this existing angle, not create a new, needle-sharp point.
Step 3: The Filing Technique
This is the most critical step. Consistency is key.
- Hold the file against the carbide tip at the original angle.
- Using moderate pressure, push the file across the tip in one direction only—away from the pole shaft and away from your body. Do not use a back-and-forth sawing motion.
- Make 3-5 strokes on one section of the tip, then rotate the pole slightly.
- Repeat this process, filing and rotating, until you have worked your way evenly around the entire circumference of the tip.
Step 4: Check Your Progress
Frequently stop to visually inspect and feel the edge with your thumb (carefully!). The goal is a uniform, sharp edge around the entire tip, not a perfectly pointed one.
Step 5: Clean Thoroughly
Once sharpened, wipe the tip vigorously with a rag to remove all metal and carbide dust. These fine particles can be harmful if left on the tip.
Common Mistakes to Avoid
- Over-filing: The most common error. Remove only as much material as necessary to restore the edge. Each sharpening session shortens the tip's overall lifespan.
- Ignoring the Angle: Creating multiple angles or a rounded point will reduce the tip's effectiveness and structural integrity.
- Sawing Motion: A back-and-forth motion is less effective and can damage your file. The one-directional push cut is far more efficient.
- Skipping Safety Gear: Always, always wear safety glasses.
Pro Tips for Longevity and Performance
- The Nail Test: A freshly sharpened tip should lightly catch on your fingernail when dragged across it.
- File Maintenance: Clean your metal file with a file card or wire brush after use to keep it cutting effectively.
- Know Your Limits: View sharpening as a temporary measure to extend the life of a moderately worn tip. Have a set of replacement tips on hand for when the time comes.
Conclusion: A Skill for the Prepared Hiker
Knowing how to properly sharpen your walking pole tips is a valuable skill that bridges the gap between a new tip and a completely worn-out one. It enhances safety by restoring critical trail grip and is a testament to maintaining your own equipment. By following this guide—emphasizing the correct angle, a controlled filing technique, and, most importantly, knowing when to stop and replace—you can confidently keep your poles in peak condition. Remember, a sharp tip is a safe tip, and this simple maintenance task ensures your trusted poles remain reliable partners on every adventure.


