


Walking Pole Rubber Feet Replacement: The Complete Guide to Better Grip and Trail Etiquette
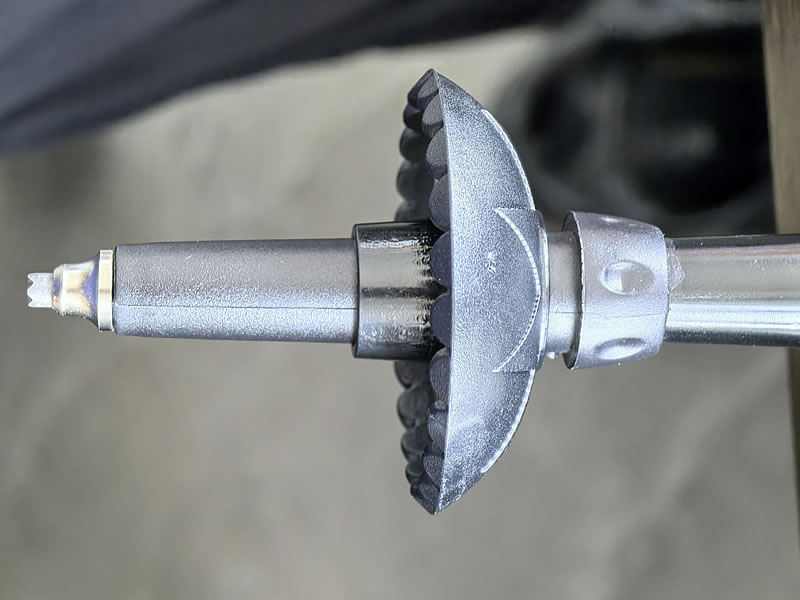
Those small rubber tips on your trekking poles might seem insignificant, but they play a crucial role in your hiking experience and trail preservation. While the exposed carbide tip is essential for dirt and rock, rubber feet provide grip on hard surfaces and protect delicate floors. Over time, these rubber feet wear down, crack, or get lost, compromising your safety and increasing your environmental impact. This comprehensive guide will walk you through everything you need to know about walking pole rubber feet replacement, from identifying wear to proper installation techniques.
Recommended trekking pole purchase link: https://s.click.aliexpress.com/e/_c4M7OWaN
Understanding the Purpose: More Than Just a Rubber Cap
Rubber feet, also known as rubber tips or road tips, serve multiple important functions:
- Enhanced Grip on Hard Surfaces: On smooth rock, pavement, or boardwalks, carbide tips can slip dangerously. Rubber feet provide the necessary friction for secure footing.
- Noise Reduction: The constant "click-clack" of metal on rock or pavement is eliminated with rubber tips, creating a more peaceful hiking experience.
- Floor Protection: When entering buildings or using your poles for urban walking, rubber feet prevent scratches and damage to hardwood, tile, or other finished surfaces.
- Trail Preservation: On sensitive or eroded trails, rubber feet minimize further damage that can be caused by aggressive carbide tips.
Identifying When Replacement Is Necessary
Don't wait until a slip on a wet rock signals that your rubber feet need replacing. Watch for these signs:
- Visible Cracks or Splits: Any cracking in the rubber compromises its integrity and grip capability.
- Worn-Out Soles: The tread pattern is completely smooth, or the rubber has become thin and uneven.
- Loss of Elasticity: The rubber no longer snaps back to shape when pressed and feels hard or brittle.
- Difficulty Staying On: If the foot frequently falls off during use, the internal grip has been compromised.
- Visible Metal: If you can see the carbide tip protruding through the bottom, replacement is overdue.
Choosing the Right Replacement Feet
Not all rubber feet are universal. Consider these factors when selecting replacements:
- Size and Fit: Rubber feet come in different sizes, typically measured by the diameter of the pole tip they fit. Common sizes range from 12mm to 18mm. Check your pole manufacturer's specifications or measure your existing feet.
- Material Quality: Look for durable, high-quality rubber that offers good flexibility and traction. Softer rubber generally provides better grip but may wear faster.
- Design Features: Some replacement feet feature enhanced tread patterns for better traction, reinforced collars for durability, or ventilation holes to prevent suction on flat surfaces.
- Brand Compatibility: While universal options exist, manufacturer-specific replacements (from brands like Black Diamond, Leki, or Komperdell) often provide the best fit and performance.
Step-by-Step Replacement Process
Replacing walking pole rubber feet is typically a simple, tool-free process:
- Remove the Old Foot: Grip the old rubber foot firmly and pull straight off the metal tip. If it's stuck, a slight twisting motion while pulling can help break the seal. Avoid using tools that might damage the carbide tip.
- Clean the Tip: Wipe the carbide tip thoroughly with a cloth to remove any dirt, sand, or old rubber residue. A clean surface ensures the new foot will adhere properly.
- Install the New Foot: Align the new rubber foot with the carbide tip and press firmly until it seats completely. You should feel and hear a distinct "snap" or "pop" when it's fully seated.
- Security Check: Gently try to twist and pull the rubber foot to ensure it's securely attached. It shouldn't rotate freely or come off with moderate pressure.
Troubleshooting Common Installation Issues
- Loose Fit: If the new foot feels loose or falls off easily, the size may be incorrect. Alternatively, a small wrap of electrical tape around the carbide tip can create a tighter fit.
- Difficulty Installing: If the foot won't slide on completely, try warming it briefly with warm water to increase flexibility, then attempt installation again.
- Incompatible Shape: Some pole tips have unique shapes that require specific model replacements. Consult your pole's manual or manufacturer website for guidance.
Maintenance Tips for Extended Lifespan
- Regular Inspection: Check your rubber feet before each hike for signs of wear or damage.
- Proper Storage: Store poles in a cool, dry place away from direct sunlight, which can accelerate rubber deterioration.
- Clean After Use: Remove dirt and debris from the rubber feet after hiking to prevent abrasive wear.
- Carry Spares: Always keep an extra set of rubber feet in your repair kit or backpack for trailside replacements.
When to Use Rubber Feet vs. Bare Tips
Understanding when to use each option will maximize both performance and trail etiquette:
- Use Rubber Feet On:Pavement, asphalt, and urban environmentsSmooth rock surfacesBoardwalks and wooden structuresIndoor spaces and visitor centersSensitive or heavily eroded trails
- Use Bare Carbide Tips On:Dirt and forest trailsLoose gravel and screeIce and hard-packed snow (with baskets)Muddy conditions where rubber feet might get stuck
Conclusion: A Small Investment with Significant Returns
Replacing your walking pole rubber feet is one of the simplest yet most impactful maintenance tasks you can perform. With fresh rubber feet properly installed, you'll enjoy better traction on hard surfaces, contribute to trail preservation, and extend the life of your carbide tips. By understanding the replacement process, choosing quality components, and knowing when to use them, you elevate yourself from a casual hiker to a conscientious outdoor enthusiast. Keep those spare feet in your pack, and you'll never be caught without this essential piece of hiking equipment when you need it most.


