


Cleaning Mud from Walking Poles: The Ultimate Guide to Proper Maintenance
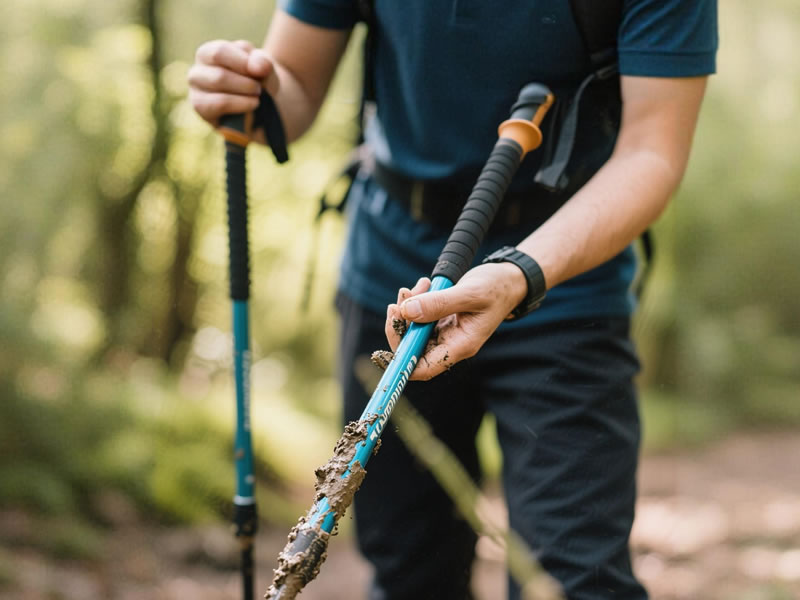
There's nothing quite like the satisfaction of a good hike through challenging terrain - until you look down at your trekking poles caked in mud. While a little dirt might seem harmless, neglecting proper cleaning can lead to serious consequences: corroded locking mechanisms, damaged shaft coatings, and compromised performance when you need it most. Mud isn't just unsightly; it's abrasive, retains moisture, and can hide small cracks or defects in your equipment. This comprehensive guide will walk you through the complete process of cleaning mud from walking poles, ensuring they remain reliable partners for countless adventures to come.
Recommended trekking pole purchase link: https://s.click.aliexpress.com/e/_c4M7OWaN
Why Immediate Cleaning Matters: Beyond Aesthetics
Many hikers postpone cleaning their gear, but mud presents specific threats that make timely attention crucial:
- Abrasive Damage: Dried mud contains fine mineral particles that act like sandpaper against pole shafts and components, gradually wearing away protective coatings and potentially compromising structural integrity.
- Corrosion Catalyst: Moisture trapped in mud against metal components - particularly in locking mechanisms and connection points - accelerates corrosion. This can lead to seized adjustments and eventual failure.
- Hidden Damage: A layer of mud can conceal small cracks, bent sections, or other damage that might worsen if not addressed promptly.
- Hygiene Concerns: Mud often contains organic matter and bacteria that can degrade materials and create unpleasant odors over time.
Essential Cleaning Supplies You'll Need
Gather these items before starting for an efficient cleaning process:
- Soft-bristled brush (an old toothbrush works perfectly)
- Mild dish soap or specialized gear cleaner
- Lukewarm water
- Soft cloth or sponge
- Compressed air (optional, for drying mechanisms)
- Dry microfiber towel
- Silicone-based lubricant (for post-cleaning maintenance)
The Step-by-Step Cleaning Process
Step 1: Initial Dry Brushing
Begin by removing excess mud while it's still dry. Use your soft-bristled brush to dislodge large chunks of dried mud from the poles, paying special attention to basket connections, locking mechanisms, and grip textures. This preliminary step prevents creating unnecessary mud slurry during wet cleaning.
Step 2: Disassemble Components
Remove all detachable parts:
- Take off rubber feet if present
- Remove baskets
- Separate pole sections completely
- Detach wrist straps if possible
This ensures you can clean each component thoroughly, especially crucial connection points where mud tends to accumulate.
Step 3: Warm Soapy Wash
Create a mild cleaning solution with lukewarm water and a small amount of dish soap. Avoid hot water, which can damage pole coatings and adhesives. Using your soft cloth or sponge, gently wipe down all pole sections, focusing on one at a time. For textured grips, use your soft-bristled brush to work the soapy solution into the patterns.
Step 4: Deep Clean Locking Mechanisms
This is the most critical step for long-term functionality:
- For twist locks: Extend the mechanism and use your brush to carefully remove debris from both the internal expander and the shaft interior.
- For lever locks: Open the mechanism fully and brush away accumulated grit from all moving parts and contact surfaces.
- Rinse thoroughly with clean water, ensuring no soap residue remains.
Step 5: Thorough Rinsing
Rinse all components with clean water, ensuring all soap and loosened debris is completely washed away. Pay special attention to ensure no grit remains in locking mechanisms or between collapsible sections.
Step 6: Complete Drying
Proper drying prevents moisture-related damage:
- Shake poles vigorously to remove excess water
- Wipe with a dry microfiber towel
- Allow to air dry completely extended in a well-ventilated area away from direct heat
- Use compressed air to blast moisture from hard-to-reach areas in locking mechanisms
Step 7: Post-Cleaning Maintenance
Once completely dry:
- Apply a small amount of silicone-based lubricant to locking mechanisms
- Check that all components are functioning properly
- Reinstall baskets, rubber feet, and reassemble poles
Special Considerations for Different Materials
Carbon Fiber Poles:
- Avoid abrasive brushes or scrubbing pads that could scratch the surface
- Never use harsh chemicals that might degrade resin coatings
- Inspect carefully for any hairline cracks that might have been hidden by mud
Aluminum Poles:
- Watch for oxidation spots that might indicate coating damage
- Ensure complete drying to prevent corrosion between sections
Cork Grips:
- Clean gently to avoid removing the natural cork surface
- Don't oversaturate, as water can degrade adhesive bonds
Rubber Grips:
- Use brush to clean deeply into texture patterns
- Ensure complete drying to prevent slippery surface
Common Cleaning Mistakes to Avoid
- Using High-Pressure Water: Forceful streams can drive mud deeper into mechanisms and damage protective coatings.
- Harsh Chemicals: Bleach, ammonia, or strong solvents can degrade pole materials, adhesives, and protective coatings.
- Incomplete Drying: Storing poles while damp invites corrosion and mold growth.
- Wire Brushes or Abrasive Pads: These can permanently scratch shafts and damage anodized coatings.
- Neglecting Internal Sections: Failing to clean and dry the interior of collapsible poles can lead to internal corrosion and difficult adjustment.
Establishing a Cleaning Routine
Make pole cleaning part of your regular post-hike ritual:
- After every muddy hike: Perform a complete clean following the steps above
- After dry hikes: Wipe down with a damp cloth and check mechanisms
- Monthly during active season: Deep clean and lubricate mechanisms
- End of season: Comprehensive cleaning, inspection, and proper storage preparation
Conclusion: Preservation Through Proper Care
Cleaning mud from your walking poles isn't just about maintaining their appearance - it's an essential practice that preserves functionality, ensures safety, and significantly extends your equipment's lifespan. The thirty minutes spent properly cleaning your poles after a muddy adventure pays dividends in reliable performance when you need it most. By incorporating these cleaning techniques into your regular gear maintenance routine, you're not just removing dirt; you're investing in the longevity of your equipment and ensuring your poles remain trusted companions for every step of your journey. Remember: well-maintained gear rarely fails when you need it most.


