


How to Test Walking Poles for Safety Before Use?
Your trekking poles are your first line of defense against fatigue and injury on the trail, but their reliability is not guaranteed. A sudden failure during a steep descent or a river crossing can turn a pleasant hike into a dangerous emergency. Conducting a thorough pre-hike safety inspection is a non-negotiable ritual that takes only minutes but can prevent catastrophic equipment failure. This guide outlines a systematic approach to testing your poles, ensuring they are ready to provide the support you depend on.
Recommended trekking pole purchase link: https://s.click.aliexpress.com/e/_c4M7OWaN
A comprehensive safety check involves five key areas: a visual inspection, a mechanical test of the locking systems, a structural stress test, a component check, and a final on-trail verification.
1. The Visual and Tactile Inspection
Before extending the poles, give them a close look and feel.
- Shaft Integrity: Run your hands along the entire length of each shaft, feeling for any bumps, bends, or cracks. Pay special attention to:Carbon Fiber Poles: Look for any cracks, chips, or deep scratches that look white or frayed. These can be stress concentrators that lead to a sudden break.Aluminum Poles: Look for sharp bends or dents. A slight curve might be acceptable if it doesn't affect performance, but a sharp kink is a point of failure.
- Grips and Straps: Check that the grips are secure and not rotating unexpectedly. Inspect the straps for fraying, rotten stitching, or cracked plastic buckles.
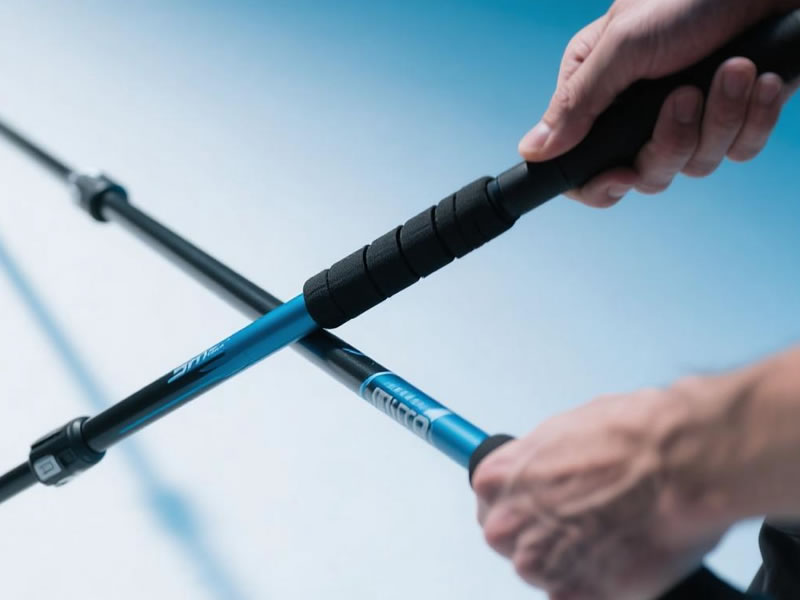
2. The Locking Mechanism Test
This is often the weakest point and deserves rigorous testing.
- Extension and Collapse: Extend and collapse each section smoothly. They should move without sticking or grating.
- Lever Lock Test: For poles with external lever locks (FlickLocks, etc.), ensure the lever moves firmly and locks into place with a definitive click. Open and close the lever several times to confirm it maintains tension.
- Twist Lock Test: For twist locks, tighten the mechanism until it is snug. Then, attempt to collapse the section by applying direct downward force without untwisting it. It should not budge. If it slips, the lock may be worn or dirty and requires cleaning or replacement.
- Stress Test the Locks: Once all sections are extended and locked, place the pole on the ground at a hiking angle and lean your body weight onto it. Listen for any creaking or clicking sounds and watch for any sudden slippage in the locks.
3. The Structural Load Test
This simulates the forces experienced on the trail.
- The Flex Test: Hold the pole horizontally with both hands, about shoulder-width apart. Gently apply pressure to bend it slightly. You should feel a consistent, springy resistance. Any audible cracking or a feeling of "giving way" is a major red flag. Be very gentle with carbon fiber, as it can fail catastrophically.
- The "Catch Your Weight" Test: In a safe, open area, plant the pole firmly and use it to catch a significant portion of your body weight as you take a large step forward. This dynamic test is the ultimate check for both the shaft and the locking mechanisms under real-world conditions.
4. Component and Accessory Check
- Tips: Ensure the tungsten carbide tips are secure and not worn down to a smooth nub. Check that any removable rubber tips are present and not torn.
- Baskets: Verify that baskets are snapped on securely and are not cracked or deformed.
5. The Final On-Trail Verification
Even after passing all static tests, the first few minutes of your hike serve as a final verification. Use the poles normally on flat, non-critical ground. Pay attention to how they feel. Is there any unexpected flex, vibration, or noise? If anything feels off, stop and re-inspect.
Conclusion: A Ritual for Reliability
A thorough pre-hike test is a small investment in your safety. By incorporating this five-step checklist into your routine, you develop an intimate understanding of your gear's condition. You'll be able to identify wear and tear early, before it becomes a critical failure. This proactive approach ensures that your trekking poles remain the trustworthy partners they are designed to be, providing confidence and stability with every step you take on the trail.


