


Hiking Poles for Winter Hiking: Essential Gear for Snow, Ice, and Safety
Winter transforms familiar trails, blanketing them in snow and ice and presenting a unique set of challenges: hidden obstacles, uneven footing, deep post-holing, and treacherous, slick surfaces. In these conditions, a reliable pair of hiking poles transitions from a helpful aid to an absolute non-negotiable piece of safety equipment. However, not all poles are created equal for winter duty. Specialized features and adjustments are required to ensure they perform when temperatures drop and the terrain becomes unforgiving.
Recommended trekking pole purchase link: https://s.click.aliexpress.com/e/_c4M7OWaN
The Core Winter Advantages: More Than Just Balance
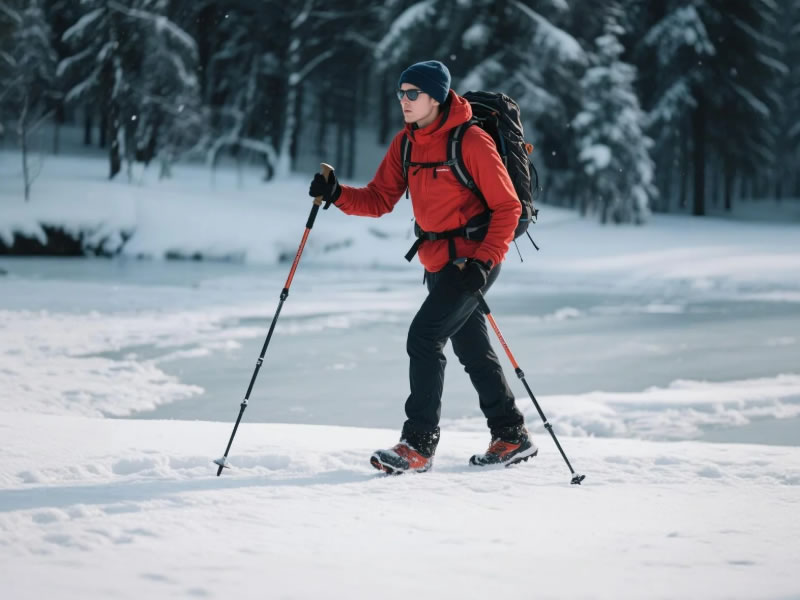
- Stability on Unstable Surfaces: Poles provide critical probes and anchors in deep, unconsolidated snow. They help you test snow depth and firmness before committing your weight, preventing nasty post-holes up to your thigh.
- Power and Flotation Aid: When paired with snowshoes, poles engage your upper body to propel you forward, conserving leg energy. They provide essential leverage for climbing steep, snowy slopes.
- Crucial Support on Ice: On icy trails, a planted pole can be the difference between a controlled step and a dangerous fall. They offer a secure, third or fourth point of contact, vastly improving confidence and security.
- Reduced Joint Strain: Descending hard-packed snow or icy inclines is brutal on knees. Properly lengthened poles act as braking and shock-absorbing tools, distributing impact to your arms and shoulders.
Key Features for Winter-Ready Poles
Your three-season poles may suffice for a light dusting, but dedicated winter use demands specific upgrades.
- Snow Baskets: The Mandatory UpgradeThe small, plastic "summer" baskets that come standard are useless in snow. They allow the pole to sink in deeply, often past the grip. You must equip large, round winter snow baskets (typically 4-5 inches in diameter). These distribute the pole's pressure over a wider area, keeping the shaft and grip above the snow surface for effective use.
- Locking Mechanism: Lever Locks are Non-NegotiableAvoid twist-lock mechanisms at all costs for winter. Moisture can freeze inside the mechanism, locking it shut or making it impossible to tighten. External lever locks (FlickLocks) are the only reliable choice. They are mechanically simple, can be operated with gloves, and are far less likely to freeze solid. If they do ice up, they are easier to free with a firm tap.
- Shaft Material: Durability Over Ultralight WeightWhile carbon fiber is light, aluminum (particularly 7075 alloy) is the superior winter choice. Aluminum is more impact-resistant against hidden rocks and ice, performs consistently in extreme cold (carbon can become more brittle), and is easier to de-ice. The slight weight penalty is worth the immense gain in durability and reliability.
- Grips: Insulation and DrynessCork and foam grips are still good, but ensure they are not soaked before a cold outing. Some winter-specific poles feature extended foam grips that allow you to choke down on the shaft for steep sections without gripping cold metal. Wool or insulated glove liners are essential to pair with any grip in freezing temperatures.
- Adjustability and Length:You will likely need to lengthen your poles from your summer setting to account for:The added height of snowshoes or bulky winter boots.The need for greater reach when planting poles in deep, soft snow on the side of a slope.
Winter-Specific Techniques and Tips
- The "Probe and Plant" Method: Before each step in deep snow, use your pole to stab the area in front of you. Check for depth, hidden logs, or rocks.
- Double Planting for Security: On steep or icy sections, abandon the alternating rhythm. Plant both poles securely, then take one or two steps. This guarantees three points of contact at all times.
- Angling on Side Slopes: When traversing a slope, shorten the uphill pole and lengthen the downhill pole to maintain a comfortable, upright posture.
- Wrist Strap Caution: In avalanche terrain or very deep snow, consider not using your wrist straps. If you fall, you need to be able to discard your poles quickly to self-arrest or swim in moving snow.
Post-Hike Care: Preventing the Freeze-Up
Winter maintenance is critical to longevity:
- Collapse and Dry: After your hike, fully extend the poles and wipe them dry. Pay special attention to the locking mechanisms.
- Store Uncollapsed: Never store poles tightly collapsed after a winter hike. Trapped moisture will freeze, potentially welding the sections together. Store them extended or only partially collapsed in a dry, warm place.
- Lubricate Sparingly: Use a dry, silicone-based lubricant on the lower shaft sections. Avoid wet oils that attract grit and moisture.
Conclusion: Your Foundation for Winter Confidence
Venturing into the winter wilderness requires adapting both your skills and your gear. Hiking poles, when properly configured with large baskets, lever locks, and durable aluminum construction, become foundational tools for safety and efficiency. They are your scouts, your anchors, and your guardians against the hidden hazards of snow and ice. Investing in these winter-specific features—or thoughtfully adapting your existing poles—empowers you to embrace the serene beauty and profound silence of the winter trail with resilience and confidence. Prepare your poles as diligently as you pack your layers, and they will provide unwavering support through every snowy mile.


