


How to Walk with Walking Poles Correctly? The Complete Guide to Proper Technique
Walking poles are remarkable tools, but their benefits are not automatic. Simply carrying them provides minimal advantage; using them correctly transforms them into efficiency engines that protect your joints, improve your balance, and propel you forward with less effort. This comprehensive guide covers the fundamental principles of proper pole walking—from the basic gait to advanced techniques for varied terrain. Master these elements, and your poles will become seamless extensions of your body.
Recommended trekking pole purchase link: https://s.click.aliexpress.com/e/_c4M7OWaN
The Three Fundamentals
Before diving into specific techniques, understand the three non‑negotiable elements of correct pole walking:
- Strap engagement – The straps bear weight, not your grip.
- Opposite arm/leg rhythm – Right pole with left foot; left pole with right foot.
- Active planting – Poles are pushed against, not dragged.
Part I: Strap Engagement – The Foundation
Correct strap use is the single most important skill to master.
Step‑by‑Step:
- Insert your hand upward through the bottom of the strap. Your hand should enter from the palm side, with the strap crossing the back of your wrist.
- Grip the handle normally. The strap should now lie across the back of your hand, between thumb and index finger.
- Adjust tension so the strap is snug but not tight. You should be able to open your hand fully without the strap falling off.
- Push down through the strap when you plant the pole. Your grip remains relaxed; the strap bears the weight.
Why this matters:
- Transfers weight through your skeleton, not hand muscles.
- Prevents hand fatigue and blisters.
- Allows relaxed grip for better proprioception.
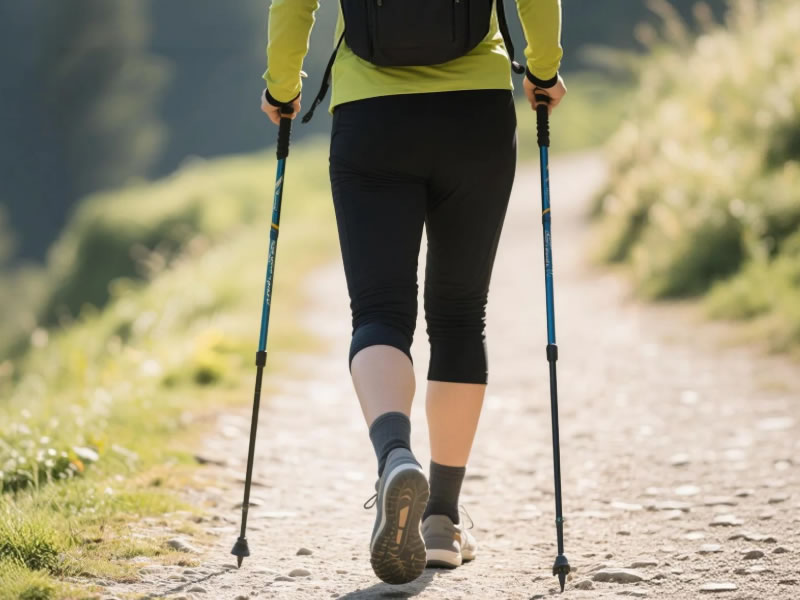
Part II: The Basic Walking Gait – Opposite Arm/Leg Rhythm
Human locomotion is naturally contralateral: when you walk without poles, your right arm swings forward with your left leg, and vice versa. Poles should follow this same rhythm.
The Rhythm:
- Right pole plants as left foot steps forward.
- Left pole plants as right foot steps forward.
This coordination:
- Engages your core stabilizers.
- Promotes a natural, efficient gait.
- Maximizes balance and propulsion.
To practice: On flat ground, focus on the rhythm. Count "right pole, left foot; left pole, right foot" until it becomes automatic.
Part III: The Plant – Active vs Passive
Passive planting: Pole tip touches ground, you step past it, pole drags behind. This provides no propulsion and minimal benefit.
Active planting: Pole tip touches ground, you push against it, generating forward thrust.
The Active Plant Technique:
- As the opposite foot swings forward, plant the tip at a point beside or slightly behind your trailing foot (not ahead).
- Immediately push down and back through the strap.
- Allow your arm to extend fully behind you at the end of the push.
- The pole then swings forward naturally for the next plant.
Why active planting matters:
- Engages upper body muscles in locomotion.
- Adds propulsive force to every step.
- Reduces the workload on your legs.
Part IV: Arm Motion and Cadence
- Keep arms relatively straight but not locked. Allow natural elbow flexion (about 10–20 degrees) at the point of planting.
- Swing from the shoulder, not the elbow. The motion should be smooth and rhythmic.
- Maintain a quick, light cadence. Short, rapid plants are more efficient than long, slow ones.
- Relax your grip between plants. Your hand should open slightly as the pole swings forward.
Part V: Posture and Gaze
- Stand tall. Chest open, shoulders back, head level. Avoid hunching over the poles.
- Look ahead, not down. Your poles probe the terrain; trust them.
- Engage your core lightly. This stabilizes your pelvis and transfers power between upper and lower body.
Common posture mistake: Hunching forward, especially on climbs. This reduces lung capacity and leverage. If you find yourself hunched, your poles may be too long.
Part VI: Adjusting for Terrain
Your basic technique adapts to changing terrain.
Uphill
- Shorten poles by 5–10 cm.
- Plant slightly behind your trailing foot for powerful push‑off.
- Maintain upright posture; avoid hunching.
Downhill
- Lengthen poles by 5–15 cm.
- Plant firmly ahead of your leading foot to create braking action.
- Transfer weight through straps to reduce knee impact.
Sidehill
- Adjust each pole independently: Uphill pole shorter, downhill pole longer.
- Maintain level shoulders.
Flat / Rolling
- Return to baseline 90° elbow length.
- Focus on rhythmic, active planting.
Part VII: Common Mistakes and Corrections
| Mistake | What It Looks Like | Consequence | Correction |
|---|---|---|---|
| Hand entering strap from above | Strap wraps around front of wrist. | Strap cannot bear weight; must grip tightly. | Insert hand from below. |
| Same‑side rhythm | Right pole with right foot. | Awkward, inefficient, reduces stability. | Practice opposite arm/leg. |
| Dragging poles | Poles trail behind, not actively planted. | No propulsion; wasted energy. | Plant actively and push. |
| Death grip | White knuckles; hand muscles constantly flexed. | Rapid fatigue; blisters. | Use straps; consciously relax grip. |
| Planting too far ahead | Pole planted far in front of body. | Creates braking force on flats; inefficient. | Plant beside or behind trailing foot. |
| Stiff arms | Arms locked, no elbow flexion. | Disrupts shock absorption; increases fatigue. | Allow natural elbow bend. |
| Hunched posture | Shoulders rounded, head down. | Reduced lung capacity; back strain. | Stand tall; check pole length. |
| Ignoring terrain adjustments | Same length for all terrain. | Missed benefits; increased joint strain. | Adjust length for climbs/descents. |
Part VIII: Advanced Techniques
The Double Plant
On very steep or unstable terrain:
- Plant both poles simultaneously ahead of you.
- Take one or two steps to meet them.
- Repeat.
This guarantees three points of contact at all times.
Nordic Walking Technique
For fitness walking on flat terrain:
- Emphasize an aggressive rearward push.
- Open your hand at the end of the push, allowing the pole to swing forward from the strap.
- Maximizes upper body engagement and calorie burn.
Part IX: Developing the Habit
Correct technique requires practice. Within one or two outings, the fundamentals will become automatic.
Progression plan:
- First hike: Focus only on strap engagement and opposite arm/leg rhythm.
- Second hike: Add active planting—consciously push against each plant.
- Third hike: Begin adjusting length for terrain changes.
- Ongoing: Refine, experiment, and listen to your body.
Part X: Equipment Checks
- Locks: Ensure they are secure before starting. A slipping pole under load is dangerous.
- Tips: Check for wear. Replace rounded carbide tips.
- Baskets: Match to terrain (small for trails, large for snow/mud).
- Straps: Adjust tension; replace if frayed.
Conclusion: From Novice to Natural
Walking correctly with poles is a skill, but it is a skill that rewards quickly. Within a few miles, the awkwardness fades, and the poles begin to feel like natural extensions of your body. You will notice:
- Less strain on your knees and hips.
- Greater stability on uneven ground.
- A smoother, more rhythmic gait.
- The ability to walk farther with less fatigue.
Master the fundamentals:
- Straps from below.
- Opposite arm/leg rhythm.
- Active planting.
- Terrain adjustments.
Then let the rhythm take over. Your poles will do the rest, mile after mile, year after year.


