


How to Properly “Plant” a Hiking Pole for Maximum Stability?
The simple act of planting a trekking pole separates casual use from expert technique. Done correctly, it transforms your poles into extensions of your skeleton, creating a dynamic, stable platform that enhances safety, efficiency, and endurance. Maximum stability is achieved not by stabbing the ground, but through a deliberate, biomechanically sound motion involving precise angle, timing, and force application.
Recommended trekking pole purchase link: https://s.click.aliexpress.com/e/_c4M7OWaN
The Core Principle: The Angled Plant and Backward Push
The most common mistake is planting the pole vertically or too far forward. For stability and propulsion, the pole must be an angled lever.
1. The Correct Position: The Forward Triangle
- As your right foot steps forward, your left pole should swing forward.
- Plant the tip slightly ahead of your body and slightly to the side, not directly in front of your foot. Imagine forming a triangle: your two feet and the pole tip as the three points. This wide base is inherently more stable than a narrow, inline stance.
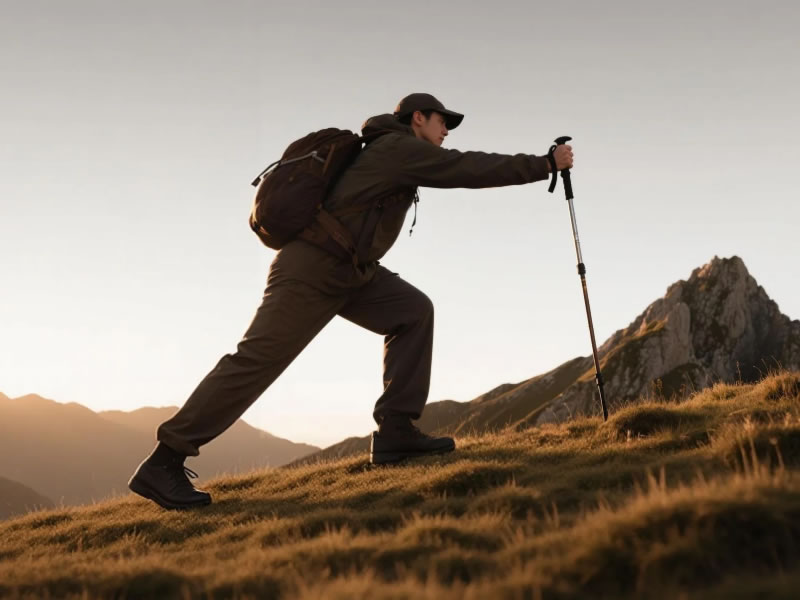
- The Angle: The pole shaft should be angled backward when it makes contact. The grip will be ahead of the tip. This is the prep position for generating useful force.
2. The Critical Action: The Backward Push
- Stability comes from loading the pole. As your body moves forward over the planting point, apply downward and backward pressure through the pole.
- This is where the wrist strap is essential. Your hand should push down into the strap, transferring force through your arm bones and large back muscles, not just your grip. This allows for a powerful, sustained push without hand fatigue.
- The backward component of this push propels you forward, actively assisting your stride and reducing leg workload.
The Rhythm and Timing: Integration with Your Gait
Proper planting is rhythmic, not random. It follows the natural opposite-arm/opposite-leg swing of walking.
- The Cue: Pole tip touches down just before your opposite foot hits the ground.
- The Sequence: Right foot forward → Left pole plants → Left foot forward → Right pole plants.
- This rhythm ensures a continuous cycle of support, always having at least three points of contact with the ground (two poles + one foot, or two feet + one pole).
Technique Variations for Different Terrain
- Steep Uphills: Plant the pole closer to your body, with a more pronounced backward angle. The push is more downward and directly behind you to drive your body upward. Shorten poles for this.
- Steep Downhills: Plant the pole farther ahead and to the side. The primary goal is braking and controlling descent. Lengthen poles significantly. The push is more about controlled weight transfer to alleviate knee impact.
- Loose or Slippery Terrain (Scree, Mud): Use a quicker, more assertive "tap and test" plant before committing full weight. Consider a double plant for critical sections: planting both poles for a secure anchor before moving your feet.
Common Planting Errors That Reduce Stability
- "The Front Stab": Planting the pole too far forward, vertically. This acts as a brake, jars your arm, and pulls you off balance.
- "The Passive Drag": Letting the tip skid along behind you without applying purposeful backward pressure. This provides no stability or propulsion.
- Gripping Too Tightly: White-knuckling the grip wastes energy and prevents effective force transfer through the strap.
- Breaking Rhythm: Planting the pole on the same side as the forward foot (ipsilateral planting) disrupts balance and natural gait.
The Advanced Skill: The Silent Plant
A key indicator of expert planting is minimal noise. A loud, jarring CLACK means you are stabbing the ground and braking your momentum. A quiet, brushing swish-thud means the pole is sweeping into place with your momentum and the push begins immediately. Aim for silence.
The Verdict: From Accessory to Essential Tool
Properly planting a hiking pole is a skill that turns an accessory into a fundamental component of your mobility. By focusing on the angled plant to the side, the powerful backward push through the strap, and seamless integration with your natural gait rhythm, you achieve maximum stability.
This technique does more than prevent slips; it actively propels you, reduces leg fatigue by up to 20%, and can decrease impact forces on your knees by 25% or more on descents. Practice on flat ground until the motion becomes instinctual. Your joints, muscles, and overall hiking confidence will reap the benefits for miles to come.


